Contents
The Clusters view provides a display of the nodes that StreamBase® Studio installs and starts when running EventFlow and LiveView fragments.
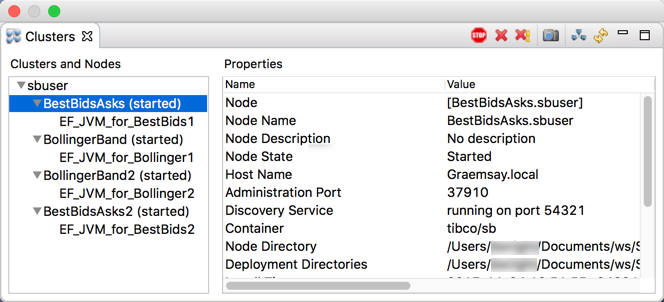
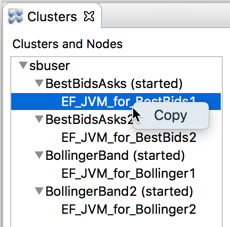
The Clusters view shows cluster topology as a tree view. In the image above, a cluster named sbuser contains four running nodes, each of which contains a JVM engine.
A cluster is a logical grouping of one or more nodes. Even a single node launched alone is always part of a cluster, and a node can belong to only one cluster.
StreamBase Studio installs and starts nodes dynamically and automatically when you ask Studio to run or debug an EventFlow or LiveView fragment. By default, Studio installs nodes into a single cluster named the same as the system login name of the user who started Studio. So, by default, the Clusters view shows only the nodes installed by Studio.
If you install and start nodes on the command line with epadmin using the same cluster name, those nodes also appear in the Clusters view.
The currently selected node, shows (started) or (stopped) to indicate that node's state. The started state does not necessarily mean that the node contains a running fragment, but only indicates that the node is in the installed
and started state.
You can optionally set the Clusters view to show all nodes and clusters in the IP subnet of the current machine.
When Studio exits, it automatically stops and removes any nodes it started in that session. No explicit action is required to either create or destroy a cluster and its member nodes. When all nodes in a cluster are removed, the cluster is destroyed. A StreamBase Application is active as long as a cluster is active and has at least one node installed and running. When all nodes in a cluster are stopped and removed, the application is removed.
The Clusters view's toolbar buttons are convenient shortcuts for their epadmin counterpart commands, such as epadmin stop node and epadmin remove node. To understand how to use these buttons, you must understand the node lifecycle for StreamBase Runtime nodes.
Caution
Do not use these Clusters view buttons to terminate a normally running fragment or application!
To stop any StreamBase launch, including fragments and applications, use the
button ![]() in Studio's top toolbar, or see Stopping a Fragment for alternatives.
in Studio's top toolbar, or see Stopping a Fragment for alternatives.
In the normal Studio workflow, you rarely need to use the Clusters View toolbar buttons. Studio creates and starts nodes automatically, then stops and removes the nodes it opened when Studio shuts down.
So, you only need to stop or remove a node in event of an error condition that has left a node orphaned. You might also deliberately stop and remove a node:
-
If you have changed the environment, node installation properties, or deployment parameters in a node's Run Configuration dialog. These changes do not affect currently installed nodes, but only take effect when the node is re-installed.
-
If you wish to use Clusters view node management features on nodes you installed and started in the same cluster outside of Studio with the epadmin command.
With these cautions in mind, the following describes the actions of the Clusters view toolbar.
- Stop Node

-
Stops the selected node.
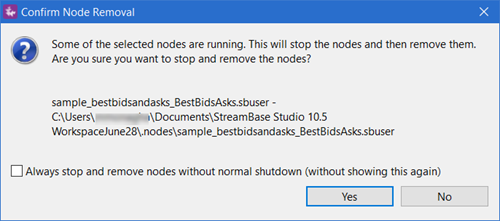
- Remove Node

-
Removes the selected node. If you select a node that is currently started, and containing an EventFlow or LiveView running fragment, Studio prompts for confirmation:
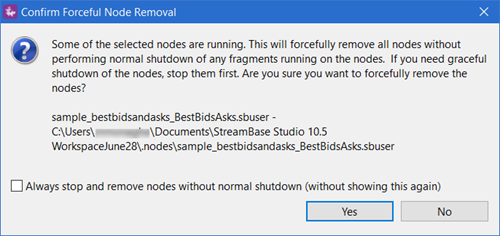
- Force Remove Node

-
Forcefully removes the selected node. If you select a node that is currently started, and contains an EventFlow or LiveView running fragment, Studio prompts for confirmation:
- Snapshot

-
Exports a snapshot of the currently selected node's logs and runtime state, based on the contents of its node directory. This might be requested by Support to aid in troubleshooting a failed node deployment.
Select the node of interest before clicking the Snapshot button. This opens a dialog that prompts for the location to write the snapshot zip file. The default location is a folder named
snapshots/in the current Studio workspace, wherenodedirnodedirIf you select a cluster name or engine name before clicking , the resulting dialog prompts for the location of the node directory of interest. Navigate into the
.nodessubdirectory of your Studio workspace, then select the node directory. If you click in this dialog, it prompts for the target location of the snapshot zip file as above. - Display

-
This button determines the set of installed nodes to display in the Clusters view. The button toggles between showing only the nodes in the same Studio workspace (default) and showing all nodes in the IP subnet of the current machine. Local workspace nodes include nodes installed by Studio even if you change the default cluster name during this Studio session, and those installed from the command line with epadmin, as long as the cluster name matches.
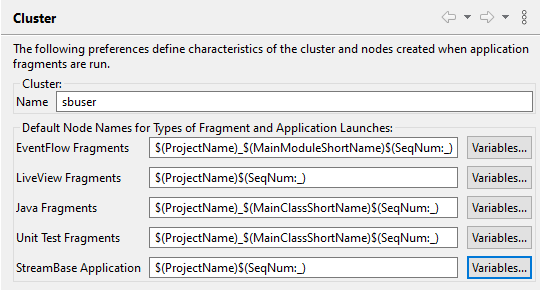
The Cluster name setting can be managed in the > panel of the Studio Preferences dialog, and is the system login name of the current user by default.
- Refresh

-
Forces a refresh of the displayed clusters and nodes.
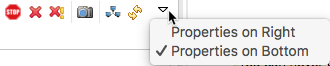
- Drop-down menu

-
The drop-down menu provides options to locate the Properties panel on the right of the Clusters, Nodes, and Engines panel or on the bottom. It also provides an option to show the output of all
epadmincommands that are run by Studio.
You can also stop, remove, and forcefully remove one or more multiple running nodes using the context menu by Ctrl+clicking nodes in the Clusters view.
When there is an active launch and deployment, selecting a Clusters view toolbar button (, or ) is analogous to going outside of Studio to run the corresponding epadmin command. For example, selecting the button is analogous to running a Linux kill -9 command, which deliberately forces a shutdown, graceful or not.
You can copy selected rows in the Clusters view to the system clipboard as plain text or CSV values.
In the Clusters and Nodes panel, you can select one row at a time. Right-click a row to show its Copy action.
 |
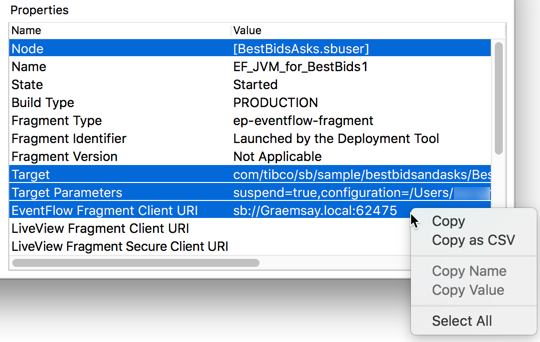
In the Properties panel, you can select more than one row by holding the Ctrl key (Windows) or command key (Mac) while clicking to select. Press press Ctrl+A (Windows) or command+A (Mac) to select all rows, or use the Select All option from the context menu. Right-click to show the context menu.
 |
- Copy
-
In the Clusters and Nodes panel, the Copy action copies the node name or engine name of the selected row.
In the Properties panel, the Copy action copies both Name and Value cell contents of the selected rows.
- Copy as CSV
-
Copies the selected rows to the clipboard as a string with Name cell contents separated by a comma from Value cell contents. Following CSV standard practice, quotes are not used to delimit cell values that contain spaces.
- Copy Name
-
Copies the contents of the selected row's Name cell.
- Copy Value
-
Copies the contents of the selected row's Value cell. This option has many uses, including:
-
With a node selected, copy the value from the Node Name row. This lets you paste a long node name into an epadmin command's servicename= parameter without retyping.
-
With an engine selected, copy the value from the row to copy the fragment's current StreamBase URI into an Add Server dialog in the SB Manager perspective.
-
Use the Cluster panel of Studio Preferences to specify the default cluster name and to specify the default naming pattern for nodes.
 |