Creating your First REST API
The following tutorial walks you through building a simple REST service in TIBCO Cloud™ Integration - Flogo® (PAYG).
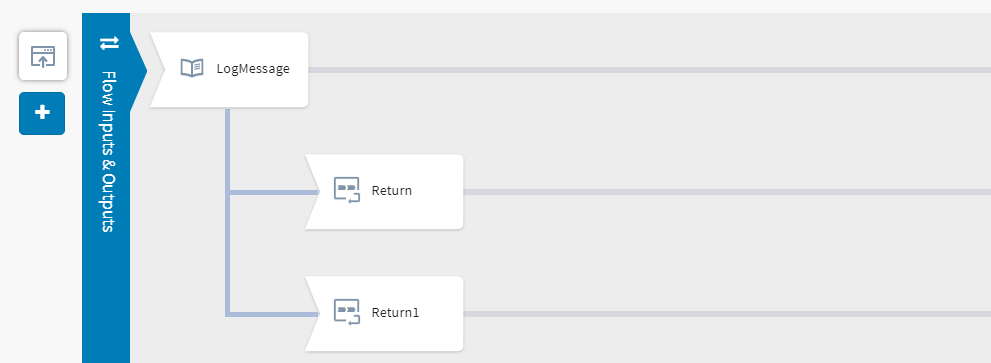
The app contains a REST flow, FlightBookings, which implements the POST HTTP operation to book a seat for the passenger requesting it on the flight. The flow is triggered by the ReceiveHTTPMessage REST trigger which listens for a request to book a seat that comes in from a passenger. The flow contains a LogMessage activity which you configure to log a custom message when a request has been received successfully. The LogMessage activity has two branches. Each branch must have its own Return activity, so you will need to add a Return activity at the end of each branch.
- The first branch accepts requests with any last name that appears in the REST request.
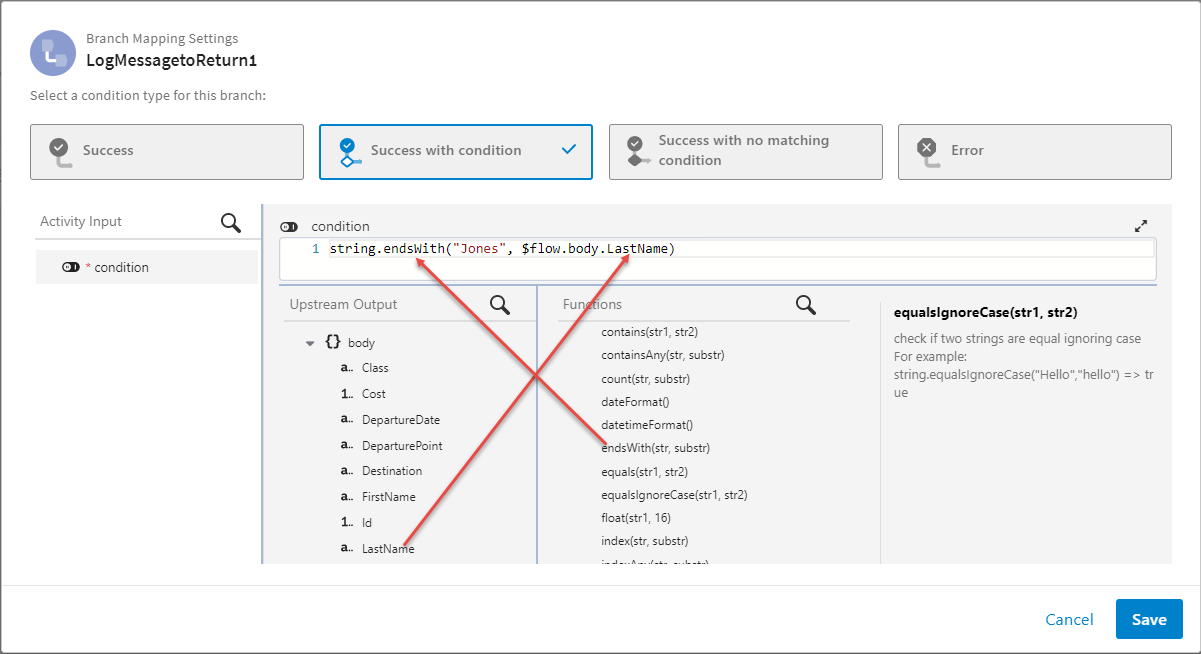
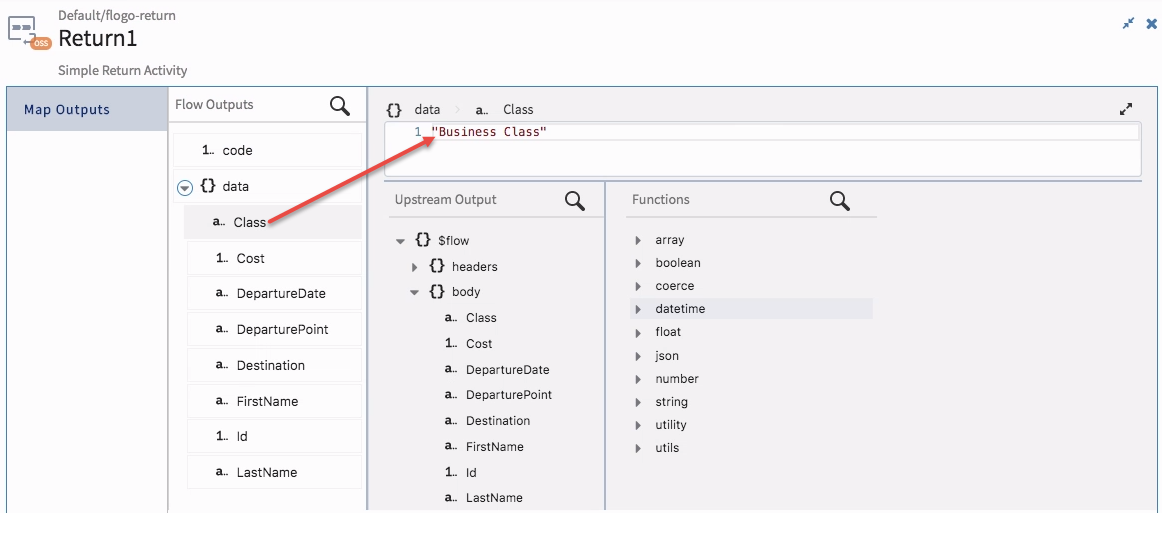
- The second branch then checks to see if the last name in the request is "Jones". You configure this check (condition) in the Branch Mapping Settings for this branch. If the last name is "Jones" then the flow outputs the passenger details with the Class element automatically set to Business Class meaning that the passenger's seat has been booked in Business Class. You configure this action of automatically setting the Class element to BusinessClass for passengers with last name "Jones" in the Return activity for this branch.
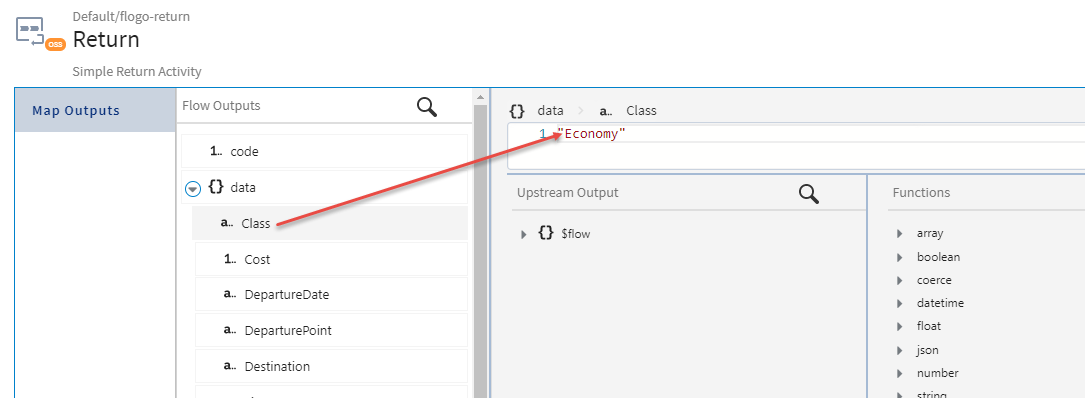
- If the last name received is not "Jones" the control is transferred to the first branch whose flow outputs the details of the request as received with the Class to Economy.
Creating the JSON Schema for REST Request and Response
{
  "Class" : "string",
  "Cost" : 0,
  "DepartureDate" : "2017-05-27",
  "DeparturePoint" : "string",
  "Destination" : "string",
  "FirstName" : "string",
  "Id" : 0,
  "LastName" : "string"
}
High-level Steps in the Tutorial
- Create a New TIBCO Flogo® App
- Create a Flow in the App with a REST Trigger
- Map Trigger Output to Flow Input. This is the bridge between the trigger and the flow where the trigger passes on the request data to the flow a flow input.
- Map Flow Output to Trigger Reply. This is the bridge between the flow output and the response that the trigger sends back to the HTTP request it received. After the flow has finished executing, the output of the flow execution is passed back to the trigger by the Return activity. Hence, we map the flow output to the trigger reply. This mapping is done in the trigger configuration.
- Add a Log Message Activity to the Flow and configure a message that the activity must log in the logs for the app as soon as it receives a request.
- Add the First Branch and Configure It to accept any last name that appears in the REST request.
- Add a Second Branch to Check for Last Name "Jones". If the last name of the passenger is "Jones", this branch is executed and the passenger is placed in Business Class.
- Validate the App to make sure that there are no errors or warnings in any flows or activities.
- Build the App
- Test the App
Step 1: Create a New TIBCO Flogo® App
Create a new TIBCO Flogo® App in TIBCO Cloud Integration - Flogo (PAYG).
- Open the Apps tab in TIBCO Cloud Integration - Flogo (PAYG).
- Click Create/Import app.
- By default, a Flogo app is named New_Flogo_App_<sequential-number> where the sequential-number is the next number of a new app being created. Click the default app name next to the Flogo app icon to make it editable. Edit the app name to FlightApp and click anywhere outside the name to persist your change.
Step 2: Create a Flow in the App with the REST Trigger (Receive HTTP Message)
Every app must have at least one flow. Create a new flow with the REST trigger. The ReceiveHTTPMessage REST trigger listens for an incoming REST request that contains the details of the passenger who wants to book a flight. You configure the expected fields for the request in the REST trigger in JSON schema format.
- Click Create. The Flow option is selected by default in the Add triggers and flows dialog.
- Enter
FlightBookings in the
Name text box and optionally a description for the flow in the
Description text box and click
Create.
- Click
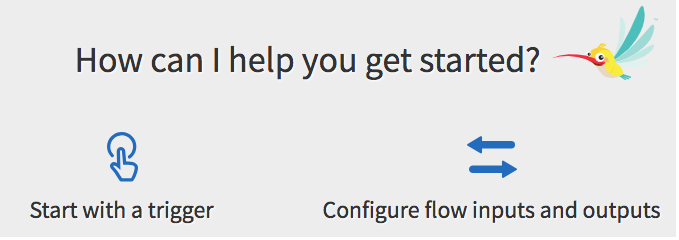
Start with a trigger.
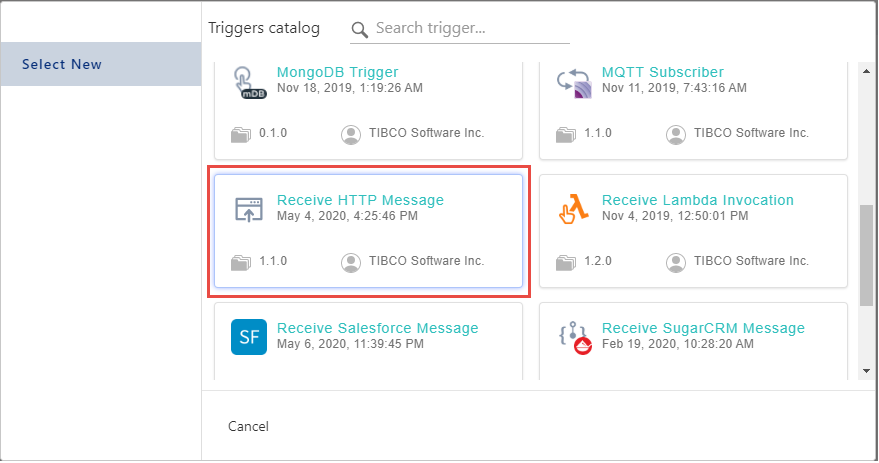
- Click the Receive HTTP Message card in the Triggers catalog.
- In the
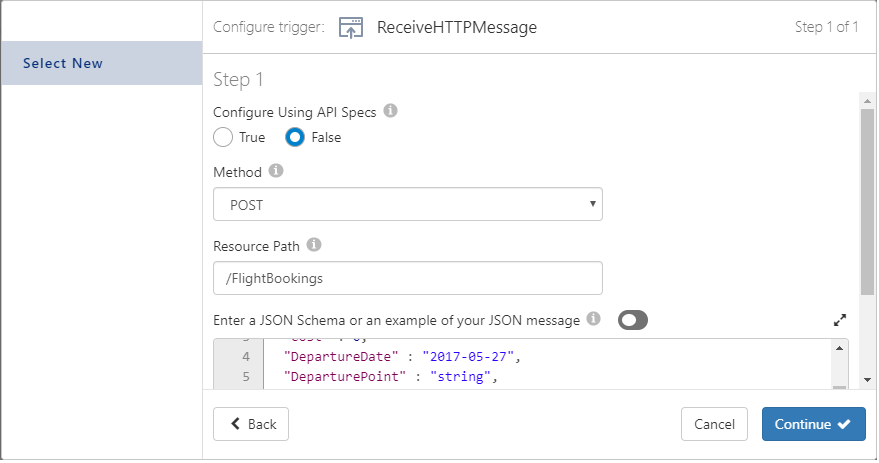
Configure trigger: ReceiveHTTPMessage dialog, do the following:
- Select
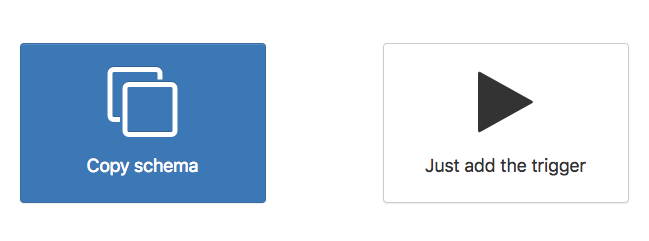
Copy Schema when prompted as shown below.
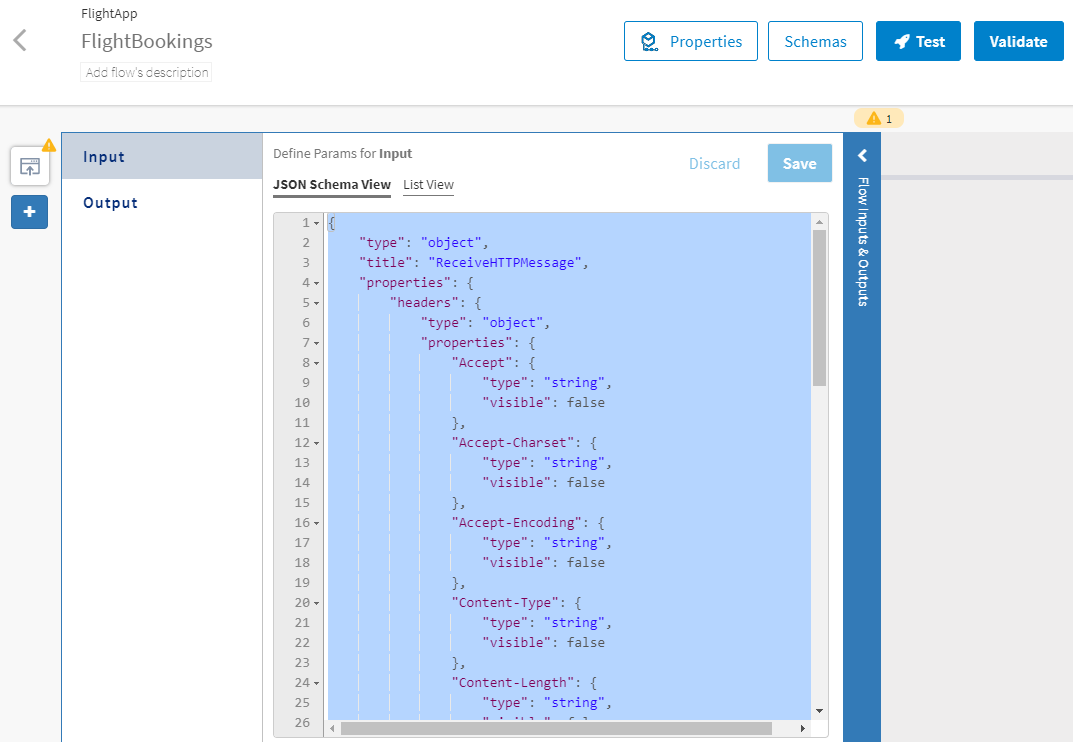
The schema that you entered when creating the trigger automatically gets copied to the following locations when the trigger is added:
- Flow input in the Input Settings tab of the Flow Inputs & Outputs accordian tab.
- It is displayed in a tree format in the Map to Flow Inputs tab of the trigger. This allows you to map the elements from the trigger output to flow input elements, such that the trigger output feeds into the flow input.
- The Reply Settings tab of the trigger, if the trigger has a reply. In the next step, you map the flow output schema elements to the trigger reply. By doing so, you send the output from the flow back to the trigger such that it becomes the trigger reply.
A new flow is created attached to a REST trigger.
Your flow should look similar to the following:
- Collapse the Flow Inputs & Outputs accordian tab by clicking the left-facing arrow above the tab name in the blue vertical bar.
Step 3: Map Trigger Output to Flow Input
When TIBCO Cloud Integration - Flogo (PAYG) receives a flight booking request from a passenger (a REST request), the data from the request is output by the ReceiveHTTPMessage REST trigger. For the request to be processed, this output must be consumed by the flow in the form of flow input. Hence, you must map the trigger output to the flow input.
Step 4: Map Flow Output to Trigger Reply
When the flow has finished executing, its output must be sent back to the trigger for the trigger to send a reply to the REST request initiator. Hence, the flow output data must be mapped to the trigger reply which in turn will return the result of the flow execution to the REST request initiator.
Step 5: Add a Log Message Activity to the Flow
The flow uses the LogMessage activity to log an entry in the app logs when the trigger receives a request from the passenger that reaches the trigger in the form of a REST request.
- Add a new
LogMessage activity from the
General tab and configure it. To do so,
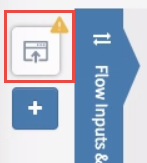
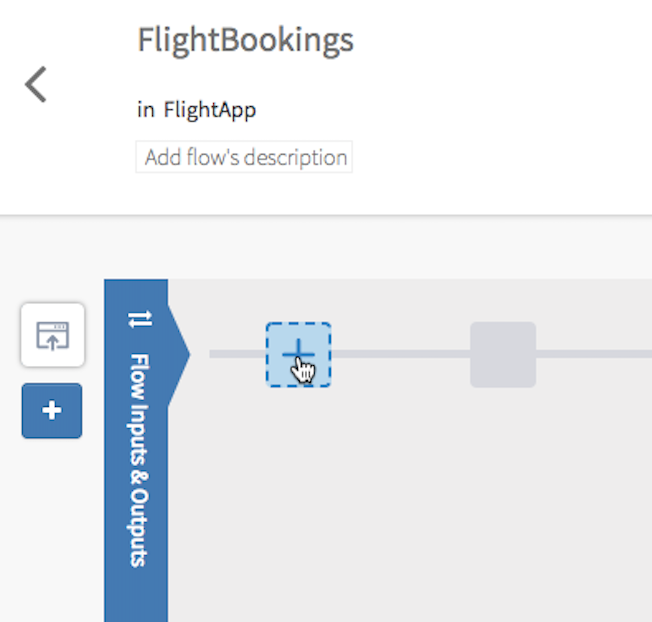
- Hover your mouse cursor to the right of the
Flow Inputs & Outputs tab and click
 .
.
- In the Add Activity dialog, click General, then click Log Message.
- Configure the
LogMessage activity with a message to log when it receives an incoming request from the
ReceiveHTTPMessage trigger. To do so:
- Click the Input tab.
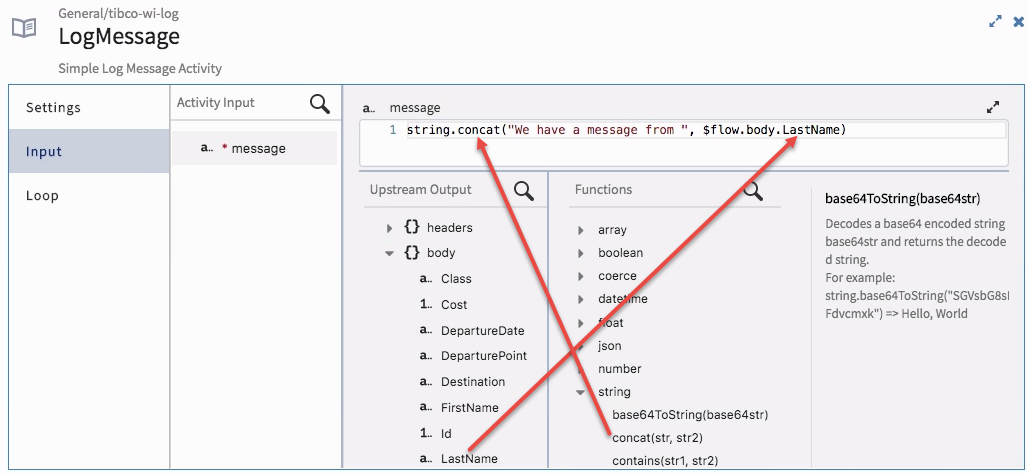
- Click message to open the mapper to the right. You will now configure a message to be logged by the LogMessage activity when the flow receives the input from the request that the trigger received and passed on to the flow.
- To configure the message, expand the string category under Functions and click concat(str, str2) to add this function to the message text box.
- Select str in the and replace it by entering "We have received a message from " (include the quotes too).
- Replace
str2 with the last name of the passenger who booked the flight. The last name of the passenger is passed on from the trigger to the flow. We had mapped this trigger output to flow input in step 3 above. Hence it is now available for mapping under $flow in Upstream Output.
- Click the x on the upper right side of the LogMessage box to close it. The LogMessage activity is added to the right of the Flow Inputs & Outputs tab.
- Hover your mouse cursor to the right of the
Flow Inputs & Outputs tab and click
Your flow should now look like the following:
Step 6: Add the First Branch and Configure It
We want the flight seat booking to be based on the last name of the passenger. If the last name is "Jones" we want to book the passenger in the Business Class. If the passenger's last name is anything other than "Jones", we want the passenger's seat to be booked in the Economy class. To accomplish this, use the conditional branching feature in TIBCO Cloud Integration - Flogo (PAYG). Add a branch from the LogMessage activity.
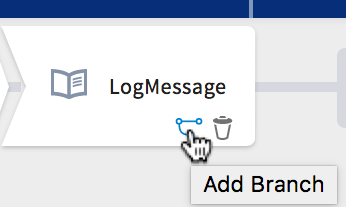
- Hover your mouse cursor over the
LogMessage activity and click
 .
.
The branch gets added with the Add Activity dialog open.
- Click the x on the upper right corner of the Add Activity dialog to close it.
- Add a
Return activity to the branch. To do so,
- Hover your mouse cursor to the end of the branch and click the (
 ) icon.
- Scroll to the Default category and click it.
- Click the Return card to add the activity.
- Click the x to close the configuration dialog. You must now configure the Return activity with a condition to read the last name of the passenger.
- Hover your mouse cursor to the end of the branch and click the (
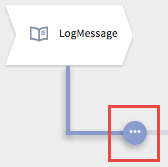
- Hover your mouse cursor to the end of the branch until you see a button with three dots placed horizontally.
Click the button to expose the following options:
Click (
 ). The
Branch Mapping Settings dialog opens.
Select the Success with condition branch condition.
- Click condition to open the mapper on the right.
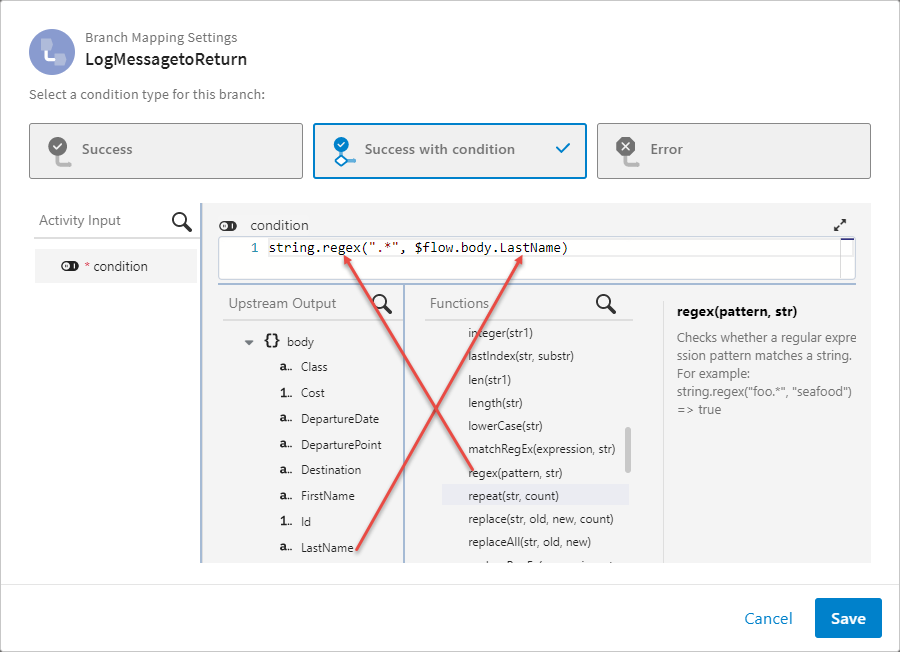
- Configure the branch condition with a regular expression that accepts all last names.
- Expand the string category under Functions and click regex(pattern, str) to add this function to the condition text box.
- Replace pattern in the expression by manually entering ".*" (include the quotes too).
- Replace str in the function with the last name that is mapped from the flow output under Upstream Output. To do so, expand and click on LastName. Your condition
- Click Save.
- Configure the
Return activity for the branch to output the flow results if this branch executes (when the passenger's last name is anything but Jones). To configure the activity, follow these steps:
- Click on the Return activity to open its configuration.
- Expand data under Flow Outputs.
- Click code to open the mapper and enter 200 in the text box.
- Expand data under Flow Outputs.
- Click
Class and enter
"Economy".
- Expand under Upstream Output.
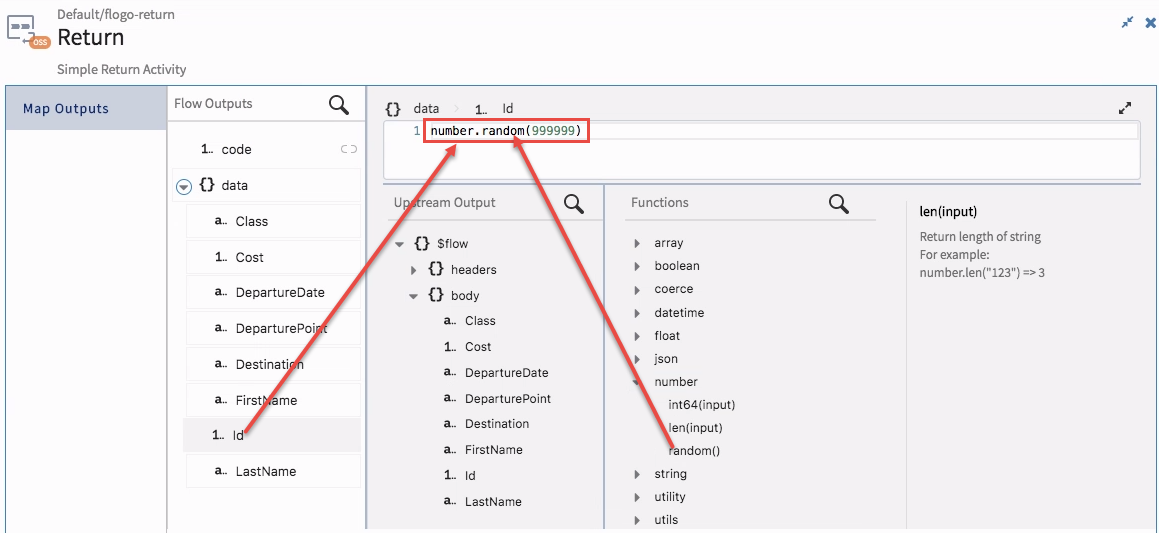
- One by one, map all remaining elements of the flow outputs under data (Cost, DepartureDate, DeparturePoint, Destination, FirstName, and LastName) except ID, by first clicking on them under data and then clicking on the corresponding element under body. Do not map id.
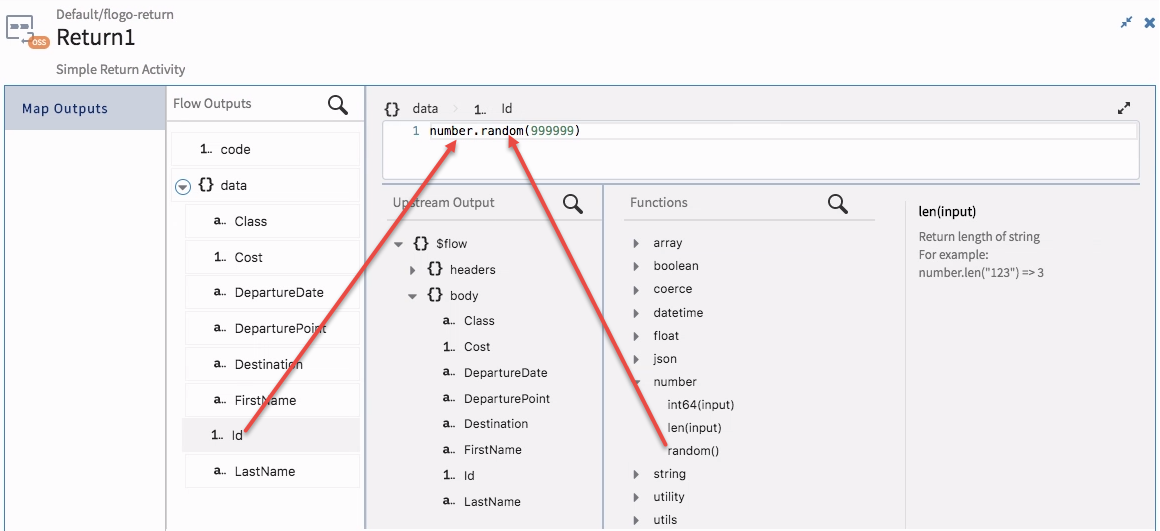
- Click id under data to configure it.
- Expand the number category under Functions and click random().
- Enter
999999 as an input parameter to the
random() function.
- Click Save.
- Click x to close the dialog.
Your flow should continue to look like this:
Step 7: Add a Second Branch to Check for Last Name "Jones"
- Hover your mouse cursor over the
LogMessage activity and click
 .
.
The branch gets added with the Add Activity dialog open.
- Click the x on the upper right corner of the Add Activity dialog to close it.
- Add a
Return activity. To do so,
- Hover your mouse cursor to the end of the branch and click the (
 ) icon.
- Scroll to the Default category and click it.
- Click the Return card to add the activity.
- Click the x to close the configuration dialog. You must now configure this branch with a condition to read the last name of the passenger and check to see if it is "Jones".
- Hover your mouse cursor to the end of the branch and click the (
- Hover your mouse cursor to the end of the branch until you see a button with three dots placed horizontally.
Click the button to expose the following options:
Click (
 ). The
Branch Mapping Settings dialog opens.
Select the Success with condition branch condition.
- Configure the condition for the branch to check if the last name ends with "Jones".
Note: The string for the last name is case sensitive. So, "Jones" is considered different from "jones".
- Click condition to open the mapper.
- Expand under Upstream Output.
- Expand the string function group and click endsWith(str, substr).
- Replace str by manually typing "Jones" (include the quotes).
- Select
substr, then click
LastName under
body. This replaces the
str with the last name extracted from the output of the
ReceiveHTTPMessage trigger.
- Click Save.
- Configure the
Return1 activity to send the flow results back to the trigger if the second branch executes (it will execute when the passenger's last name is Jones.).
- Click Return1 to open its configuration dialog.
- Expand data under Flow Outputs.
- Click code and enter 200 in its text box.
- Click
Class under
data and enter
"Business Class" (include the surrounding double quotes).
- Expand under Upstream Output.
- Map all remaining elements under data (Cost, DepartureDate, DeparturePoint, Destination, FirstName, and LastName) except id, by clicking on them one at a time and then clicking on the corresponding element under body. Do not map id.
- Click Id under data to configure it.
- Expand the number function and click random().
- Enter
999999 as the input to the random() function.
- Click Save.
- Click x to close the dialog.
Your flow should look like the following:
Step 8: Validate the App
Your app is now ready. Before you push the app to the cloud, be sure to validate all the flows in order to confirm that there are no errors or warnings. To do so click the Validate button. TIBCO Cloud Integration - Flogo (PAYG) validates each flow and activity within the flow. If there are any errors or warnings, you see the respective icons next to the flow name or activity tab which contains the error or warning.
On successful validation, you get the following message:

