|
In this section: |
|
How to: |
You can use the WebFOCUS Schedule task type to configure a schedule to initiate one or more separate schedules. On the Advanced Scheduling ribbon, in the Show group, click the Tasks tab, and then click the drop-down arrow on the New button to access the WebFOCUS Schedule task type, as shown in the following image.

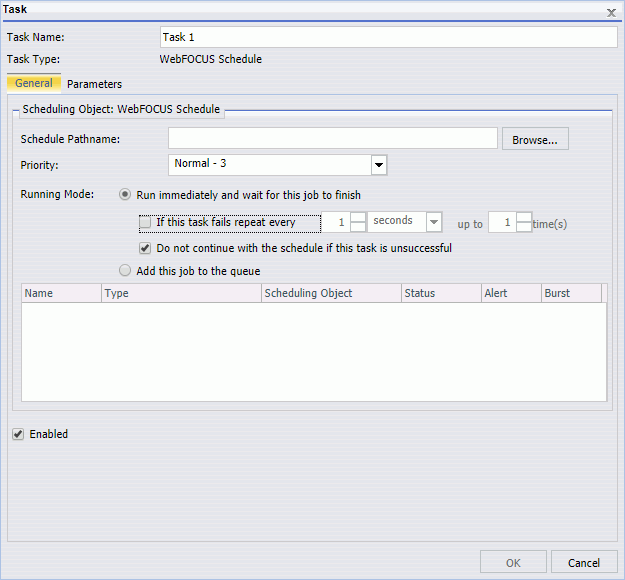
Click WebFOCUS Schedule to display the WebFOCUS Schedule Task dialog box, as shown in the following image.

Note: In order to use the WebFOCUS Schedule task type, you must be authorized to schedule other schedules. For more information, see the WebFOCUS Security and Administration technical content.
The WebFOCUS Schedule Task dialog box includes the following options:
- Schedule Pathname. Contains the pathname of the schedule that you select to be called by the task. Click the Browse button to select a schedule from the Repository. You will only see schedules that you are authorized to see, such as your own private schedules or any schedules that have been published.
- Priority. Displays the level of priority the schedule will have when it is processed by the Distribution Server. Priority value 1 is the highest priority and 5 is the lowest priority.
- Running Mode.
Provides options that define how the Distribution Server handles the selected
schedule you use in this task. This includes:
- Run immediately and wait
for this job to finish. Schedules the called schedule to run immediately.
The Distribution Server runs the called schedule immediately before any other
queued jobs. The calling schedule waits for the called schedule to complete
before running the next task.
- If this task fails repeat every. If this check box is selected, when the called schedule encounters an error, the calling schedule will attempt to rerun the called schedule every specified number of seconds, minutes, or hours for the number of times that you define. The highest integer you can use for both numerical options is 999. This option is cleared by default.
- Do not continue with the schedule if this task is unsuccessful. Select this check box to make the calling schedule stop running if the called schedule encounters an error. This option is selected by default.
- Add this job to the queue. Schedules the called schedule to run independent of any other schedules. The Distribution Server adds the schedule to the queue, respective of its priority. The calling schedule does not wait for the called schedule to complete before running the next task. If workload distribution is configured, the selected Distribution Server makes a console call to the manager.
- Run immediately and wait
for this job to finish. Schedules the called schedule to run immediately.
The Distribution Server runs the called schedule immediately before any other
queued jobs. The calling schedule waits for the called schedule to complete
before running the next task.
- Tasks list. Shows the tasks saved within the called schedule, including the name, type, scheduling object, status, alert, and burst parameters for each task.
- Enabled. When selected, enables the task. This is selected by default.
- The Distribution Server verifies that a WebFOCUS Schedule task is not running itself to avoid infinite recursion. If the Distribution Server detects that infinite recursion will occur, it stops the schedule and records the task as an error in the schedule job log.
- Although a schedule that contains only WebFOCUS Schedule tasks does not distribute reports, a distribution method must still be selected before the schedule can be saved.
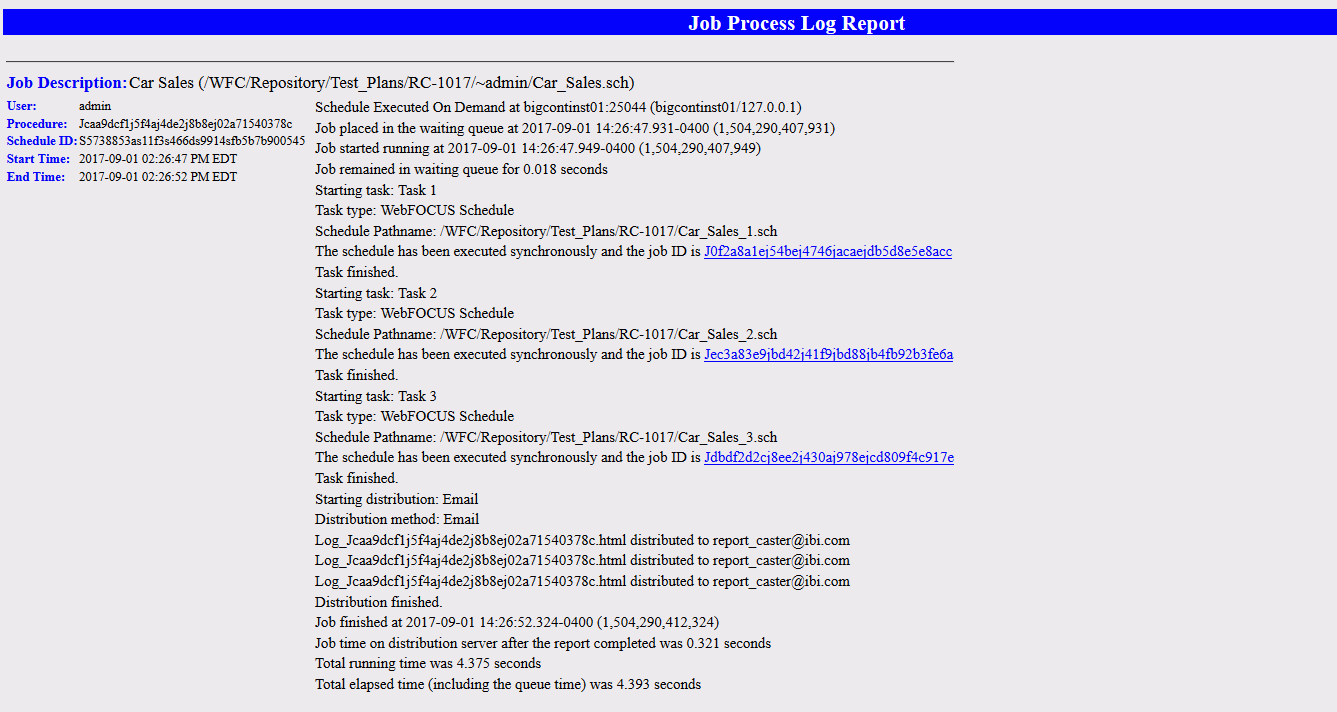
WebFOCUS Schedule tasks that distribute schedules create log reports of the task. These log reports are distributed in HTML format. For each distributed schedule, the job log records the job submission, job name, and a link to the job log. A sample log is shown in the following image.
