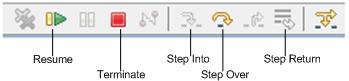
To interact in Debug view, you can use the following toolbar. Which icons in the toolbar are enabled at any time depends on the states of the debug models and the debug event notifications from the engine.
The process may be in one of the following states when debugging:
"Suspended" means the process is halted by a breakpoint. In this state, you can browse/modify the variables in the Variables view
"Active" means the process is running, and the variables will not be listed in the Variables view.
"Completed" means the process runs successfully.
"Cancelled" means that you terminate the process instance before it finishes.
Note: When debugging the process, you should press "Step Over" or "Step Into" if you want to change the state to "suspended" . If you press "Resume" while debugging a process, the state of the process does not change to "suspended" so you cannot see the variables in the debug window.
Procedure
Load the emulation elements from the emulation file.
From the top right area, select the
Testpoints tab and click the
button to select the process node from an emulation file.
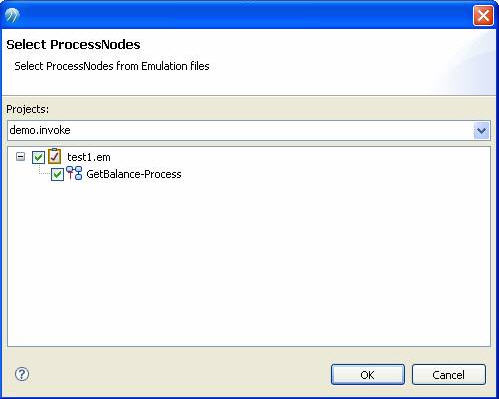
The Select ProcessNodes dialog appears.
Select
demo.invoke from the Projects drop-down list.
Select
demo.invoke.em and
GetBalance-Process.
Click the
OK
button.
Notice that the
Testpoints
view in the top right area displays the predefined testpoint in the
demo.invoke process as shown:
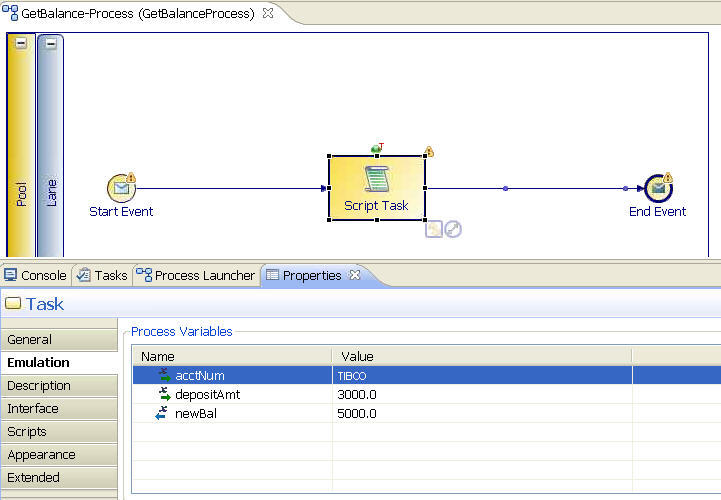
Select the
Script Task activity.
From the bottom area, select
Properties > Emulation.
Notice that the values passed as emulation data (that you defined earlier) are as follows:
Variable
Value
acctNum
TIBCO
depositAmt
3000
newBal
5000
Type the following values as input parameters to start
GetBalanceProcess:
Variable
Value
acctNum
ABC
depositAmt
1000
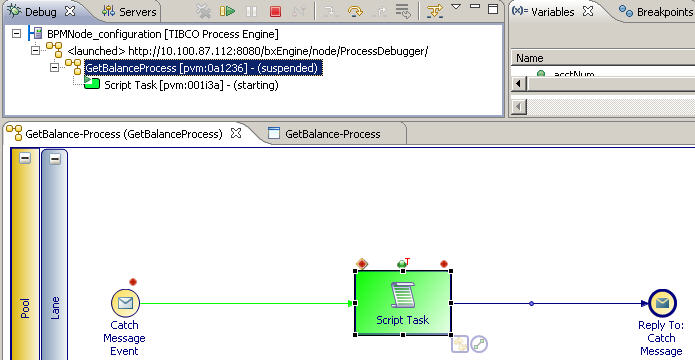
Notice that the
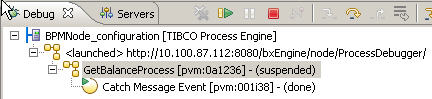
GetBalanceProcess process starts in the Debug view.
Notice that the process starts and stops at the first breakpoint after the
Catch Message Event activity.
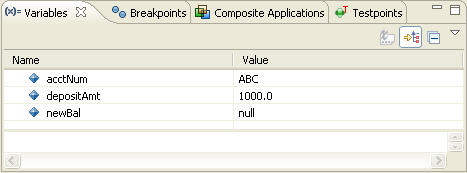
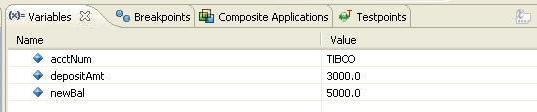
Click the
Variables view in the top right area and notice the variable values at the first breakpoint after the
Catch Message Event
activity:
Select the
Script Task activity and select
Properties
> General
to see the formula to calculate the
newBal value:
newBal = 1000.0 + depositAmt
Click the
button on the task bar to execute the next step in the process.
The
Script Task activity starts as shown:
Click the
Variables view to see the values.
The values of variables are still the same at the breakpoint set before the
Script Task
activity.
Select the
Script Task activity and click the
Properties tab, notice that
Script Task has emulation data with a testpoint that was added at
Adding and Editing Emulation Files.
Click the
button to execute the
Script Task activity.
The
Script Task activity executes and displays the output data as shown:
Click the
button to complete the process with the
Reply to Catch Message Event
activity.
Notice that the value of the
newBal variable remains at 5000, as specified in the emulation data.
Remove the testpoint and emulation data for the
Script Task activity as follows:
Select
Script Task, right-click and click
Testpoint > Remove.
From soapUI, pass the following values as input parameters to start
GetBalanceProcess:
Variable
Value
AcctNum
ABC
depositAmt
1000
Click the
button to complete the process up to the
End Event activity.
Check the value of the
newBal variable.
The value appears as shown:
Variable
Value
AcctNum
ABC
depositAmt
1000
newBal
2000
Runtime Behavior
The process stops execution at every breakpoint and allows you to edit values for variables from the Variables view.