Adding and Editing Emulation Files
By adding testpoints and/or assertions, you can prepare to emulate a process and add test data to certain activities to check the data flow at various points in a process.
A BPM project has either one emulation folder or no emulation folder. Therefore, you can add an emulation folder to a BPM project without one, or remove an emulation folder from a project that has one.
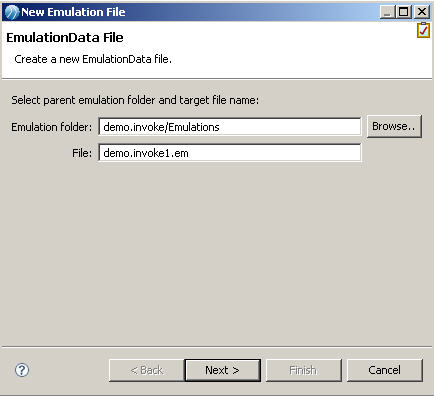
An emulation file contains emulation data. You can add multiple processes into an emulation file or add the same process into one file multiple times.
In an emulation file, a process presents an emulation case which contains five types of elements.
| Element | Description |
|---|---|
| Input | Keeps the value of parameters that are used to start a process instance if the corresponding StartEvent trigger type is set as none. Or keeps the SOAP request message if the trigger type is set as message. |
| Output | Keeps the parameter values while a process instance terminates, or keeps the SOAP response message. Note that you can’t create outputs in the current version. They are created from the debug result. |
| Testpoint | Can be considered a script task that replaces the corresponding task while debugging. |
| Assertion | A declaration of whether a sequence flow is executable or not. An assertion failure causes the suspension of a process instance. |
| Intermediate Input | Keeps the SOAP request message of Catch Message Intermediate Event. |
Procedure
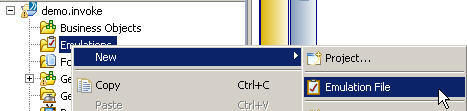
- The Emulations folder is available under the project folder.
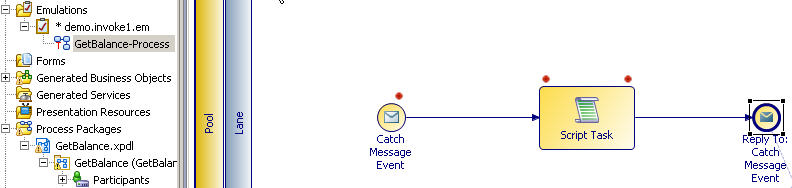
- Check the GetBalance.xpdl checkbox.
- Double-click the GetBalance-Process process.
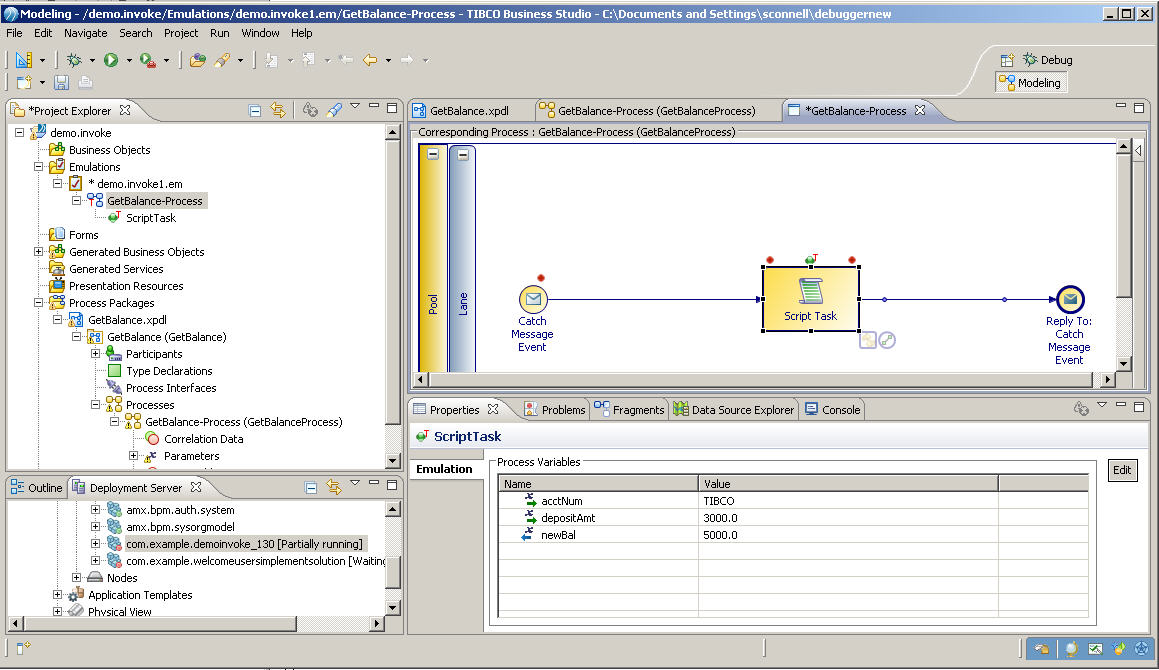
- Select the variables accNum, depositAmt, and newBal using Ctrl + Click, then click OK to return to the Edit Testpoint dialog.
- The Emulation data appears in the Properties view. The Script Task activity on which the testpoint is defined appears in the Project Explorer under the Emulations folder.


Copyright © Cloud Software Group, Inc. All rights reserved.