Linking a Drive and data model field
Configuration task map
The following map shows where you are in the add-on configuration process:

The following section outlines the steps to complete Task 3: Linking a Drive and field.
Steps to complete Task 3
To complete the final configuration task you link the data model field and Drive created in Tasks 1 and 2, respectively.
The following steps show how to link the media field you created in the data model with the Drive (storage location):
Navigate to Administration > User interface > TIBCO EBX® Digital Asset Manager Add-on > D.A.C and open the Digital asset component table and create a new record.
Fill the required fields, save and close. It is important to note that by default no restrictions apply to the types of files users can upload. If you want to exclude certain file types, you can enable the Restrict file upload option and select acceptable types in Supported extensions field. The add-on includes a set of default image extensions. If you want to allow other file types, you can create them in the File extension table located in the Reference data domain. Additionally, you can use the Blacklisted extensions field to manually exclude available file types.
Additionally, the final required property, Tag cloud, isn't available to edit until you've saved the initial configuration.
The following image highlights D.A.C. functionality:
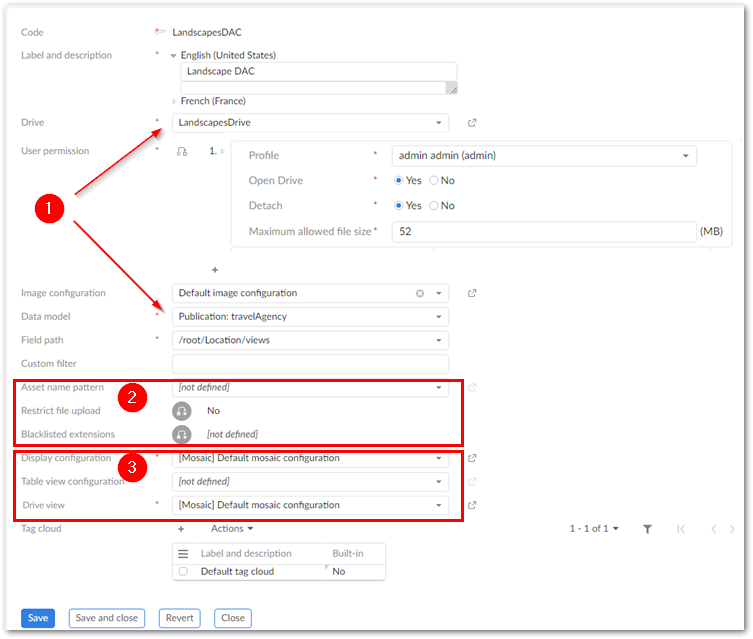
1) | Link the physical storage location selected in the Drive menu to the Media-type field in the data model. |
2) | Options to govern asset upload:
|
3) | These options determine:
|
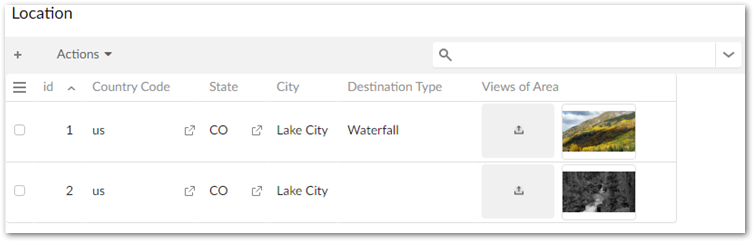
Enabling thumbnail display and upload in the tabular view
You can specify that an asset's thumbnail and an icon to upload and attach assets display when viewing a table. You can also customize the thumbnail display size. Enabling upload of assets from the tabular view is convenient for end users since they won't have to open each record to attach assets. Additionally, users can preview and download assets from the tabular view.
Thumbnail display behaves as follows:
When no assets are attached, the field is left blank.
If multiple assets are attached, the first thumbnail displays. Or if multiple types of assets are attached, the first asset whose type supports thumbnails displays.
If the asset type does not support thumbnails, the type's icon displays. When no icon is specified for the asset type, the default icon displays.
To enable table display of thumbnails and allow upload and attach:
If one does not already exist, create a view configuration and set the View mode to Table view. For instructions on creating a view configuration, see Specifying the view mode.
Open the D.A.C. associated with the data model field that you want to display thumbnails.
Use the EBX tabular view drop-down menu to select the desired view configuration.
Save and close. The following image shows an example thumbnail display: