Management overview
Overview of digital asset management
The add-on makes it quick and easy to find the specific digital asset you need with sophisticated searching, sorting, and information editing capabilities. In addition to options available to administrators, users can launch the following activities from the Drive view:
Upload new assets.
Attach assets to a data model field.
Use criteria to sort and filter assets.
Select assets to view their details.
Download, share, deactivate and delete assets.
Move assets from one Drive to another.
Create folders and move assets between folders
To access the Drive view:
Navigate to and open a data model record containing a field attached to a Drive.
As shown below, click the Drive button.

The following image and list highlight some components of this view (with no assets selected):
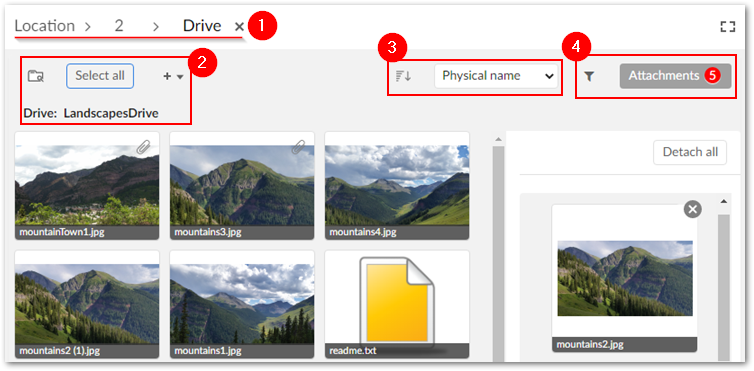
1) | The Folder navigation pane allows you to switch between available Drives and folders. |
2) | The breadcrumb shows the current table and record. |
3) |
|
4) |
|
5) | Use the filter and Attachments pane to locate assets and view assets attached to the current field, respectively. |
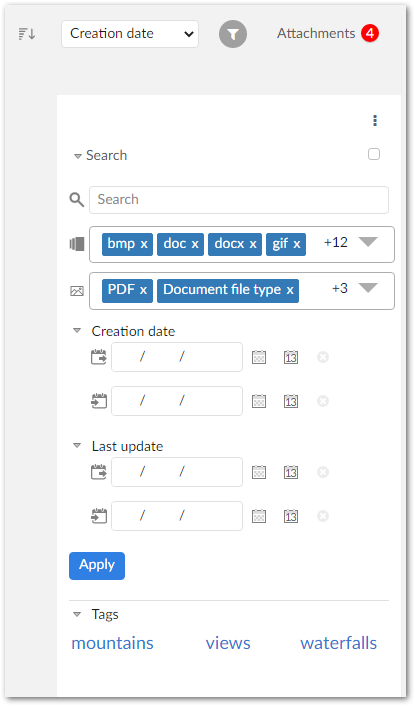
As shown below, you can use the filter to locate assets. You can:
Enter keywords and search the asset's label, description, and physical name. Use the menu to specify whether the search looks for the exact search term, or text that contains the search term. This option defaults to Contains.
Filter results using file extensions and asset types.
Use creation date, last update, and asset tags to filter results.
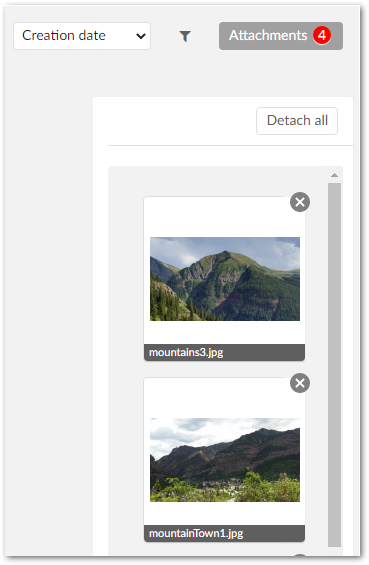
Select Attachments to display this pane and manage assets attached to the current field. Select Detach all to detach all assets from this field, or individually remove them using the corresponding X icon:
When you select an asset in the Attachments pane, an enlarged view displays. From this view you can use the icons in the top-right corner to:
Download the selected asset. A window displays and allows you to choose the download location.
Deactivate the asset. After deactivating an asset, only administrators can re-activate it. A deactivated asset no longer displays in the Drive view. To re-activate the asset: Navigate to Administration > User interface > TIBCO EBX® Digital Asset Manager Add-on > Digital asset. In the Digital asset table, double-click the asset to activate. Use the State drop-down list to update the asset, save, and close.
Permanently delete the asset. When you permanently delete an asset, the add-on physically deletes it from the Drive.
Share via email. Opens your email client with the selected asset attached to a new email.
Administrators can perform the same actions mentioned above. Additionally, they can use the add-on's administrative tools to backup/restore assets. The following sections describe how to:
Edit an asset's basic information. See Editing asset information.
Create Tag clouds and tags, and apply them to assets. See Tags and tag clouds.
Create new versions of an asset and choose the asset considered the current version. See Managing digital asset versions.
Create metadata categories and apply them to assets, backup and restore assets, configure additional Drive options, and set user permissions. See Additional configuration options.
Moving assets to other Drives or folders
You can move assets and folders to other Drives and folders. This can help you organize and classify your assets. This feature is also useful when you want to use a new Drive with an existing DAC.
To move assets to another Drive:
Open the Drive containing the assets you want to move.
Click to select the desired assets or folders.
Select the
 icon.
icon.Use the Move to pop-up to select the destination Drive and folder, then click Confirm.
To move assets or folders to another folder:
Open the Drive containing the assets you want to move.
Click to select the desired assets or folders.
Use one of the following methods to move the selections:
Drag the selected items to the desired folder in the Drive view.
Select the
icon, use the options in the pop-up to select the destination, and click Confirm.
Sharing assets
The add-on allows you to share assets via links in email, permalinks, or asset URLs. To share assets:
Open the Drive containing the assets you want to share.
Select one or more assets. Note that if you want to share using a URL, only select a single asset.
Note
The URL link expiration time defaults to 30 minutes. However, an administrator can adjust this limit in the
ebx.propertiesfile using theebx.addon.dama.rest.token.timeoutproperty.Click the
 icon and choose how you want to share the asset.