Creating indicators
Overview
Indicators can help you understand your data by measuring data quality dimensions of EBX® assets and providing visual feedback. This enables you to discover and monitor the actual structure, content, and quality of EBX® assets.
The add-on affords you the flexibility to choose from several built-in display options for results: charts, graphs, and a digital readout. Additionally, the linked record feature allows you to efficiently navigate to profiled assets.
As outlined below, when you create an indicator, you link it with a specific data asset. Then, you specify which dimension you want to profile and the technique used to profile. At this point you can optionally set additional configuration options.

Attention
Before creating an indicator, the dashboard must be in edit mode and at least one section must exist. See Creating a dashboard and Adding sections for more information.
Creating indicators
To create an indicator:
Create the indicator:
Select the section where you want to add the indicator.
Select the '+' icon to create the indicator.
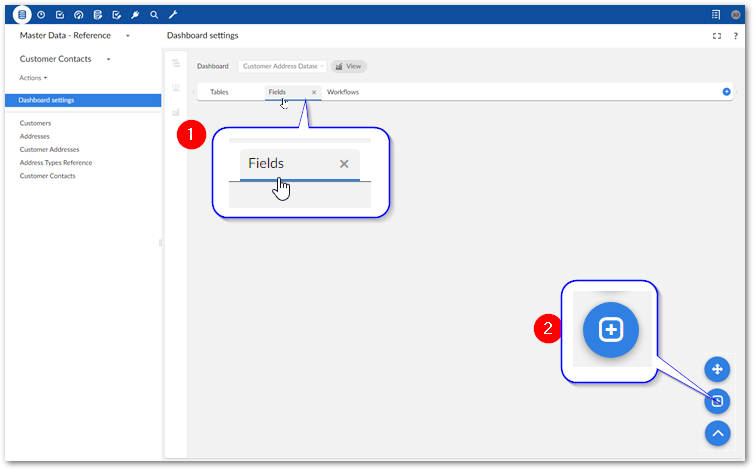
As shown below a blank indicator displays. Note that you can edit its title and description by double-clicking Indicator title.
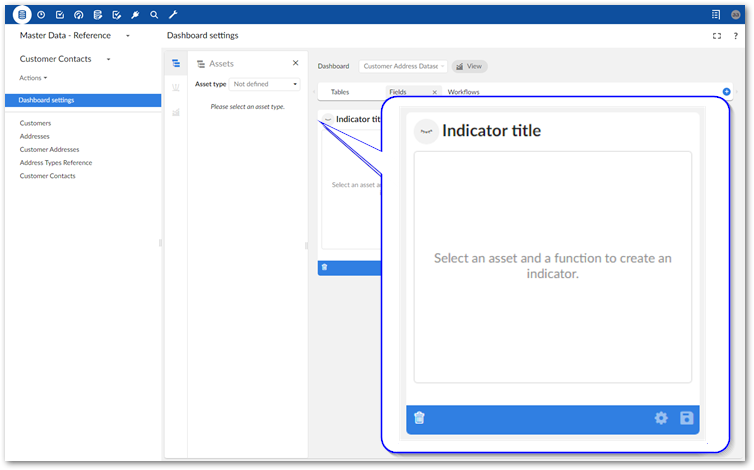
Specify an asset, function, and optional display:
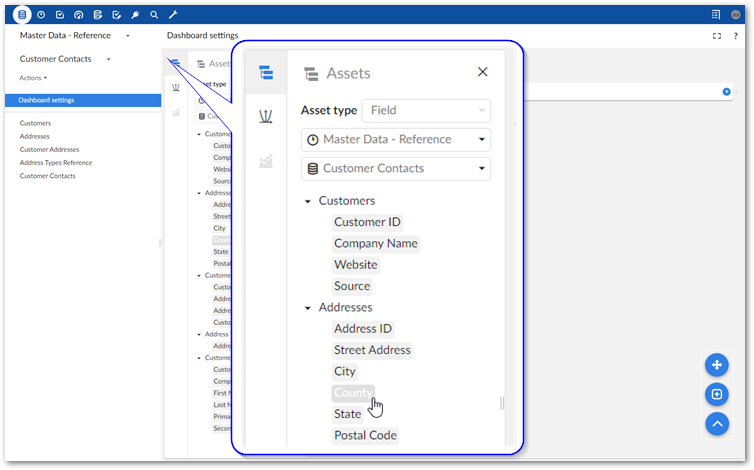
Use the Asset type menu to choose the asset type. Depending on the type of asset you select, you might have to provide additional details. For example, to select a field, you must point to the correct dataspace, dataset, and table.
Note
While creating an indicator, as long as you have not yet saved it, you can select the 'x' to remove the selected asset or function. After saving, you can remove the asset, but the option to remove the function is locked.
Attention
At this time some EBX® asset data types are not supported. These are hidden from this view.
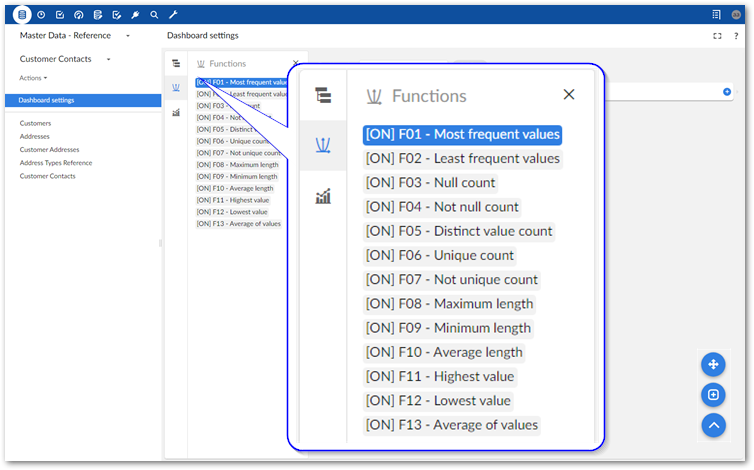
Select the desired function:
Note
The functions available are specific to the type of asset chosen for this indicator.
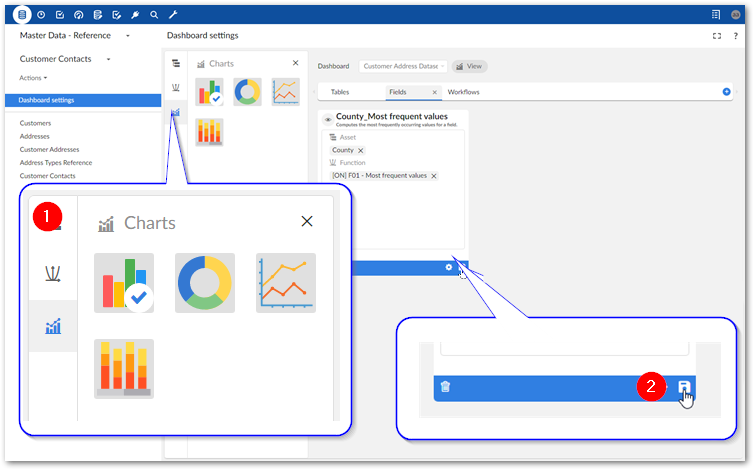
1) Optionally, change the display setting. 2) Save the indicator.
Note
You can select the indicator's gear icon to change additional settings. See Configuring indicators for more information about these options.