Cross tables are used to summarize large amounts of data, and
then present the result in a structured table format.
Before you begin
See
Cross table for a
description of the concept.
Procedure
-
On the authoring bar, click
 to open the
Visualization types flyout.
-
Drag the
Cross table visualization type to the wanted
position on the analysis page.
A suggestion of a cross table is presented.
-
On the
Row axis (sometimes called
Vertical axis),
select one or more columns containing the categories that
you want to use for organizing the rows in the cross
table.
-
On the
Column axis (sometimes called
Horizontal axis), select one or more columns
containing the categories that
you want to use for organizing the columns in the
cross table.
Note: When you select more than one column on the Row axis or Column
axis, you are setting up a
hierarchy, which is a very powerful feature in a cross
table.
-
On the
Cell values axis, select the column whose
values you want to aggregate.
Tip: Under
Display cells with no data as you can
specify what to show in the cell when the combination of selected categories on
the horizontal and vertical axes does not exist in the data, and therefore does
not result in a value for the cell. This setting does not specify how empty
(null) values should be displayed. You can specify what to display by default
in Tools > Options, the Cross Table page.
-
Select which type of aggregated value you want to use.
Note: You can also set up your cross table by dragging a column of
interest from the
Data in analysis flyout and dropping it on
one of the three drop targets shown.

Example
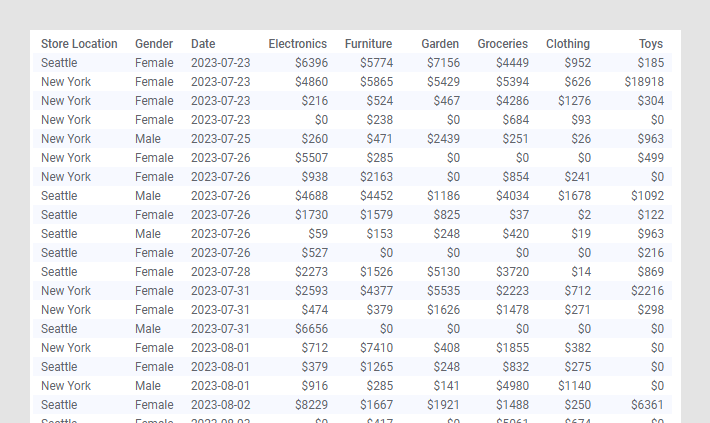
The data table contains purchases made by customers at two different
store locations.
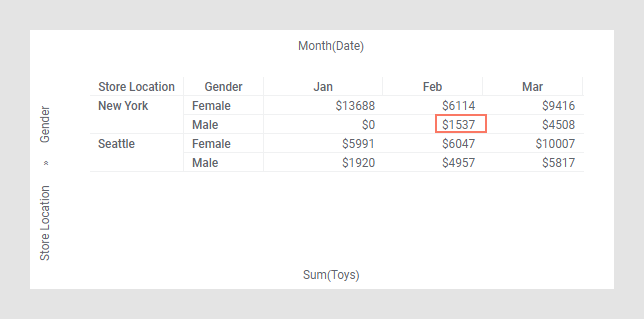
The cross table below gives you an overview of the monthly sum of toys
purchases made by men and women at each store location.
For example, the value $1537 represents the sum of toys purchases
made by men in New York during February.


