This tool allows you to create classification models using the TIBCO Enterprise Runtime for R engine, without the need of writing any scripts yourself. A model page will be created (see The Model Page) and the model will be added to the Analytic Models panel.
To reach the Classification Modeling dialog:
Open the Tools menu.
Select Classification Modeling....
Option |
Description |
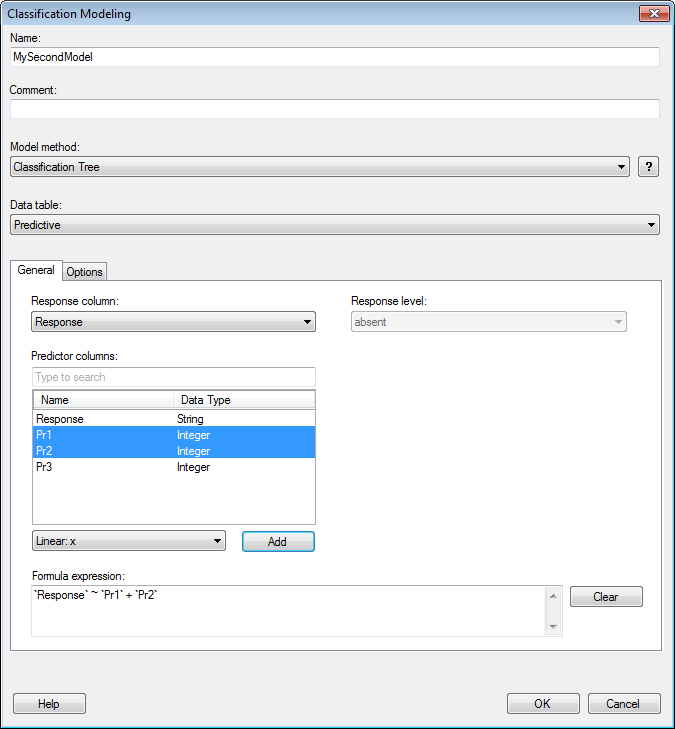
Name |
The name of the model as you want it to be referenced in the Analytic Models panel. |
Comment |
A field for optional comments on the model. |
Model
method |
Specifies the prediction model method. Choose from Logistic Regression and Classification Tree. |
|
Displays more information about the currently selected model method. |
Data
table |
Specifies the data table on which the model will be calculated. |
Response
column |
Specifies what you are trying to predict. It should generally be a column with not too many values. The selected response column is automatically added to the Formula expression field. |
Response
level |
[Only available when the Model method is set to Logistic Regression.] The Response level is the value of the response which you want to model all of the other values against. Typically, there should only be a couple of possible response values available (for example., "true" and "false", or "absent" and "present"). If there are more than two possible response levels available, they will automatically be grouped into two groups, with your selected choice in the first group and the other options in the second group. For example, if the response can be five different outcomes and if you have selected "Outcome 1" as response level, then all other possible outcomes will be grouped together into a "Not_Outcome 1" group. |
Predictor
columns |
Lists all columns in the selected data table that can be used as predictor columns. Select all variables that you think might affect the values you are trying to predict (the selected response column) and click Add after specifying a suitable transformation. |
[Drop-down list] |
Select a transformation from this list to apply it to the selected predictor columns before clicking Add and sending the predictor columns to the Formula expression field. The selected method should reflect the expected relationship between the response column and the selected predictor column. For example, if the response column is expected to linearly depend on another column, then this column should be added as a predictor column using the Linear: x method. If the relationship between the two columns instead is logarithmic, then you might add the predictor column using the Log: log(x) method. |
Add |
Adds the selected predictor columns to the Formula expression field using the transformation selected in the drop-down list. |
Formula
expression |
Displays the relationship set up between the response column and the selected predictor columns. You can also edit the formula expression field manually if you want to create more advanced expressions. |
Clear |
Clears the Formula expression field. |
See also:
Details on Classification Modeling – Options
