Example 13: Constructing an I-Optimal Design
Designing the experiment. Start the Experimental Design (DOE) analysis.
Ribbon bar. Select the Statistics tab, and in the Industrial Statistics group, click DOE to display the Design & Analysis of Experiments dialog box.
Classic menus. On the Statistics - Industrial Statistics & Six Sigma submenu, select Experimental Design (DOE) to display the Design & Analysis of Experiments dialog box.
Select the Advanced tab, and select Experimental Design Builder.

Suppose that we are interested in setting up an experiment that contains 3 continuous predictor variables x1, x2, x3. We have enough resources to perform up to 16 runs of the experiment. We already know that the 3 continuous factors are important in determining the outcome of the response variable. What we want to do now is to optimize the response. To do this, we need to model curvature in the response by including interaction and quadratic effects. Additionally, the D-optimal criterion is not appropriate in this situation since we are now more interested in precise prediction of the response instead of precise estimation of the coefficients. Recall that I-optimal designs will minimize the average prediction of the response. This is the criterion that will be used for this example.
Set up the design. Set N factors to 3.
Set factor Type to Continuous.
Click the Add factor(s) button.
Set Number of runs to 16.
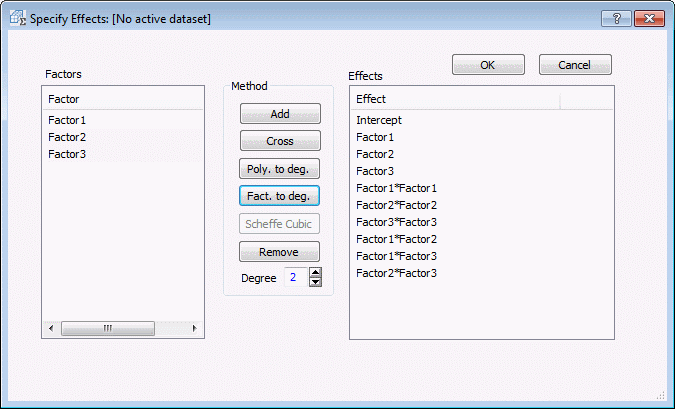
Click the Specify effects button. In the Specify Effects dialog box, add all quadratic and two-way interaction terms to the model, that is, include the effects as shown in the following image:
On the Design Options tab select I-Optimal as the Optimization Criterion.
Click the OK button to generate the design and display the Experimental Design Builder Results dialog box.
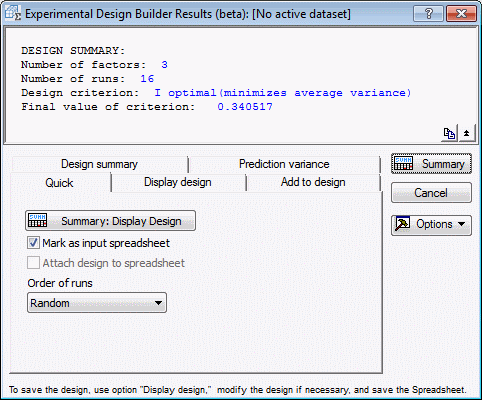
The results dialog box indicates the average variance of the response for the optimal design is 0.340517. In addition to the design efficiency measures that were reviewed in the Example 12, the percent of design space plot is a useful graph that illustrates how good an I-optimal design is.
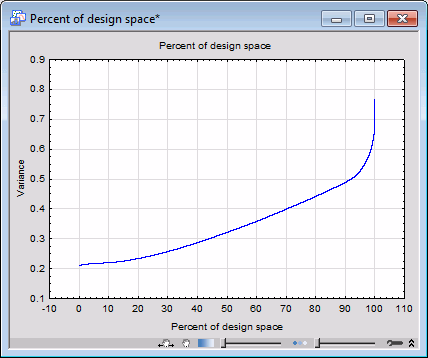
Select the Design summary tab. Click the Percent of design space button to produce a percent of design space graph for the I-optimal design. The interpretation of the graph is as follows: for a given variance (relative variance, since σ2 is unknown) on the y-axis, the value on the x-axis gives the percentage of points in the design that have a variance at or below that value.
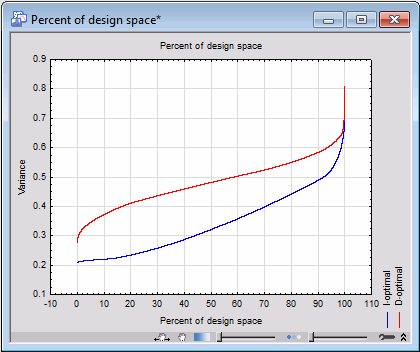
To illustrate the difference between an I-optimal design and a D-optimal design, the following graph overlays the Percent of design space plots for each optimal design. Notice that the I-optimal design is superior in terms of the small relative variance across the design space.
The prediction variance plots for a given factor will also show that the relative variance tends to be smaller in the middle of the design space and will increase toward the edges for an I-optimal design. This is due to the I-optimal design placing more points in the middle of the design.
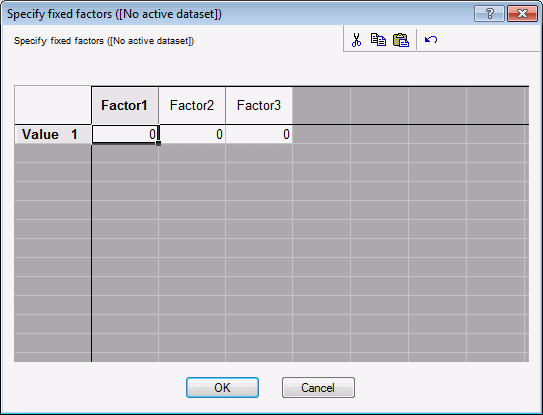
Select the Prediction variance tab. Click the Prediction variance plot button. Enter the following values into the Specify fixed factors dialog box.
Click OK to produce a prediction variance graph.
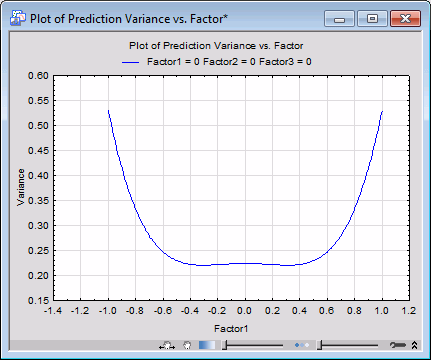
The prediction variance graph of Factor1 shows that the variance increases toward the edges of the design space and decreases toward the middle.