Managing Projects and Artifacts
Overview
Projects are directory folders in the AMS repository where you manage your artifacts. As a business user, typically you create a new project in the web client or work with an existing one to which you have access. In practice, multiple business users may be assigned the same project to manage artifacts either serially or concurrently. At least one project must be available for artifact management.
See Workflow in Detail to learn more about the artifact management workflow.
After signing into the web client, if no projects are currently assigned to you, AMS prompts to create one. Once a project is created or otherwise available, you add artifacts to it by:
As of Release 1.3.0, AMS manages two project types:
-
Native, whose artifacts are maintained entirely within the AMS database. This is the traditional, pre-Release 1.3.0 project type.
-
SCM, which references artifacts in a Subversion or Git repository. A copy of the artifact content and version number is kept in the AMS database. See AMS Integration with Source Control Management Systems for SCM integration details.
Adding Projects and Artifacts
The following sections describe how to create projects and add artifacts to them.
AMS attempts to resolve file naming conflicts if duplicate artifacts or invalid artifact naming syntax is detected within the project. AMS also allows you to re-use artifacts stored in other AMS projects in your project.
Adding a New Artifact into a Project
-
In the web client's Workspace view, click the plus sign and select . If a project is already available:
-
right-click the desired project and select .
-
or click the plus sign and select
-
-
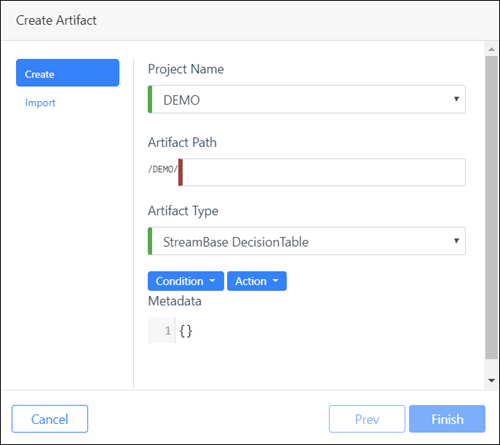
To create a new artifact, enter a name in the Artifact Path field and select the desired Artifact Type from the drop-down list:
-
StreamBase Decision Table (default)
-
R script
-
H2O Plain Old Java Object
-
Predictive Model from PMML
-
Scala file
-
Text File
-
Avro Schema
-
Python Script
![[Note]](images/note_826758100.png)
Note In most scenarios, it is more efficient to import model files — that have already been edited natively — into AMS than it is to create a new one in AMS.
-
-
To add metadata to the artifact, click between the braces and enter text in JSON format as needed. You can skip this step and enter metadata directly into your artifact later using the Artifact Editor.
-
For the StreamBase Decision Table artifact type, click or to directly add columns of those types into the artifact (you can skip this step and create columns using the Artifact Editor later) as follows:
-
Select or from the drop-down list.
-
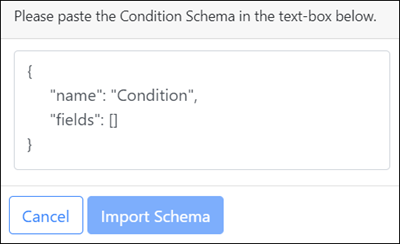
In the dialog that appears, type or paste (if you have schema data copied in your clipboard, such as from a StreamBase decision table, for example) contents between the open and closed braces, in JSON or XML format. AMS typechecks the content, which must be valid before you can proceed. You can perform this step once for a Condition, and/or once for an Action.
-
Click
-
-
Click . The updated project and its containing artifacts appear in the Workspace view. At this point, the artifacts are local to you and not yet committed to the AMS repository.
Note Adding new artifacts to a project under SCM control also propagates the artifact to the SCM.
Importing Artifacts into a Project from an SCM
-
In the web client's Workspace view, click the plus sign and select .
-
Enter a project name in the Create Project dialog.
-
Click to add a directory containing SCM-sourced artifacts into your project.
-
Select a repository from the available list to populate a list of directories. Clicking a directory adds all available artifacts contained within (because AMS requires the directory hierarchy to be preserved, you cannot select artifacts in SCM at the individual artifact level). You can add one and only SCM artifact instance into AMS (AMS notifies you if AMS is already managing the artifact).
-
Click . The new project and its containing artifacts appear in the Workspace view. At this point, the artifacts are stored in the SCM and AMS.
Importing Artifacts into a Project from a File System
-
In the web client's Workspace view, click the plus sign and select .
-
Enter a project name in the Create Project dialog and click .
-
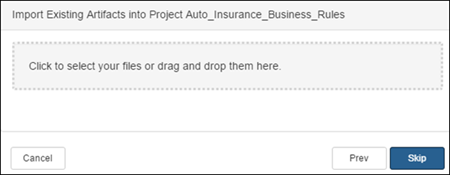
The Import Existing Artifacts dialog presents the following methods for adding existing artifacts into your project. Click in the selection area to browse files on your system. From the dialog that appears, you can:
-
Select one or more artifacts from your local file system by Shift- or Ctrl-clicking artifacts.
-
Drag and drop artifacts from your system into the selection area.
AMS copies the artifact to your workspace; it is not yet stored in the AMS repository. Changes you make to the artifact in the web client do not affect the original artifact.
-
-
Click . The new project and its containing artifacts appear in the Workspace view. At this point, the artifacts are local to you and not yet committed to the AMS repository.