Contents
The FIX Schema Designer view provides a way to specify the FIX fields of interest for a set of FIX message types, to generate a set of StreamBase schemas for the selected fields, then save the generated schemas as named schemas in an EventFlow or interface file.
StreamBase provides the FIX Schema Designer (FSD) to save time when creating schemas for use with the FIX adapter, or with any StreamBase adapter that uses the FIX protocol. The FSD creates a set of schemas for one of the adapter's ports. You select the FIX message types that you expect to pass through a particular port, and the fields of interest for each message type. The FSD creates a schema or set of schemas that represent the union of all selected message types and fields.
All FIX data types map to simple StreamBase data types, except FIX repeating groups, which map to a StreamBase list of tuples. The FSD creates a top-level schema for the union of selected message types, and automatically creates subordinate schemas for each selected FIX repeating group field.
Using the FSD requires knowledge of the FIX protocol variant required by the venue of interest. The FSD is expected to be used in conjunction with the venue's documentation for its FIX data dictionary.
By default, the FIX Schema Designer view shares the bottom central panel of the SB Authoring perspective in StreamBase Studio, the same panel used by the Properties view. If the FSD is not visible, switch to the SB Authoring perspective and run >>>>.
In the default installation, the FIX Schema Designer view is not displayed. You can open it by selecting >>>.
Use the FIX Schema Designer with the following steps:
-
Select a FIX data dictionary, which defines the version or variant of the FIX protocol to use.
-
Select the FIX message types that you expect to pass through a given adapter port, and select the fields for each message type that you want to use.
-
Generate a set of schemas for the union of selected messages and fields, and save them as named schemas.
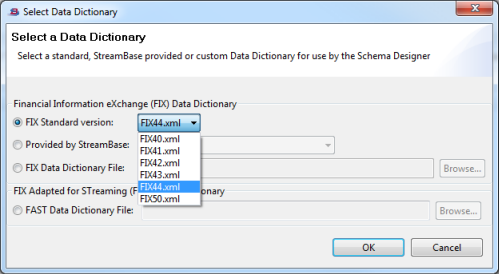
In the Configuration section at the top of the FIX Schema Designer, click the select link to open the Select Data Dictionary dialog. Select a data dictionary as follows:
- FIX Standard version
-
A drop-down list offers the data dictionaries for the FIX standard, versions 4.0, 4.1, 4.2, 4.3, 4.4, or 5.0. FIX 4.4 is the default selection for the dialog.
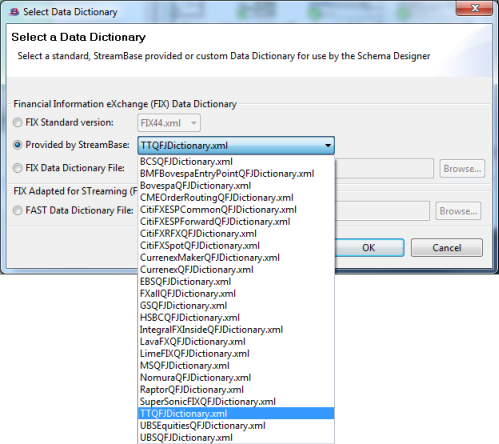
- Provided by StreamBase:
-
A drop-down list offers the data dictionaries for various StreamBase adapters. If you are designing schemas for use with a particular adapter, select the corresponding data dictionary.
- FIX Data Dictionary File:
-
Your site might use an in-house custom FIX data dictionary. In this case, use the button to navigate to the file system location of the XML file that contains your custom data dictionary.
- FIX Adapted for STreaming (FAST) Data Dictionary
-
If your site communicates with a trading venue using the FAST FIX protocol, select this option and use the button to locate the FAST FIX data dictionary file provided by your venue.
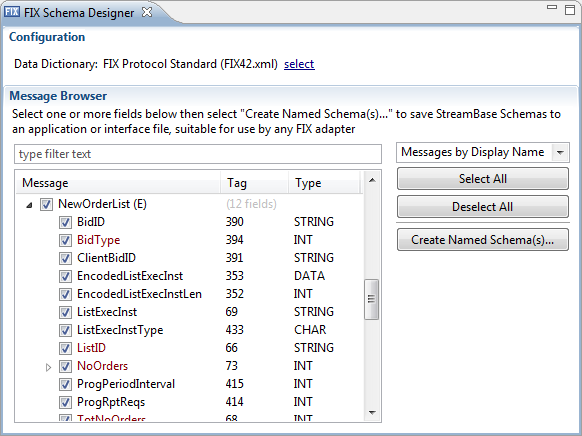
Once you specify a data dictionary, the Message Browser section is populated with a list of FIX message types.
Each message type is shown with its name followed by its message type in parentheses. Use the control above the button to sort the list of messages by name or by type.
Use the filter field to narrow the list of messages and fields to those matching the string you enter. The filter string does not need to be case-sensitive.
 |
Use the Message Browser as follows:
-
Select the check box for the first message type of interest. This pre-selects all fields in that message.
-
Clear the check box for any message fields you do not want to include.
-
Select the check box for the next message type of interest, and so on.
Message fields that appear in red are required components of the containing message type, according the data dictionary in use. If you are creating a schema for an output port (containing the set of message types to be sent on that port to a venue), you must include at least the fields in red. If your schema is for an incoming message expected on an input port for processing by StreamBase, you can limit the fields to only those you need to process.
When you have selected the message types and fields of interest, click . This generates one or more schemas as required by the selection.
In the Main schema name field, edit the provided starting point FIXMessage to specify a base name for the named schema to generate. For a simple, non-hierarchical message type, this specifies the
schema's name.
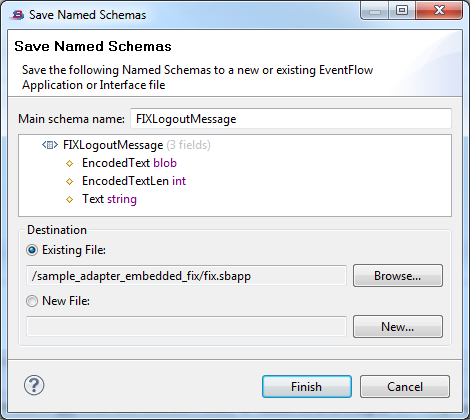 |
For a message type that contains repeating group fields, the base name is used for the overall port's schema, as well as the base name for subordinate schemas.
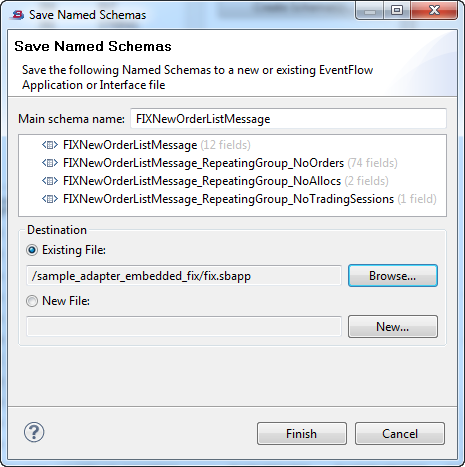 |
Specify a destination to contain the generated set of named schema:
-
You can specify an existing EventFlow or interface file in any project in your Studio workspace.
-
If you select New File, click the button to browse for an existing project folder. The File Name field is filled by default with the suggested interface name
SharedSchemas.sbint, but you can enter any name, using either the.sbintor.sbappextension to create an interface or EventFlow file, respectively.
Locate your generated schemas in the Definitions tab of the specified EventFlow file, or in the Interface tab of the specified interface file.