Personal work views can be created using a wizard.
Procedure
Click the
My Work folder in the work view list.
Click the
Create New View button () on the work view list menu bar (or select
New from the
Tools
menu).
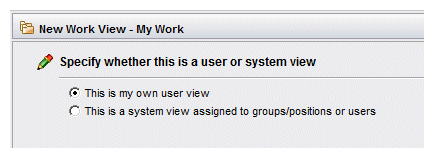
A dialog is displayed that allows you to specify whether you are creating a user view or a system view.
Note: This dialog with the user view / system view selections displays only if you have the user access authority to create system views.
Choose the type of work view to create, as follows:
A
user view is one that you create to list work items filtered and sorted as desired.
If you are creating a user view, select
This is my own user view, then click
Next.
A
system view is one that is automatically available to specified users, or to users that have been assigned to specific groups or positions.
Creating a system view is typically a supervisory or administrative function. Therefore, the discussion of creating a system view is provided in a separate section of the documentation.
If you are creating a system view, select
This is a system view assigned to groups/positions or users, which causes additional items to be displayed on the dialog. Refer to the information in
System Views to complete that dialog, then return to this step to complete the creation of the work view.
Enter the desired name for the work view in the
Name field and an optional description in the
Description
field(1), then click
Next.
Note that you could actually click
Finish at this point, which means you are creating a work view that contains all of the work items that are in your Inbox, not filtered nor sorted — basically resulting in an Inbox with a different name.
On the Filter dialog, do one of the following:
Enter filter criteria for the view, then click
Next
to advance to the Sort dialog to specify how to sort the work items in the view.
Enter filter criteria for the view, then click
Finish if you have no desire to specify how to sort the work items in the view.
Click
Next to advance directly to the Sort dialog if you have no desire to specify filter criteria.
Note that any filter criteria you specify through the wizard is considered the “base” filter for the work view (as opposed to a “refined” filter that is set through the
Filter function on the work item list). For more information, see
Base Filter and Refined Filter.
Because filtering work item lists is basically the same as filtering other types of lists in Workspace (with the exception of the specific fields on which you can filter), details of filtering is explained in a single chapter — see
Filtering Lists.
On the Sort dialog, do one of the following:
Enter sort criteria for the view, then click
Next
to advance to the Column dialog to specify the columns to display in the view.
Enter sort criteria for the view, then click
Finish if you have no desire to specify columns for the view.
Click
Next to advance directly to the Column dialog if you have no desire to specify sort criteria.
Because sorting work item lists is basically the same as sorting other types of lists in Workspace (with the exception of the specific attributes on which you can sort), details of sorting is explained in a single chapter — see
Work Items.
From the
Specify Display Columns for the View dialog, move the columns you would like displayed in the view to the list on the right, then click
Finish to complete the creation of the view.
This dialog works in the same way as the
Column Selector dialog available from all other lists in Workspace. For information about using the Column Selector, see
Customizing Columns in a List.
Result
The new view will appear in the list of work views.
You cannot use any of the four following characters in the view name or description: < (less than), > (greater than), & (ampersand), or " (double quote). The application will not allow you to enter any of these characters.