Application preferences
Preferences that an administrator can specify for the application.
| Preference | Description |
|---|---|
| Show community add-ons |
This preference specifies whether all available add-ons should be shown in the Add-ons browser. When set to False, only add-ons classified as Industry Pro add-ons will be shown. For example, visualization mods and action mods supported by Spotfire. When set to True, community add-ons that are not supported by Spotfire will be shown alongside the supported add-ons. Default is False. |
| Preference | Description |
|---|---|
| AI transparency URL |
Lets you specify a customized URL at the bottom of the AI insights panel. The default value is
|
| Show AI transparency link | Determines whether a footer with a link to the
specified
AI transparency URL should be shown in the
AI insights panel.
Default is True. |
| Preference | Description |
|---|---|
| Additional File Extensions |
Lets you specify an array of additional file extensions that should be allowed in links in Spotfire. Enter one file extension per line in the dialog. Note that Allow Additional File Extensions must be set to true if you want to be able to use additional file extensions. |
| Additional Uri Schemes | Used to link to other URI schemes besides HTTP addresses from Spotfire. Note that Allow Additional Uri Schemes must be set to True if you want to be able to use the specified URI schemes. Also note that if Allow Additional Uri Schemes is set to True and Additional Uri Schemes is left empty, then all URI schemes are allowed. |
| Allow Additional File Extensions | Must be set to True if you want to be able to use the preference Additional File Extensions. |
| Allow Additional Uri Schemes |
Must be set to True if you want to use the preference Additional Uri Schemes. The default setting is False. Note that if Allow Additional Uri Schemes is set to True, and Additional Uri Schemes is left empty, then all URI schemes are allowed. |
| Allow background calculations for recommendations |
Specifies whether to run calculations to present more recommendations based on your data. If enabled, calculations will run in the background trying to find relationships between selected columns and other columns in your data. OnDemandForWideData - Select this option to only trigger background calculations when making selections. This can improve performance if your data tables contain a large number of columns. AlwaysOn - Select this option to run background calculations until calculations of relationships for all the existing columns in your data tables are done. Off - Select this option to turn off background calculations. You will still see recommended visualizations based on data that you have selected, but no automatic search for relationships in other data will be performed. The default value is OnDemandForWideData. |
| Analyze current marking | Specifies whether to present recommendations
that show relationships between marked and unmarked data.
The default value is set to True. |
| AutoCreateFilters | Lets you specify whether filters should be
created automatically for all in-memory data columns when you load new data.
Default is True. Note that this does not apply to in-database data tables. |
| Blocked System Types |
Lets you specify an array of system types that should not be allowed to use when saving and loading documents and bookmarks. Enter one system type per line in the dialog. Note that Use Blocked System Types must be set to true if you want to block links to specified system types. |
| Default to contextual visualization properties panel | Lets you specify whether the contextual
visualization properties panel should to be opened by default in the installed
client. For example, when you right-click a visualization and select
Properties from the menu, or when you click
the properties icon
The default value is True, which will open the visualization properties panel by default. Note that with the introduction of this preference, the previous preference EnableVisualizationPropertiesPanel is no longer available. |
| DefaultValueRenderers | Opens the Renderer Settings dialog that sets the default renderer for different content types. This is applicable when showing links, images, geometries, etc. in table visualizations or as labels or tooltips. For detailed descriptions of the renderer settings, click on the Help button in the Renderer Settings dialog to view the Spotfire User Guide. |
| EnableCompatibilityPptExport | Specifies whether the deprecated 7.11 export
to Microsoft PowerPoint should be enabled.
The default value is false. |
| EnableHtmlExport | Specifies whether the export to HTML should be
enabled (export to HTML is obsolete).
The default value is false. |
| EnablePrint | Specifies whether the deprecated 7.11 printing
should be enabled, rather than exporting to a PDF and printing the PDF.
The default value is false. |
| Fixed Visualization Area Sizes |
Lets you specify which fixed sizes (in pixels) that should be available in the Visualization area size drop-down list in Document Properties besides Fit to Window and Custom Size. Enter each size on a new line and use this format: iPad Portrait (560x834) iPad Landscape (816x575) Desktop 1024 x 768 (814x610) Desktop 1600 x 1200 (1390x1030) Desktop Portrait 1050 x 1680 (840x1550) Very Large Screen ({0} x {1}) (4000x3000) The size is specified in the parenthesis, and the text before the parenthesis is the text that will be shown in the drop-down list. The last example shows how you can use variables if you want the sizes specified in the parenthesis to be shown in the drop-down list as well. By default, iPad Portrait and iPad Landscape are available in the list. Note that these are removed from the list as soon as you add a size in the list. |
| GraphicsBackend |
Lets you specify the default graphics backend. Possible values are Skia or SystemDrawing. Note: When opening analyses using the web client, the
SystemDrawing graphics backend setting only affects Web Player services running
on Windows. Skia is the only supported backend when running Web Player nodes on
Linux.
If left empty or if an invalid value is provided, the settings specified in the server configuration are used. |
| Language | Lets you specify a preferred language. (The preferred language may be unavailable in this application.) |
| MaxNumberOfWindowHandles | Lets you specify the maximum number of window handles (USER Objects) that is allowed before the application will start to delete controls/windows on non-visible pages. |
| PageFooterForExports |
Enter what to use as the default text whenever Default footer (represented by the property ${Report.DefaultFooter} is specified in the Headers and footers section of the Export to PDF dialog. If a default footer text is specified, it is automatically set in the bottom center field of the PDF pages when creating new reports. Note: For Export to PDF - 7.9 version [deprecated], the text you enter here will appear in the center footer. Moreover, the Page footer setting in the Export to PowerPoint dialog gets activated, using the entered text as the default footer. |
| Pinned shape collections |
With this preference you can specify which shape collections to show by default in the shape picker.
|
| PopupNotificationsByDefault |
Use this preference to specify whether the check box Show pop-up notifications on the Notifications flyout should be selected by default for a certain user group. When the check box is not selected, the user must manually open the Notifications flyout to inspect any notifications. Default value is True. Tip: Set this preference to False for groups where
the members will not be able to act on any notifications that might appear, for
example dashboard consumers without editing rights.
|
| PreferredFonts |
Lets you specify a list of preferred fonts to use when creating analyses. For example, this could be the company font, or a number of different fonts that you know have been installed on a Web Player or Automation Services host running on Linux. If fonts that are used in an analysis are missing from the Web Player or Automation Services host, web client users will not see the same things as the authors working with an installed client. See also Running Web Player or Automation Services on Linux. Preferred fonts will be shown at the top of the Fonts list in the Edit custom theme dialog when creating or editing analyses. Add new fonts to the preferred list by typing or pasting one new font name per line in the String Collection Editor dialog and clicking OK. |
| Sandbox Attribute for iframe Components |
Lets you restrict the content of iframe components in the application (such as the Web page panel) using the standard sandbox attribute rules. Enter values that will remove the specified sandbox restrictions, as a space-separated list. Default settings are: allow-forms allow-popups allow-same-origin allow-scripts |
| SaveCompatibilityVersion | Must be set to True to allow forward compatibility versions of analyses. |
| SaveResourceMetadataInLibrary | Lets you determine whether metadata related to
resource consumption for the analyses should be saved in the library or not.
Default is True. |
| Show accelerators |
Lets you specify whether the Accelerators browser should be available in the Files and data flyout. Default is True. |
| Show demos |
Lets you specify whether the Demos browser should be available in the Files and data flyout. Default is True. |
| ShowCommunity |
By default, there is a link to the TIBCO Community in the Help menu. This link can be modified to point to a different resource if cobranding is applied, but the link can also be removed using this preference. If set to True, the link to the specified community is shown in the Help menu. Change the setting to False to hide the option from the menu. See the Spotfire Cobranding manual for more information about cobranding. |
| ShowStatusInTaskBar |
If set to True, the installed Spotfire client is allowed to indicate status via the Windows taskbar, which can be useful when switching to a different application. Examples of indications can be progress information during lengthy operations, prompts needing user input, or whether an error has occurred. Change the setting to False to switch off the status indications. |
| ToolbarShortcuts | Use this preference to specify which shortcuts
are visible on the toolbar by default. Use the IDs listed in
Toolbar IDs, and enter
each ID on a new line in the String Collection Editor dialog.
If you have already customized the toolbar and want to use that customization as default, you can copy it instead of entering the IDs manually.
Note: If a user does not have access to certain functionality due
to how the licenses are configured, then no shortcut will be visible for that
functionality even if it has been added to the default toolbar.
Example of a customized toolbar  The toolbar in the image above has shortcuts for creating a bar chart, a line chart, maximizing the active visualization, showing visualization properties, and showing the Find tool, with a line separator between the visualization shortcuts and the rest of the shortcuts. To make it the default toolbar, enter the following lines in the String Collection Editor dialog. Note that the notifications icon cannot be removed from the toolbar. |
| Use Blocked System Types | Must be set to
True if you want to be able to use the
preference
Blocked System Types. This setting lets you to add
more system types to the list of blocked system types in Spotfire.
|
| Use Whitelist for Allowed URIs |
If empty or set to True, then the preference Whitelist for Allowed URIs will be used. This setting allows you to limit the possibility for users to add links to potentially harmful websites and applications within Spotfire analyses, and only allow links to specified domains. Note: If Use Whitelist for Allowed URIs is empty or set to True,
and Whitelist for Allowed URIs is left empty, then no URIs are allowed.
|
| Whitelist for Allowed URIs |
Lets you specify an array of URIs that should be allowed to use in links within Spotfire analyses. Enter one URI per line in the dialog. If desired, you can add a wildcard (*) to the first part of the host-name for the URI, to include all URIs within a certain domain. For example, the whitelist could contain URIs written on the following forms:
To add a path to a local directory, such as a company network
location, the path must start with
To add file URLs that work on both Windows and Linux, you can
specify additional
This sets up the Linux path to the folder
See also the AllowedFilePaths setting in the configuration file for the Web Player and Automation Services service. The Whitelist for Allowed URIs is used by the 'Image from URL' and 'Web Page panel' features in the Spotfire clients. It does not affect 'Link Renderer Settings'. Note that Use Whitelist for Allowed URIs must be enabled to force Spotfire to only allow the listed URIs. Also note that if Use Whitelist for Allowed URIs is empty or set to True, and Whitelist for Allowed URIs is left empty, then no URIs will be allowed. |
| Preference | Description |
|---|---|
| Custom data source locations | If you have deployed your own custom data
sources, developed with the software development kit (SDK) in Spotfire
Developer, the data sources are shown under
Other in the
Files and data flyout by default. With this
preference, you can pin your custom data sources to other locations in the
Files and data flyout
Specify as a JSON table where each row represents a custom data source and the location to pin it to. Example
Location is the place where the data source
should be pinned. You can pin data sources to the following locations in the
Files and data flyout; the top level, or in
a folder.
Note: If you have multiple custom data sources pinned to the
Files and data flyout, they are shown in the
order of the JSON table.
|
| Preference | Description |
|---|---|
| Allow copying refresh token for credentials profile |
Makes it possible to copy the OAuth refresh token for use in a credentials profile, when you open a Microsoft SharePoint Online connection in a Spotfire web client. Default value: False |
| AllowAddDataRecommendations | Lets you specify whether to allow recommendations on how to add data in the final step of the add data workflow (the summary view). Default is True. Change to False to never show any recommendations on how to add data. |
| AllowedServerSideConnectors |
[Only applicable when running Spotfire in the Cloud.] Lets you specify that certain connectors should be run on the server side, using the Data Access node. Type the connector name as specified in the topic "Connector Names in Configuration File" in the Spotfire Server and Environment Installation and Administration Manual; one name per row. |
| AllowSavingCredentialsForWMSLayers |
Lets you specify whether a user creating a map chart should be allowed to save credentials in the analysis when using a WMS server that requires login. If the preference is set to False and the map chart contains a WMS layer that requires login, then the credentials will be removed when the analysis is saved. The next time the analysis is opened, the user must enter the WMS server credentials in the WMS Layer Settings of the Map Chart Properties to get access to the WMS layer. If the preference is set to True, then the WMS server credentials are saved in the analysis. The next time the analysis is opened, the user opening the analysis will be logged in to the WMS server automatically. Note: Setting this preference to True means that usernames and
passwords are stored without encryption in the analysis, which might be a
security risk.
|
| AllowSharingOfCachedDataBetweenUsers |
Determines if the user, when opening analyses in web clients, should be able to use cached data in data connections where the option Share cached data between all concurrent users of the Spotfire web client is selected. It also determines if the user can use shared queries between users with different credentials in streaming connections where the option Also between users with different database credentials is selected. When this preference is set to False, sharing of cached data and streaming queries in data connections is disabled. Also, the check boxes that control these options on the Performance/Streaming Data Setting tabs in the Data Connection Settings dialog, are not available. By default, this preference is False. |
| CompatibilityUseLegacyOnDemandQueryGeneration | This is a preference that should not be
changed unless you are explicitly instructed to do so by a Spotfire support
engineer.
Default is False. |
| ConnectorExternalRowLimit |
Lets you specify the maximum number of rows that can be retrieved and visualized, when working with in-database data. The preference prevents loading of very large amounts of data, that could put strain on the network, the database and the system memory, particularly when using the web client. If the specified limit is exceeded, the visualization will not render and you will see an alert. Type an integer greater than or equal to 1000. Leaving the preference value empty indicates no limit, which is the default value. Note: The preference also affects list box filters, hierarchical
filters, item filters and statistics in the expanded data panel.
|
| ConnectorImportRowLimit |
Lets you specify a maximum limit for the number of rows that can be imported by connectors. A value of 0 indicates no limitations. |
| DefaultFileDataSourceSaveBehavior |
Lets you specify the default data loading setting for file data sources. Choose between: Linked - which represents the "Always new data" option in the data loading settings. Cached - which represents "New data when possible". Embedded - which represents "Stored data". Note: The predefined default setting in an on-premises environment
is Linked.
In a Cloud environment this setting is always Cached. |
| DefaultPasswordProtectedFileDataSource |
Lets you specify the default data loading setting for password protected file data sources. Choose between: Linked - which represents the "Always new data" option in the data loading settings. Cached - which represents "New data when possible". Embedded - which represents "Stored data". The predefined default setting is Linked. |
| EnableAllowSavingDatabaseCredentials | Lets you specify whether the user should be allowed to select the check box "Allow saving credentials" in the Configure Data Source Connection dialog which can be reached when opening data from a database. Setting this preference to False will disable the check box control. |
| ForceSerialDocumentDataLoading |
Set to True to force loading of all imported data to be done in a sequence, instead of letting data from multiple sources load simultaneously, on different threads. Default is False. See also LoadDocumentDataInParallel. |
| LoadDataFromCustomDataSourcesOnApplicationThread | Set to
True to force all custom data sources to
load on an application thread.
Default is False. |
| LoadDocumentDataInParallel |
Lets you specify whether the Allow data to be loaded in parallel check box in should be enabled by default. This setting allows data from multiple sources to load simultaneously, on multiple threads. Default is True. By switching to False, the default setting is to clear the check box, but the end users can still change this setting themselves. See also ForceSerialDocumentDataLoading. |
| ShowColumnMatchPrompts |
Lets you specify whether the Show prompt for column mismatches in new data tables by default check box in should be enabled by default. This setting lets you specify whether the Replace Column - Match Columns dialog should be shown by default for new data tables if there are inconsistences in the data matching when data in the data table is replaced. If the dialog is shown, it is possible to make manual matches between columns in the old and new data. Set to False to clear the check box and only get automatic matches (skip all manual questions regarding column matching). Default is True. |
| TableVisualizationExternalRowLimit |
Lets you specify the maximum number of rows that can be shown in a table visualization, when you are working with in-database data. Type an integer greater than 0. Default is 10 000. If the visualized data contains more rows than the specified maximum, only the first rows will be shown. The row order is determined by the sorting in the table visualization.Note: The preference will also limit data shown in the
Details-on-Demand.
|
| TableVisualizationStreamingDataRowLimit |
Lets you specify the maximum number of rows that can be shown in a table visualization, when you are working with streaming data. Type an integer greater than 0. Default is 100. If the visualized data contains more rows than the specified maximum, only the first rows will be shown. The row order is determined by the sorting in the table visualization. Note: The preference will also limit data shown in the
Details-on-Demand.
|
| UseNullAsDefaultValueForNewProperties |
Lets you specify that the default value for new properties that are not previously registered but show up when loading data should be null, instead of a valid value for the data type (like the number '0' for integers). This might be important to separate the absence of a value from a valid value. Set to True to change the default to null. |
| Preference | Description |
|---|---|
| ClientDocumentationUrl |
Determines the base URL for opening the Spotfire user guide in the installed and web client. If you have downloaded the user guide to a local web server at
You can use parameters for the current version, locale, and context ID:
|
| Preference | Description |
|---|---|
| External library configurations | Lets you configure a TIBCO Data Virtualization
integration that allows you to browse and search TDV data directly from the
Files and Data flyout.
See Configuring the TIBCO Data Virtualization integration to learn how to set these preferences and how to specify all the required properties. |
| Preference | Description |
|---|---|
| OffsetInMonths |
Sets the default value of the FiscalYearOffset document property. It specifies the number of months from the start of the calendar year to the start of the fiscal year. For instance, a value of -1 specifies that the fiscal year starts in December of the previous calendar year, whereas a value of 2 specifies that it starts in March of the current calendar year. |
| Preference | Description |
|---|---|
| BlurPreviewImages | Specifies whether preview images representing
analysis files in the library should be blurred for enhanced privacy. When set
to True, it will not be possible to see the actual data contained in the
analysis.
Default is True. |
| EmbedAllData |
Lets you specify whether data should be embedded in the analysis by default when saving the analysis to the library. If you do not specify anything, default is not to embed the data (False). This applies only to in-memory data because in-db data is never embedded. |
| ForceEmbedAllData | Set to True if you want the data to always be embedded in the analysis when saving to library. This will remove the entire step in the Save to Library wizard where a user can select whether data should be embedded. This applies only to in-memory data because in-db data is never embedded. |
| Max results for script trust search | Specifies the maximum number of entries to get
from the library for each search of trusted scripts made when a file is opened.
The default value is 30. |
| Preview render timeout(ms) |
Specifies the time in ms before a timeout when rendering previews, such as when saving a dxp file. The default value is 30000 ms. |
| ShowDetailsOfInformationLink | Lets you specify if details such as columns,
joins, filters, and prompts should be shown when you select an information link
in the Open from Library dialog. Showing much information link metadata may
affect the performance when opening data.
Set this preference to False to skip the metadata information. |
| Preference | Description |
|---|---|
| Max export timeout |
Specifies the maximum time, in seconds, allowed for an export containing a visualization mod to be finished. The default value is 20 seconds. If you set the timeout to 0 (zero), it will be interpreted as no timeout. This means that there will be no upper limit for trying to finish the export. |
| Pinned action mods |
With this preference you can specify which action mods to show by default on the Actions flyout.
|
| Pinned visualization mods |
With this preference you can specify which visualization mods to display by default on the Visualizations types flyout.
|
| Preference | Description |
|---|---|
| OAuth2IdentityProviders | Learn about how to configure the preference in OAuth2IdentityProviders preference. |
| Preference | Description |
|---|---|
| CacheCalculatedColumnsDefaultBehavior |
Lets you specify whether data should be embedded in the analysis by default when calculated columns are used on linked data. If you do not specify anything, default is to embed the data (True). |
| Preference | Description |
|---|---|
| Allow authoring of IronPython 2.7 scripts |
Specifies whether it should be allowed to create new and edit existing IronPython scripts of version 2.7. False means that IronPython 2.7 will not be available as an option anywhere in Spotfire where scripts can be added or edited. Default is True. Note: If you set this preference to
False, it can be useful to first locate
analyses containing scripts of version 2.7 and convert those scripts to a later
version. You can use the find-analysis-script CLI command to find all analyses
containing scripts in the library. The resulting report contains information
about script language and script language version. See
Finding scripts in analyses in the
library and
Interpreting the find-analysis-scripts
results in the Spotfire Server and Environment Installation and
Administration manual to learn more.
|
| Allow IronPython 2.0 scripts to execute |
Decides whether it should be possible to run any IronPython scripts of version 2.0. When the preference is set to False, Spotfire will attempt to run IronPython 2.0 scripts using the IronPython 2.7 script engine. Default is False. Note: If you have analyses containing IronPython 2.0 scripts, it
can be useful to locate those analyses and convert the scripts to a later
version. You can use the find-analysis-script CLI command to find all analyses
containing scripts in the library. The resulting report contains information
about script language and script language version. See
Finding scripts in analyses in the
library and
Interpreting the find-analysis-scripts
results in the Spotfire Server and Environment Installation and
Administration manual to learn more.
|
| Allow IronPython 2.7 scripts to execute |
Decides whether it should be possible to run any IronPython scripts of version 2.7. Default is True. Note: If you set this preference to False, it can be useful to
first locate analyses containing scripts of versions 2.0 and 2.7 and convert
those scripts to a later version. You can use the find-analysis-script CLI
command to find all analyses containing scripts in the library. The resulting
report contains information about script language and script language version.
See
Finding scripts in analyses in the
library and
Interpreting the find-analysis-scripts
results in the Spotfire Server and Environment Installation and
Administration manual to learn more.
|
| Preference | Description |
|---|---|
| Require valid signature to allow trust | Lets you specify whether it should be possible
to trust items with invalid signatures.
Default is True. |
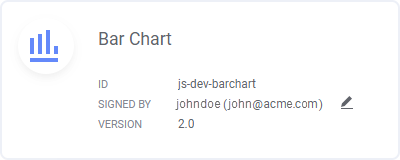
| Signer display name templates | Lets you specify how names of signers should be
displayed in Spotfire.
To display signer names like the example image above:
The preference is an array of template strings, containing (case-sensitive) variables referring to user information that has been defined on the Spotfire server. The following variables are available: $compositename - Username concatenated with domain information. For example 'John@SPOTFIRE'. $displayname - The display name defined for the user. For example 'John Doe'. $email - The email address of the user. For example 'john@acme.com'. Note: The $email variable is not defined when there is no email
information associated with the user, and a template string will only be used
if all the referenced variables have been defined. Therefore the array of
templates is declared in priority order. So when using the $email variable, you
might want to specify a second template for the case when email information is
missing. For example, enter the following lines in the String Collector Editor
dialog: $displayname ($email) $displayname
If no matching templates are found (including the case when this preference is empty) the default formatting '$displayname ($compositename)' will be used. |
| Preference | Description |
|---|---|
| Prune undo stack | Specifies whether the undo stack should be pruned. If no pruning is done, the number of data tables in the engine state increase over time because tables are kept to enable undo operations affecting the data tables. Default is False. |
| Prune undo stack limit (minutes) | Used when the Prune undo stack preference is set to True. Specifies the number of minutes before the undo stack should be pruned. Default is 0 minutes. |
| Preference | Description |
|---|---|
| Row limit for data view input to external services | This preference is not applicable. It was used for the external actions functionality, which has been removed. |