Spotfire® Server and Environment - Installation and Administration

Setting licenses

Administrators assign licenses to groups so that members of that group, and members of that group's subgroups, have access to the features contained in the license. Each license feature can also be individually enabled and disabled.

About this task

For more information, see How licenses work and License and feature reference.

For basic information, see Groups and licenses introduction.

Related commands: set-license, remove-license, show-licenses

Before you begin

  • An administrator has designed the group hierarchy for your Spotfire implementation.
  • The group you want to edit is available.
  • The client packages corresponding to the operating system of your node manager host have been deployed to Spotfire Server. For instructions, see Deploying client packages to Spotfire Server.

Procedure

  1. Log in to the Spotfire Server web administration pages and click Groups.
  2. On the Groups page, double-click the group that you want to edit (use search if you have a long list of groups).
    Tip: You can also select the group of interest and click the information icon , Open details panel, at the top right corner of the table. Use the arrow icons to toggle full screen view or a collapsed details view . See also Viewing details on the Spotfire Server administration pages.
  3. Click Licenses.
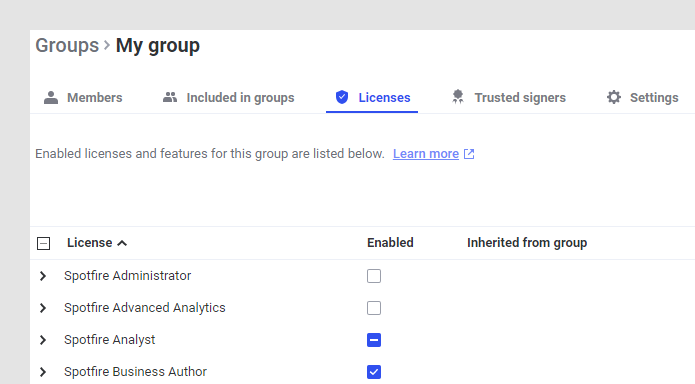
    A list of all the available licenses is visible on the Licenses page. As indicated in the following example, a dash in the check box for a license means than only some of the features under the license are enabled for the group.

    A check mark instead of a dash at the license level means that all of the features under the license are enabled.

  4. Select the check boxes for the licenses and features that you want to enable for the group, and then click Save.