
Building Rules for Decision Table Artifacts
Overview
You build rules for the artifact with the Decision Table Editor using business rules syntax.
Decision Table Editor Options
Different options are available for editing columns, rows, and cells in the Decision Table. These options are displayed below:
Editing Columns
The following options are displayed when you right-click a column heading:
| Option | Description |
|---|---|
| Remove Column | The selected column is removed. |
| Move | The four operations that can be performed on the selected column are: Move to beginning, Move left, Move right, and Move to end. |
| Column Settings | The selected column's Name and Element type can be changed.
Note: Only the Actions column Element type can be changed. |
Editing Rows
The following options are displayed when you right-click a row heading:
| Option | Description |
|---|---|
| Remove Row | The selected row is removed. |
| Move | The four operations that can be performed on the selected row are: Move to beginning, Move up, Move down, and Move to end. |
| Disable/Enable | The selected row is disabled/enabled. This option is not available if not all cells in the selected row have the same enablement state. |
Editing Cells
The following options are displayed when you right-click a cell:
| Option | Description |
|---|---|
| Add comment | A comment is added to the selected cell. The comment is displayed as a tool tip text and can be edited or deleted.
Note: If a comment is already present, then you can Edit comment and Delete comment. |
| Unset value | The selected cell values are deleted.
Note: This option is not available if the cell has no value set. |
| Disable/Enable | The selected cell is disabled/enabled. |
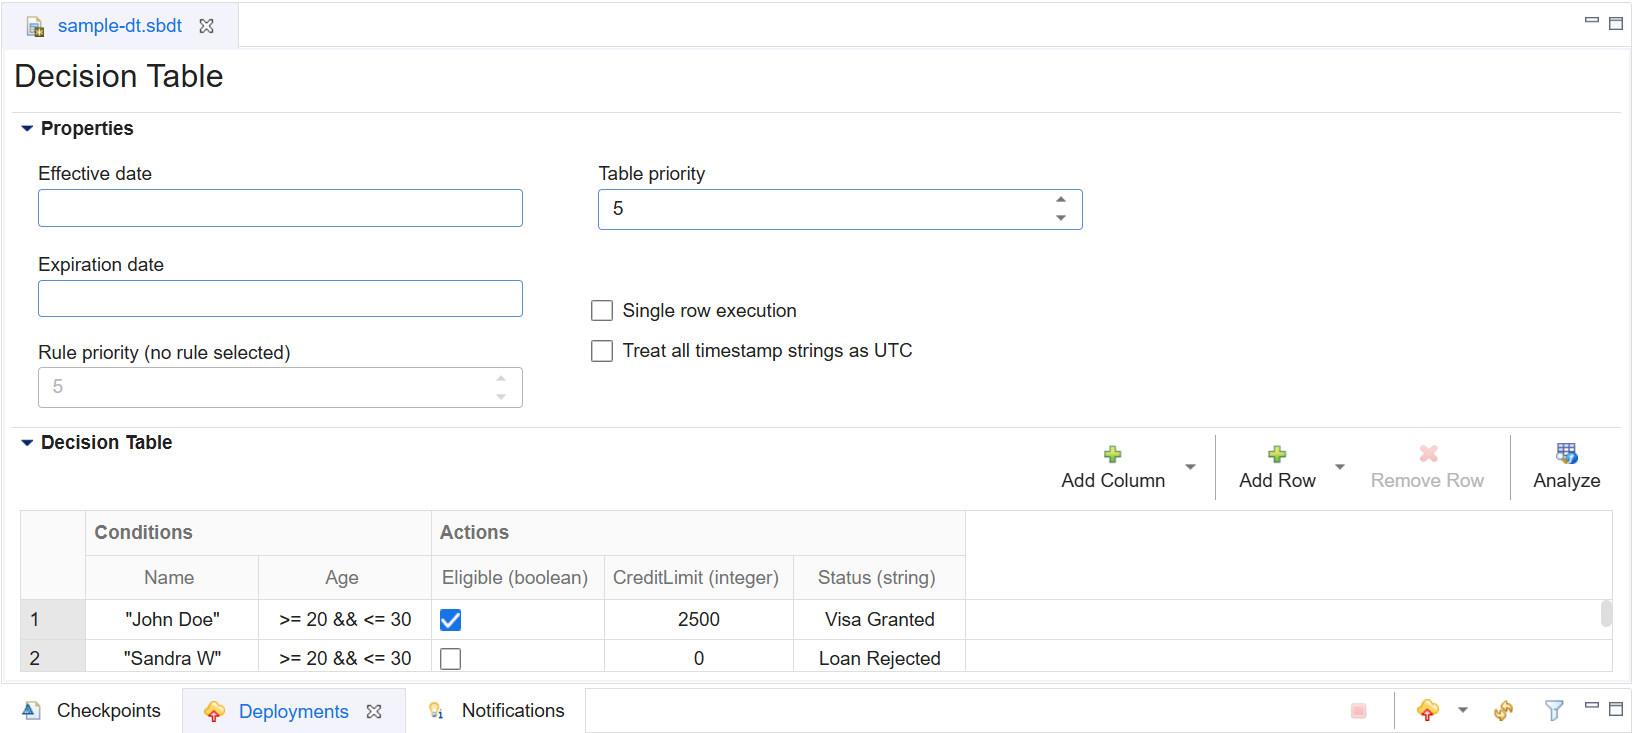
Building Rules Using the Decision Table Editor
-
With your artifact displayed in the Decision Table Editor, click Add Column for each condition or action you want to build into your business rules.
-
Click Add Column.
-
Select a column type from the dropdown list:
-
Add Condition
-
Add Action
Note: The column is created with a default name. It can be changed by editing the column settings.
-
-
For the Action column, you can select a property type by right-clicking the column and then selecting any of the following data types:
-
string
-
long
-
double
-
tuple
-
boolean
-
datetime
-
integer
Note: To set the data type as a List, select List type.
-
-
-
Click Add Row, once for each business rule that you want to build.
-
Enter your rule information into each cell as required, depending on the column's data type. See business rules syntax for syntax guidance. If using the boolean data type, single-click in the cell to toggle between true, false, and unset.
-
Optionally, you can set the rule priority (the order in which rules fire) by selecting the cell or the row header and then selecting a priority level from the Rule priority up or down arrow as needed {1 highest, 10 lowest. Default: 5}.
-
-
Optionally, select a date and time that the artifact becomes effective in the Effective Date field.
-
Optionally, select a date and time that the artifact expires in the Expiration Date field. Note: StreamBase prevents decision tables from loading when either the expiration date is less than or equal to the effective date (that is, the rules will never be active), or when the expiration date is set to the past (rules will never be active).
-
Skip the table priority option. It is currently not supported, as a single Decision Table operator does not support loading multiple decision tables.
-
Enable single row rule execution, as needed, by selecting Single row execution. When enabled, the first rule that matches the input causes the StreamBase Decision Table EventFlow module (when the artifact is deployed to the module) to emit its (StreamBase) output tuple. When disabled, all rules are run against each input tuple, prioritized in descending order by rule ID. For more information about the Decision Table operator, see the Decision Table operator documentation page in the StreamBase Authoring Guide, in the TIBCO® Streaming documentation.
-
To consider all timestamps as UTC, select Treat all timestamp strings as UTC.
-
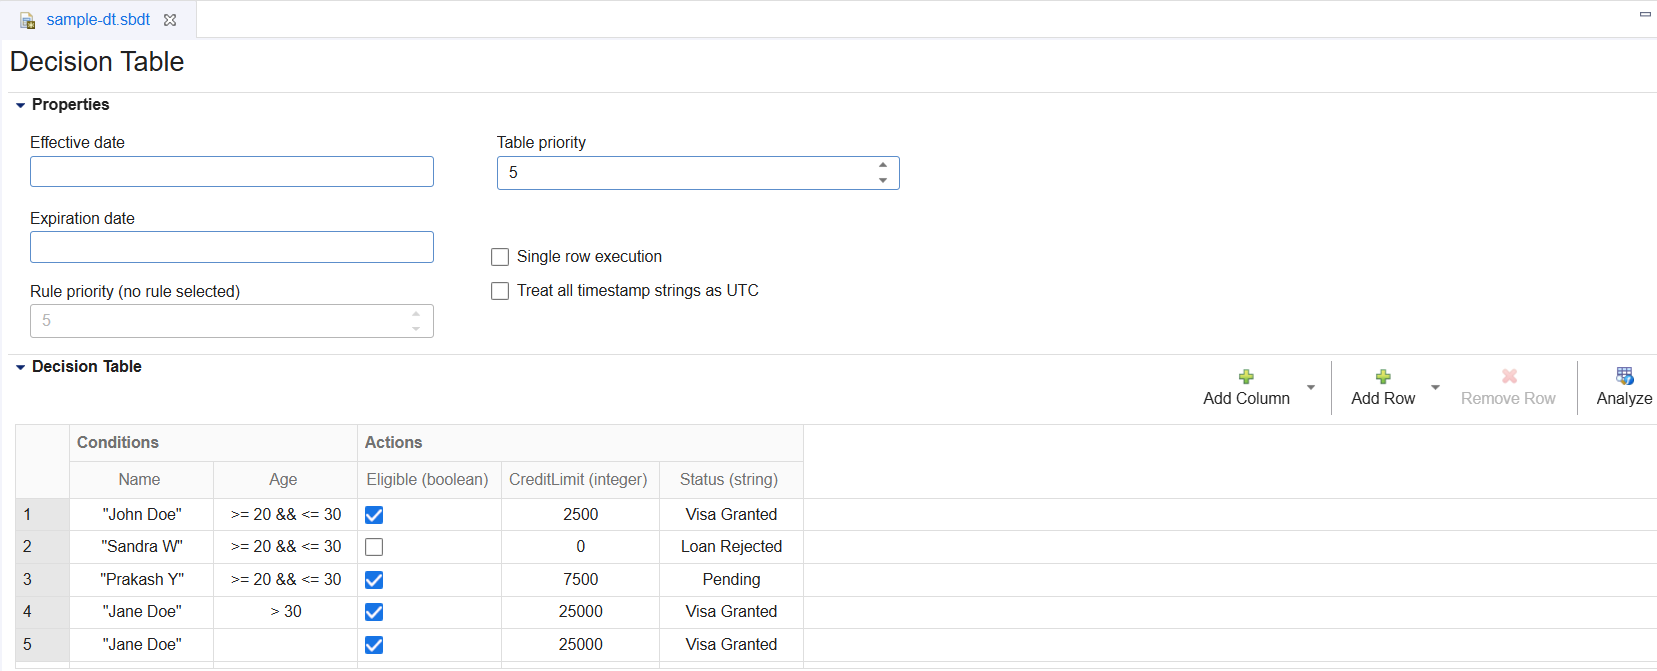
The following example shows a simple artifact containing five rules and five columns (two condition and three action columns):
-
To save your changes, select File>Save from the top-level menu bar, or press the keyboard shortcut for your platform. For the desktop client, press Ctrl+S on Windows or Linux, and Command+S on macOS. For the web client, press Ctrl+S. Changes are saved locally and are not yet visible to other users. To share your changes with other users, you can create a checkpoint and then publish it. Once a checkpoint is published, it is visible to all users.
Analyzing the Table
You can analyze the current Decision Table for any problems by clicking Analyze in the editor toolbar. When the analysis is complete, a pop-up window provides additional information about invalid rules and problematic fields.