
Using the MMS Client
This topic explains how to navigate the TIBCO Streaming Model Management Server (MMS) client user interface. The options displayed in the MMS client vary based on the assigned user role and privileges.
Table of Contents
Sandbox Selection
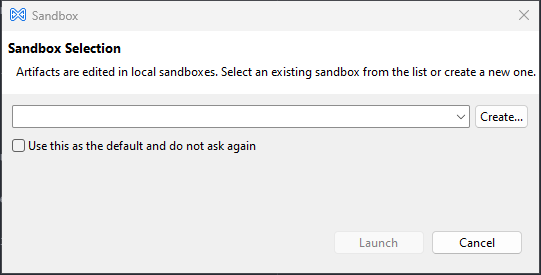
Sandbox screen is where the user creates a new sandbox or selects an existing sandbox from the list. A sandbox is a private and isolated workspace for creating and modifying projects and artifacts without impacting the shared environment. This enables safe and independent work before publishing changes to the backing space.
A Sandbox Selection screen is as shown below:
A New Sandbox screen is as shown below:

Spaces in the New Sandbox screen can be configured in MMS Configuration settings.
Top-Level Menu in the MMS Client
The Top-Level Menu offers quick access to all key functionalities within the MMS client.
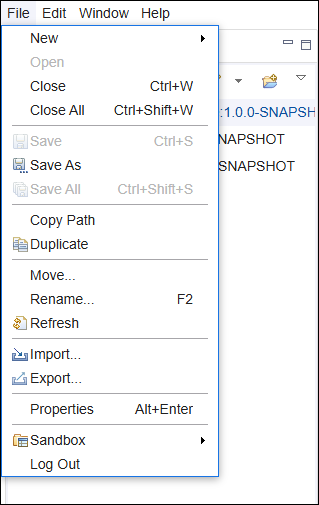
File Menu
This menu provides the following options:
- Create, open, and close projects or artifacts.
- Import and export project artifacts.
- Rename, move, and duplicate projects.
- Log out of the MMS client.
Edit Menu
This menu provides standard editing options like Cut, Copy, Paste, Undo, and Redo.
Window Menu
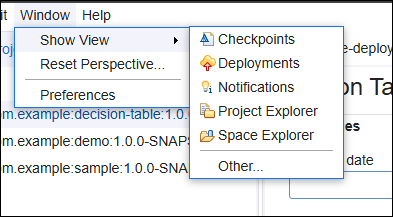
- Show View: Display additional views like Project Explorer and Space Explorer.
- Reset Perspective: Restore the default layout.
- Preferences: Adjust user settings.
Help Menu
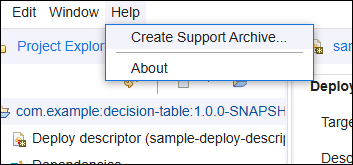
- Create Support Archive: Generate a support archive for troubleshooting. For more information, see Support.
- About: Display information about the MMS client.
Workspace Views
The MMS client contains the following views for working with projects and artifacts:
- Project Explorer
- Checkpoints
- Deployments
- Notifications
- Space Explorer
Project Explorer View
In this view, users manage projects and artifacts. By default, this view displays the projects to which the user has access, including the artifacts to which they are assigned. It allows the user to create, modify, and manage various resources related to MMS projects efficiently.
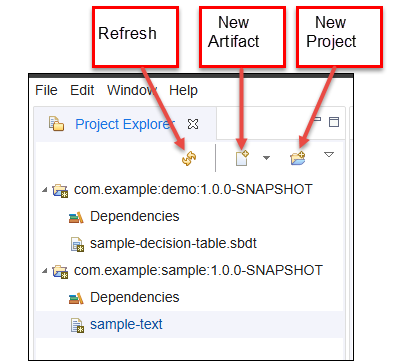
The Project Explorer view displays a hierarchical view of:
- Projects (for instance,
com.example:demo:1.0.0-SNAPSHOT). - Artifacts within projects.
- Dependencies associated with projects.
Each project contains its dependencies and related artifacts (for instance, sample-decision-table.sbdt and sample-text). Modified projects and artifacts names are appended with an asterisk(*). This indicates a modified state of the project with respect to the backing space.
Toolbar Options
The Project Explorer contains the following toolbar buttons for common actions:
-
New Artifact: Adds an artifact to an existing project.
-
New Project: Create a project in the workspace.
-
Refresh: Reload the project explorer view.
Right-Click Context Menu
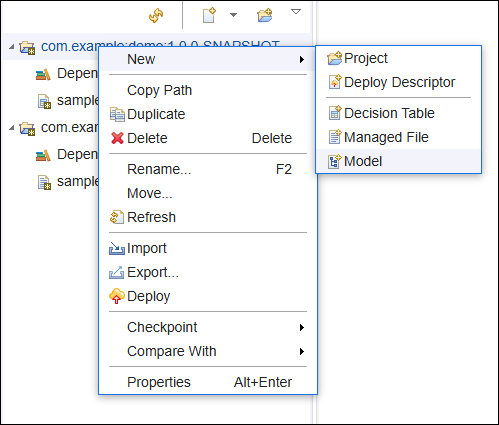
In the Project Explorer view, the user can right-click on a project to access additional options as given below:
- Project: Create a project within the workspace.
- Deploy Descriptor: Add a deployment descriptor file.
- Decision Table: Create a decision table artifact.
- Managed File: Add a new managed file.
- Model: Create a model artifact.
Other Key Actions
- Copy Path: Copy the file path of the selected project or artifact.
- Duplicate: Create a duplicate of the selected project or artifact.
- Delete: Remove the selected project or artifact.
- Rename or F2 key: Rename the selected item.
- Move: Move the selected artifact to a different location.
- Refresh: Update the project view.
- Import: Enable importing previously exported project archive file.
- Export: Enable exporting project from sandbox into file system.
- Deploy: Deploy the selected project.
- Checkpoint: Create a checkpoint of the changes.
- Compare With: Compare changes between different checkpoints or with the backing space.
- Properties or (Alt+Enter) keys: Display detail properties of the selected item, project dependencies, and approval to Streaming clusters.
Checkpoint View
The Checkpoint view in the MMS client provides users with the ability to create, manage, and publish checkpoints within their projects. Checkpoints act as snapshots of the current project state, allowing users to track and revert changes when needed.
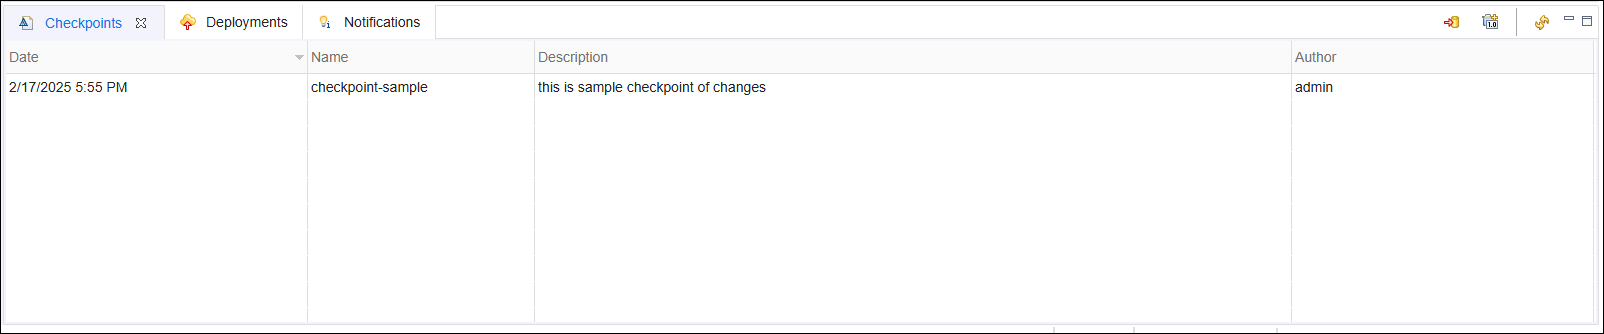
The Checkpoint View displays a list of created checkpoints with the following columns:
- Date: Timestamp of when the checkpoint was created.
- Name: Name assigned to the checkpoint.
- Description: A brief description of the checkpoint's purpose.
- Author: The user who created the checkpoint.
Toolbar Options
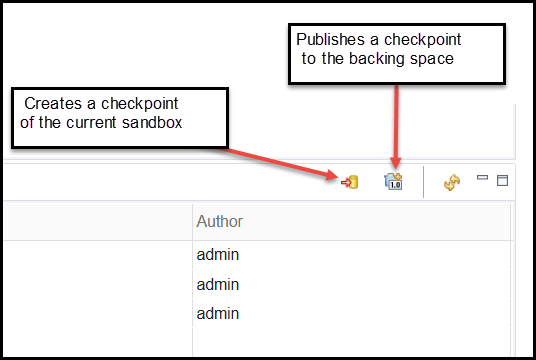
The Checkpoint View contains toolbar buttons for managing checkpoints:
-
Create Checkpoint: Capture the current state of the sandbox as a checkpoint. Created checkpoints are listed with timestamps and descriptions for easy reference.
-
Publish Checkpoint: Publish the checkpoint to the backing space, making it available for other users.
Deployment View
The Deployment View in the MMS client provides users with visibility into project deployments. This allows the user to monitor and manage deployed artifacts.
Structure of the Deployment View
The Deployment View displays information about ongoing and completed deployments in the following columns:
- Name: The name of the deployed artifact.
- Status: The current state of the deployment (such as running, stopped, or failed - error).
- Cluster: The cluster where the artifact is deployed.
- Deployed By: The user who initiated the deployment.
- Start Time: The timestamp when the deployment started.
- Description: Additional details about the deployment.
- Trace: Indicates whether tracing is enabled or disabled.
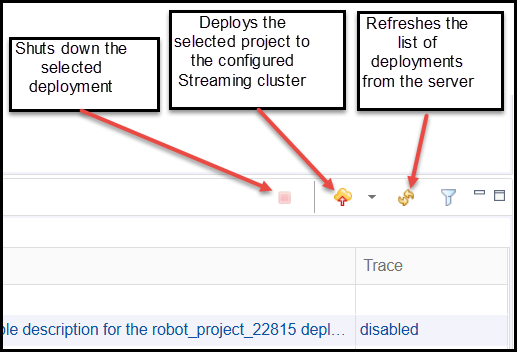
Toolbar Options
The Deployment View includes the following toolbar buttons for managing deployments. Users can monitor active deployments and review deployment status using these options::
- Shut Down Deployment: Stop the selected deployment.
- Deploy Project: Deploy the selected project to the configured Streaming cluster.
- Update Deployment: Update a running deployment.
- Refresh Deployments: Refresh the list of deployments from the server. This ensures that users view the latest deployment status.
Notifications View

The Notifications View provides users with a list of system-generated messages related to project activities, deployments, and other critical events.
Toolbar Options
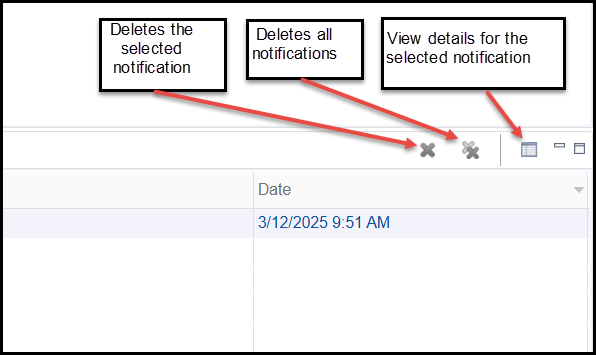
The Notifications view contains the following toolbar buttons for managing notifications:
- View Details: Displays additional details about a selected notification. Users can double-click any notification item to view details.
- Deletes all notifications: Clear all notifications from the list.
- Delete the selected notification: Delete only the selected notification.
Space Explorer View
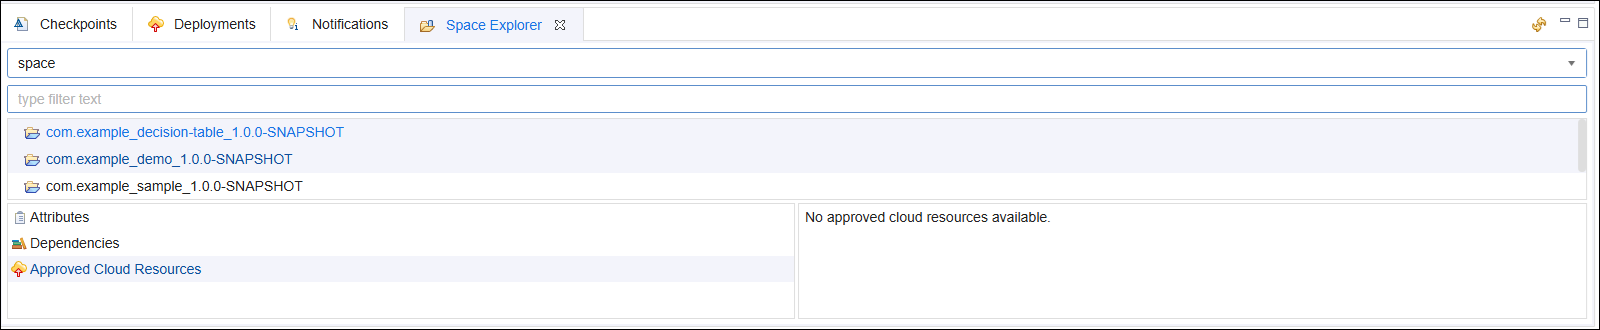
The Space Explorer view provides users with an overview of all the projects available in the backing space.
Features of the Space Explorer view are:
-
Displays all projects stored in the backing space.
-
Projects are listed with their corresponding versions.
-
Additional details such as Attributes, Dependencies, and Approved Cloud Resources are shown.
Artifact Editor
Users can build and edit decision tables and other supported artifacts in the Artifact Editor. By default the Artifact Editor is located on the right side of the MMS client. Working with the decision table artifact using the Artifact Editor is described in Building Rules for Decision Table Artifacts.
For more information on the supported artifact types in MMS, see Artifact Administration.