User Interface
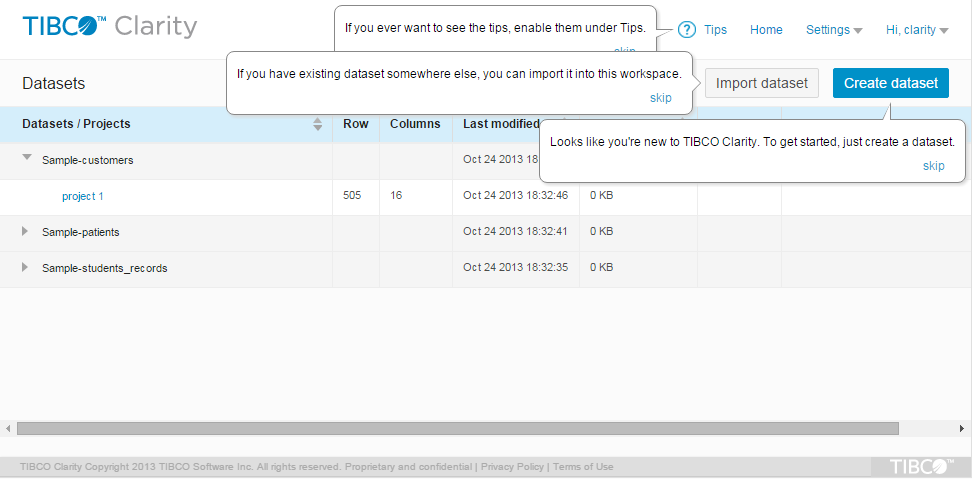
After launching TIBCO Clarity, the home page is displayed with three sample datasets.
On the home page, you can create a dataset either by importing an existing dataset or collecting source data from different sources from the very beginning. Click the corresponding dataset or project to get more information. See Dataset Summary Page and Project Data Page for details.
Click Settings in the upper-right corner, you can find the following global settings:
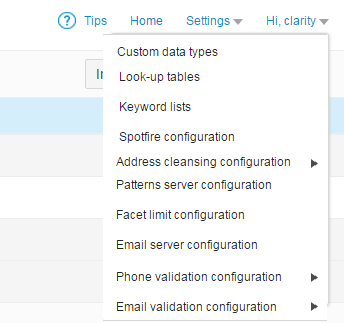
- Custom data types
- Click Custom data types to customize data types.
- Look-up tables
- Click Look-up tables to add look-up tables. A look-up table is a mapped relationship between key and value columns.
- Keyword lists
- Click Keyword lists to add keywords; then you can facet data by the keywords you add.
- Spotfire configuration
- Click Spotfire configuration to create a connection to TIBCO Spotfire®. You can synchronize the cleansed data to TIBCO Spotfire whenever a valid connection is established.
- Address cleaning configuration
- Click
Address cleaning configuration, you can find the following settings:
- GeoAnalytics configuration
Click GeoAnalytics configuration to create a connection to TIBCO® GeoAnalytics if you want to use the address cleansing function.
- Google Maps configuration
Click Google Maps configuration to create a connection to Google Maps if you want to use the address cleansing function.
- ArcGIS configuration
Click ArcGIS configuration to create a connection to ArcGIS if you want to use the address cleansing function.
- GeoAnalytics configuration
- Patterns server configuration
- Click Pattern server configuration to create a connection to TIBCO® Patterns if you want to use the dedup function.
- Facet limit configuration
- Click Facet limit configuration to set the maximum number of choices shown in each text facet.
- Email server configuration
- Click Email server configuration to create a connection to an SMTP server for the email notification. See Creating an Email Server Connection.
- Phone validation configuration
- Click
Phone validation configuration, you can find the following setting:
- Byteplant phone validation configuration
Click Byteplant phone validation configuration to create a Byteplante usage for phone validation.
See Creating a Byteplant Usage for Phone or Email Validation.
- Byteplant phone validation configuration
- Email validation configuration
- Click
Email validation configuration, you can find the following setting:
- Byteplant email validation configuration
Click Byteplant email validation configuration to create a Byteplante usage for email validation.
See Creating a Byteplant Usage for Phone or Email Validation.
- Byteplant email validation configuration
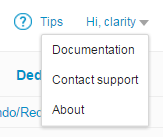
Click your account in the upper-right corner, you can find the following information:

- Memory
- Displays the memory usage information.
- Disk
- Displays the disk usage information.
- Address cleansing
- Displays the quota of the address cleansing function.
- Documentation
- Click Documentation to open the documentation of TIBCO Clarity.
- Clarity APIs
- Click
Clarity APIs to test Clarity APIs in Swagger.
See Clarity APIs.
- Contact support
- Click Contact support to get help from TIBCO support, restart TIBCO Clarity, or to terminate a TIBCO Clarity instance.
- Tutorial
- Click
Tutorial to show instructions on how to create a new dataset.
The tutorial aims to help users who launch TIBCO Clarity for the first time. When you click Tutorial, the tutorial bubbles pop up giving you instructions on how to proceed to the next step. To dismiss the tutorial bubbles, click Skip.
- About
- Click About to view the product release information.
- Sign out
- Click Sign out to log off from TIBCO Clarity.
Click your account in the upper-right corner on the view mode page, you can find the simplified information:
See Launching TIBCO Clarity in View Mode for details about the view mode feature.