
Permission Management
Permission Management gives you access to perform the following tasks:
- Add and delete users
- Enable or disable users
- Change user passwords
- Assign roles to users
Contents
- Managing Users: Add, delete, enable, or disable users; change user passwords.
- Managing Roles: Assign roles to the users
Users are assigned roles based on the operations they are permitted to perform. For example, a manager might be assigned the reviewer role (to make some changes) and an IT department personnel can be assigned the administrator role (to carry out maintenance of TIBCO ModelOps).
Users can be assigned one or more roles, and roles can be granted one or more permissions. Each permission specifies an object type, an action that can be performed on that object, and, optionally, a specific instance of the object.
Changes you make from the web client persist across user sessions.
Deleting a role causes users with that role to immediately lose any permissions associated with that role, unless they have the same permissions assigned through another role. Conversely, any user who gains a new role or privilege can immediately take advantage of that change.
Managing Users
To manage users, click Settings and Preferences at the end of Project Explorer and select Permission Management > Users.
You can perform different administrative tasks related to users, such as adding users and managing their roles and email credentials.
Adding Users
- Go to Permission Management > Users and click the plus sign (+) to add users to whom you want to provide access to TIBCO ModelOps.
- Use the displayed dialog box to:
- Add a user name
- Assign roles to the user
- Enter an email for the user to receive notifications
- Set the user password
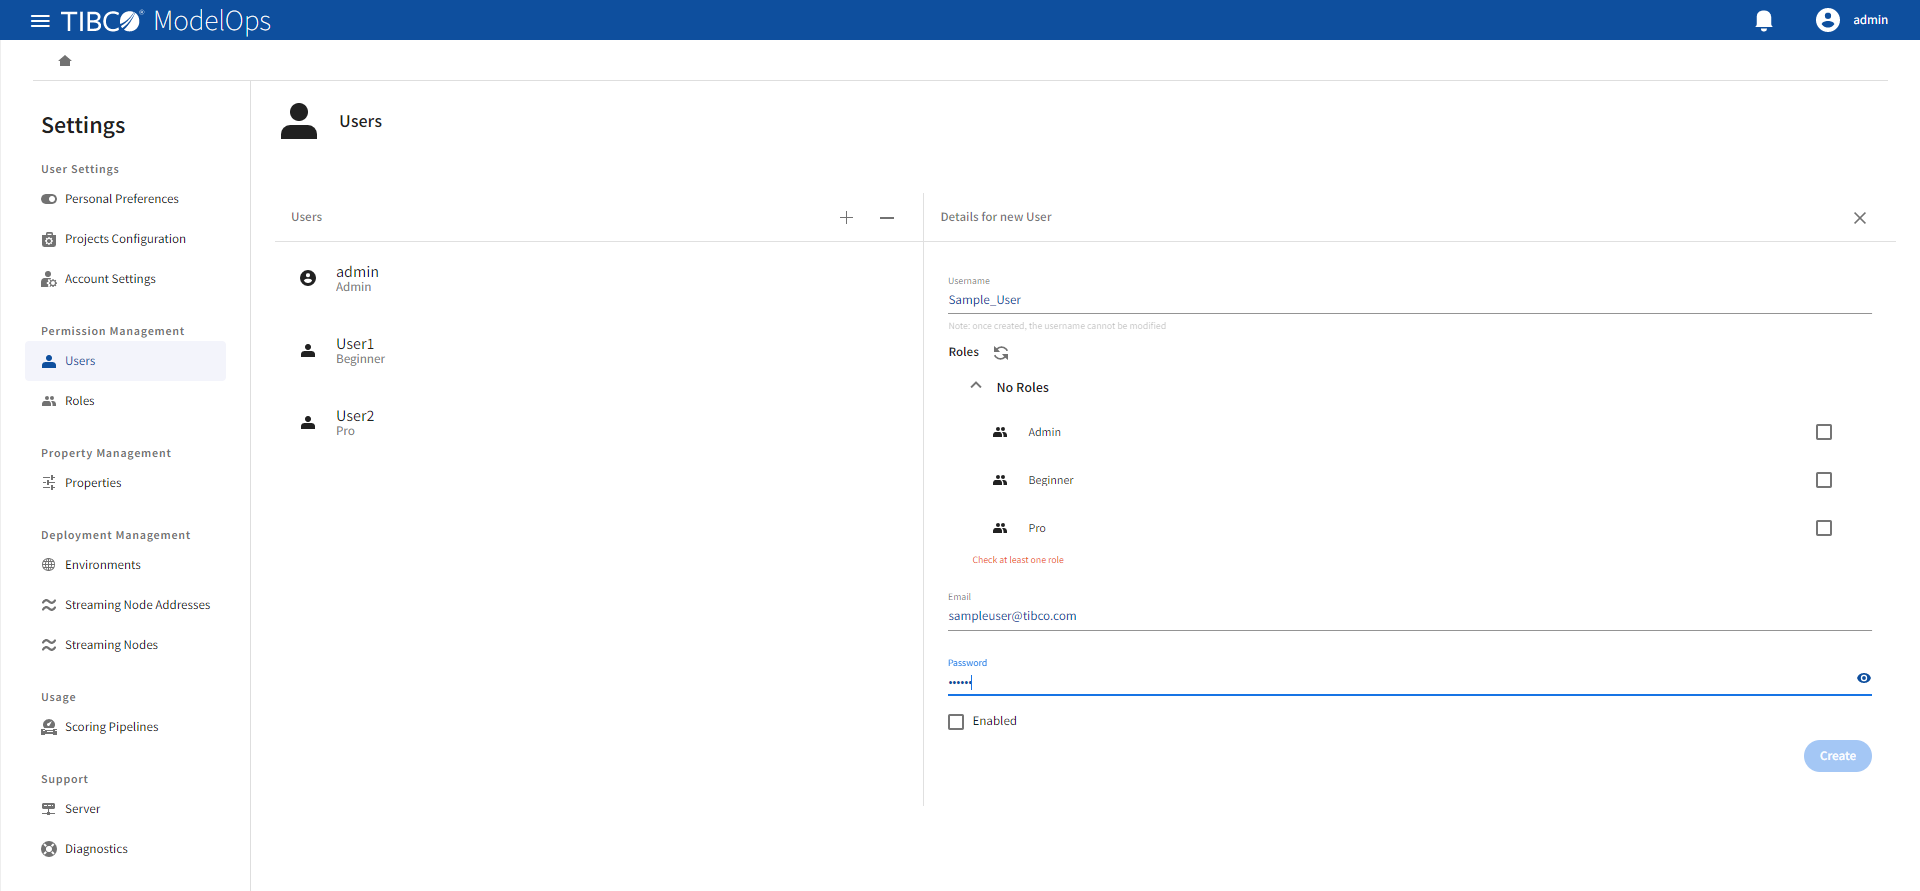
-
Click Create. The user is now added but not yet enabled. You can choose to enable the user now, or return to the Permission Management later to enable it. You can leave user accounts disabled for security reasons, such as when setting up accounts in advance.
Note: Users can edit these attributes at any time (only if they have permission to do so).
Managing Roles
Roles define the tasks that users can perform based on the permissions assigned to those specific roles.
The administrator defines the users who are permitted to log in to TIBCO ModelOps. The administrator also controls roles assigned to the user and the projects and artifacts the user can view and access in TIBCO ModelOps. Role permissions are configurable.
To manage users and assign roles, you must navigate to the following scenario:
- Go to Permission Management > Roles
- To create a new role, click the plus sign (+).
- Enter a role name and assign one or more users to the role from a list of users. This list is displayed under the Role name field.
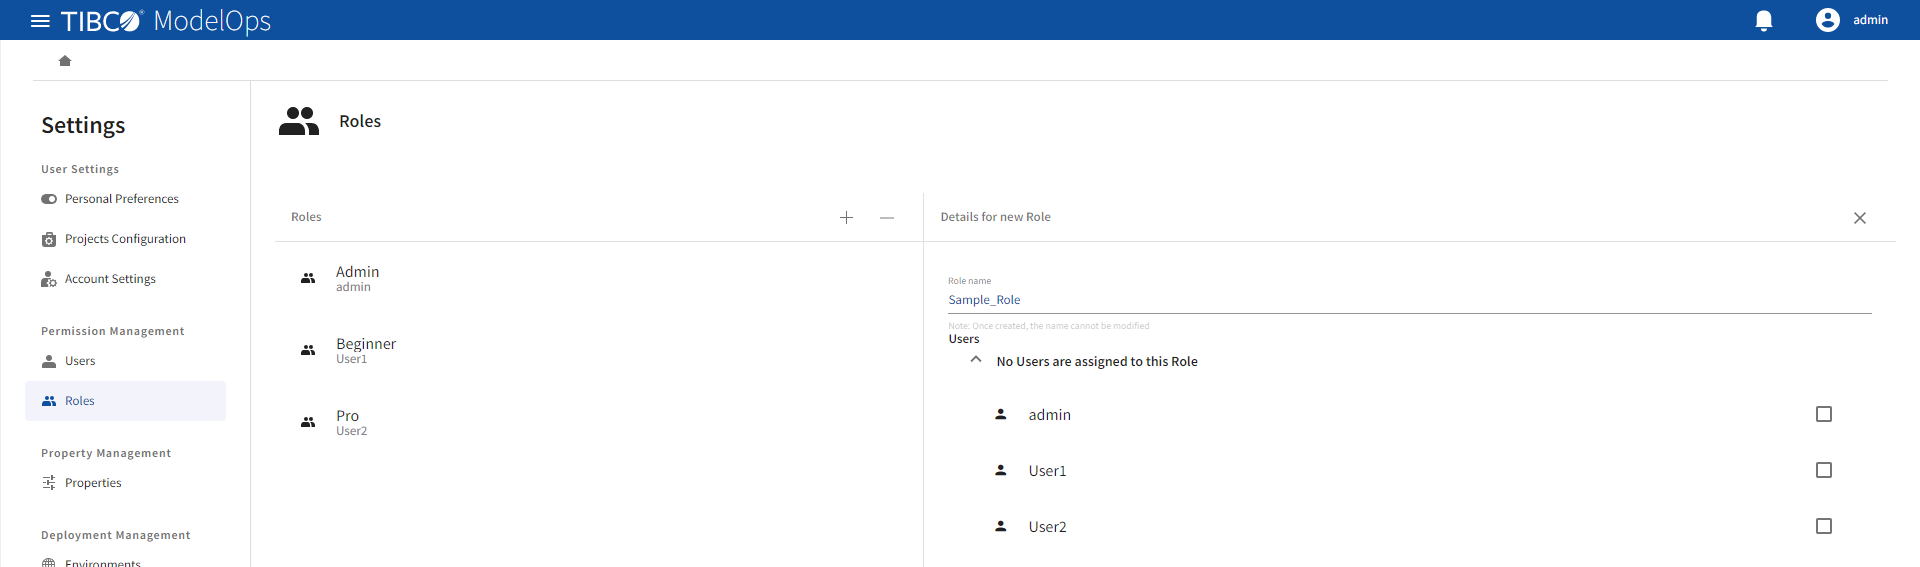
-
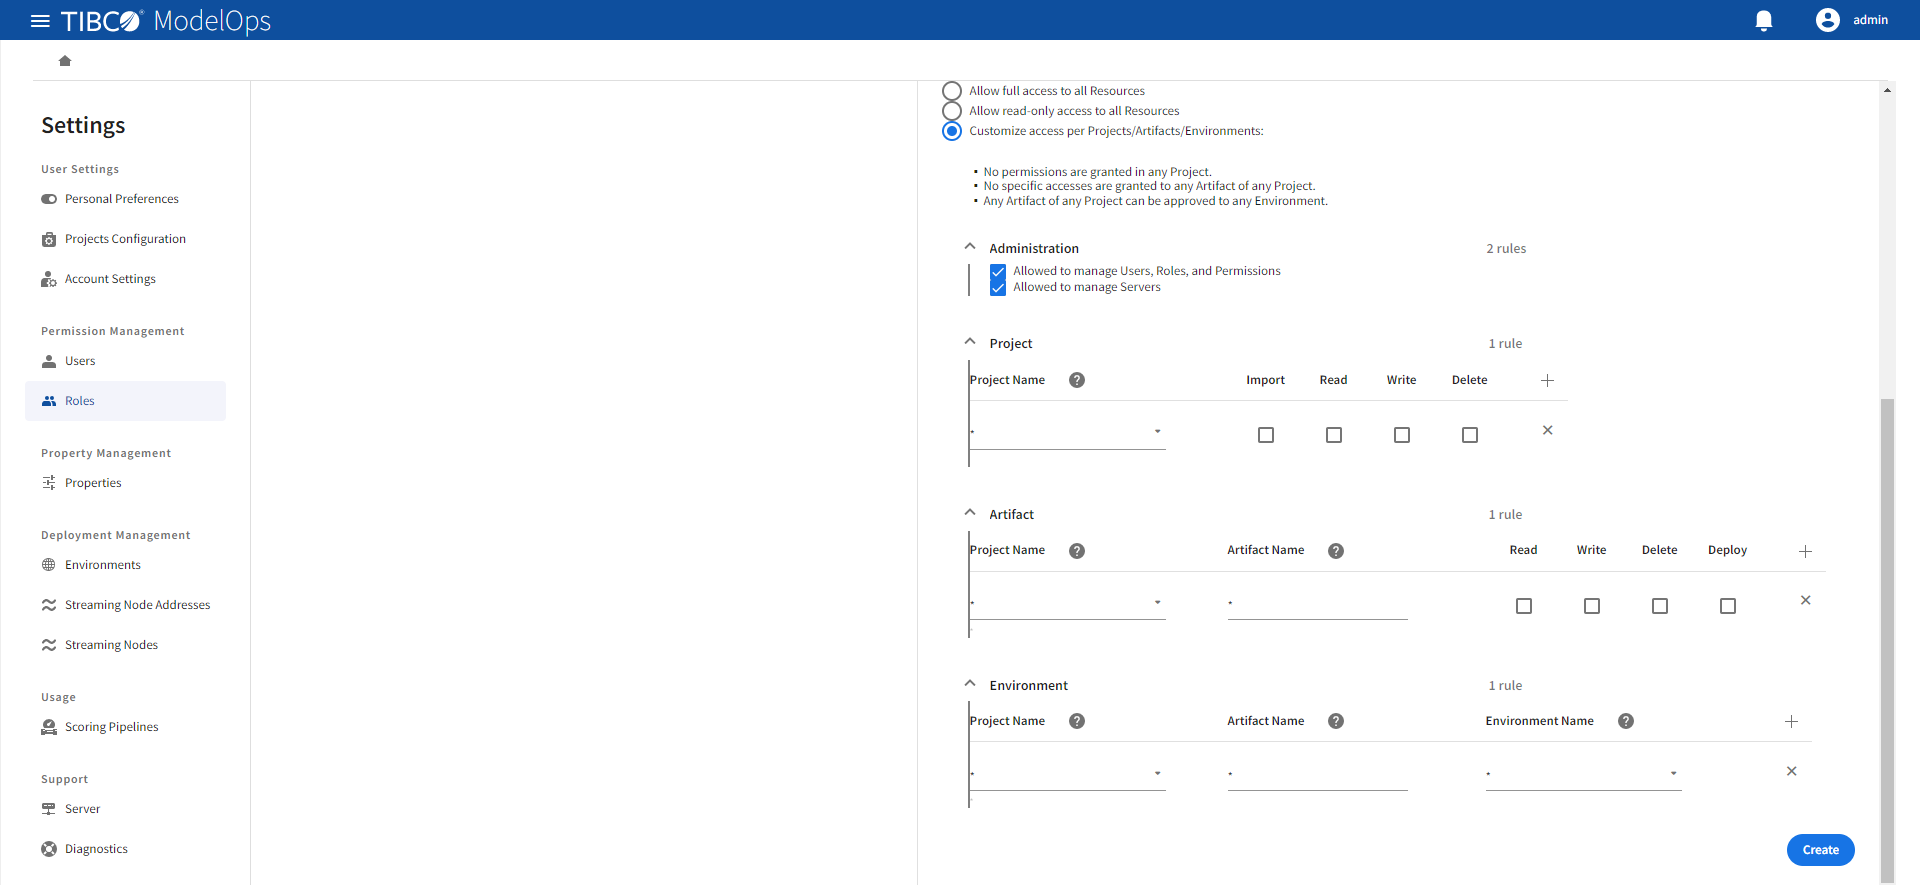
Select an access level from the following options:
- Allow full access to all resources.
- Allow read-only access to all resources.
- Customize access per project/artifacts.
- If you have selected the Customize access per Project/Artifacts/Environments option, configure the additional options related to administrator rights, projects, artifacts, and environment.
- Administration Permissions:
- Allowed to manage users, roles, and permissions: Users with this permission can manage all other users, roles, and permissions.
- Allowed to manage servers: Users with this permission can manage TIBCO ModelOps, including creating and deleting streaming nodes, viewing active login sessions, and shutting down the server.
- Project Permissions:
- You can assign permissions to:
- All projects by selecting any Project from the list. An asterisk in the field suggests that all the projects are accessible
- An individual project located in the drop-down list
- Additional projects by clicking the plus sign (+) to the right of permissions
- Supported project-level permissions:
- Import: Allows importing projects and artifacts into TIBCO ModelOps, including adding new artifacts to existing projects.
- Read: Allows checking out the specified projects. A user must have read permission for a project to fetch or check out any of its artifacts.
- Write: Allows modifying the metadata of the specified projects.
- Delete: Allows deleting the specified projects.
- You can assign permissions to:
- Artifact Permissions:
- You can assign permissions to:
- One or all projects by selecting any Project from the list. An asterisk in the field suggests that all the projects are accessible
- One or all artifacts (by adding an asterisk in the field)
- Additional projects and artifacts by clicking the plus sign (+) to the right of the permissions
- You can assign permissions to:
- Supported artifact-level Privileges:
- Read: Allows fetching or checking out the specified artifacts
- Write: Allows modifying the specified artifacts
- Delete: Allows deleting the specified artifacts
- Deploy: Allows deploying the specified artifacts
- Read: Allows fetching or checking out the specified artifacts
- Environment Permissions:
- You can assign permissions to:
- All projects by selecting any Project from the list. An asterisk in the field suggests that all the projects are accessible
- An individual project located in the drop-down list
- One or all artifacts (by adding an asterisk)
- One or all environments (by selecting any Environment from the list)
- Additional projects, artifacts, and environments by clicking the plus sign (+) situated to the right end of the section
- You can assign permissions to:
- Administration Permissions:
-
Click Create.
Editing or deleting roles is similar. Click the role you wish to edit and modify the permissions in the Details for new Role section. Once done, click Save at the end of the page. To delete a role, select the role and click the minus sign (-) in the Roles section.
Note: Sometimes a request to TIBCO ModelOps fails because the user does not have permission to access the requested project or artifact. At such times, the server returns a no-such-project or no-such-artifact response rather than a you don’t have permission to access this project/artifact response. The rationale for this behavior is for security reasons and to avoid revealing any more information to the user than is necessary. Replying with a no-permission response would confirm that the requested resource exists.