Adding a Table
In the Getting Started tutorial, the third task you must do using the plug-in is to add a table.
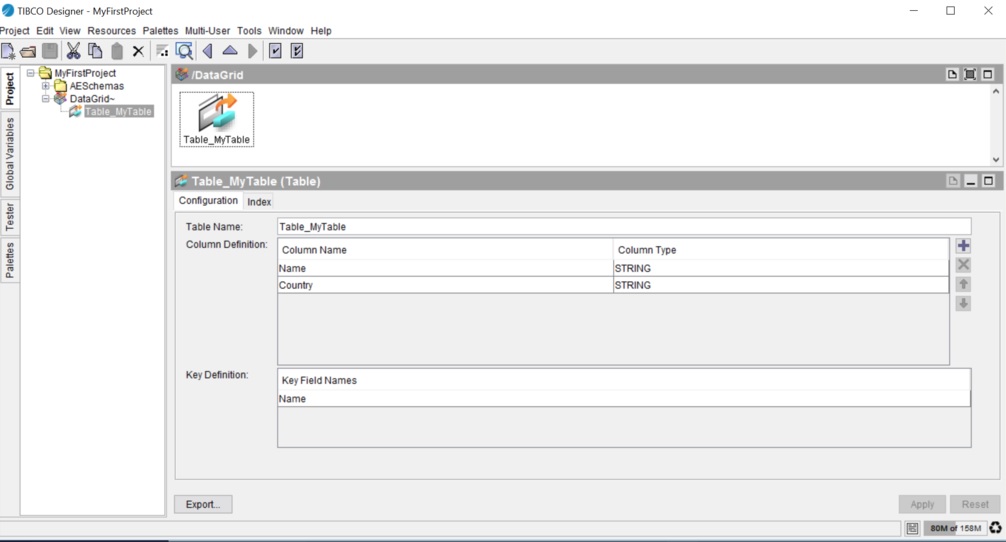
A
Table shared resource represents a table. To use the ActiveSpaces DataGrid activities, you must create a datagrid connection and then add a table to the datagrid.
Prerequisites
You must create a datagrid connection as described in Creating a DataGrid Connection in the project.
Procedure
- Click the ActiveSpaces DataGrid palette icon in the Palettes panel, and drag the Table icon to the Design panel. Or, right-click and select from the drop-down menu.
What to do next
After you have added a table, the next task is to configure a process. See the Getting Started tutorial.
Copyright © Cloud Software Group, Inc. All rights reserved.