Option |
Description |
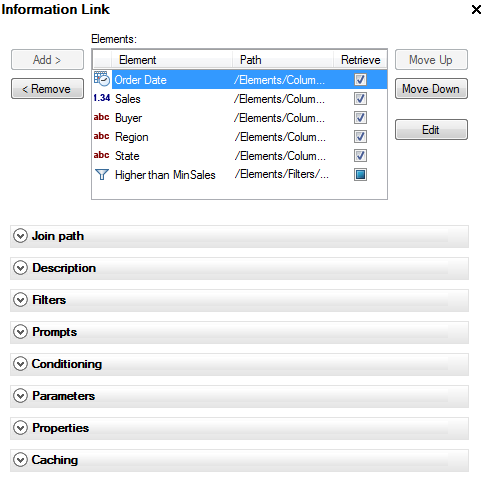
Add > |
Adds the element selected in the Elements tree to the information link. |
< Remove |
Removes the selected element from the link. |
Elements |
Lists all elements currently included in the information link. Clear the Retrieve check box to prevent a column from being loaded. (Filter conditions will still affect the amount of data loaded.) |
Move Up |
Moves the selected element up in the list. |
Move Down |
Moves the selected element down in the list. |
Edit |
Opens the Column Element tab for the selected element so that it can be edited. |
SQL... |
Opens the Edit SQL dialog where you can view and edit the SQL that the current information link is generating. |
Save As... |
Displays the Save As dialog which saves the configuration currently shown in the information link tab into a new information link. |
Save |
Saves the information link. |
Open Data |
Executes the currently selected data as an information link and retrieves the data into Spotfire. |
Option |
Description |
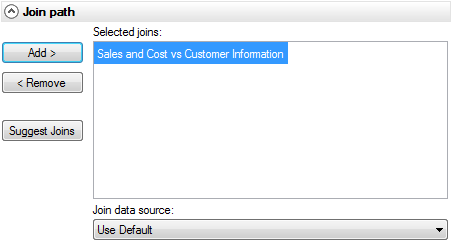
Add > |
Adds the selected join from the Elements tree to the Selected joins list. |
< Remove |
Removes the selected join from the Selected joins list. |
Selected joins |
Lists the joins that will be used in the join path between the tables in the information link. |
Suggest Joins |
If any joins have been specified between the tables currently used in the information link, clicking this button will automatically add one or more suitable joins to the Selected joins list. If a default join has been specified, then this join will be used if possible. |
Join data source |
If more than one join database have been defined during the setup of the server, then you can select where the joining should take place here. |
Option |
Description |
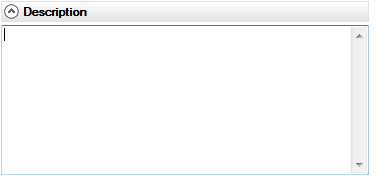
Description |
An optional description of the contents of the information link. This can be helpful for end users of the information link when searching for information links in the library. |
Option |
Description |
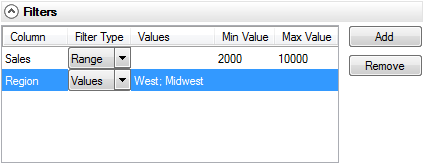
Column |
The names of added columns to filter on. |
Filter Type |
Select Range or Values to specify how the filtering conditions will be set. |
Values |
List the required values (separated by semicolons) for a values filter. Type ?param_name to use a parameter as the filter for the chosen column, where param_name is the name to identify the parameter by. |
Min Value |
Type the lower range value for a range filter in this field. |
Max Value |
Type the higher range value for a range filter in this field. |
Add |
Opens the Add Column dialog where you can select a column to filter on. |
Remove |
Removes the selected column from the Filters section. |
Note: Prompts may be converted to on-demand parameters if the prompted information link is added to an analysis from the Add Data Tables dialog. This is done by clicking on the Use-On Demand button when a prompt step is shown. Any required parameters must then be specified in the On-Demand Settings dialog instead.
Option |
Description |
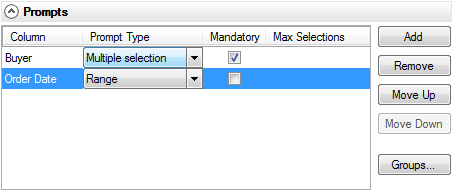
Column |
The names of added columns to prompt. |
Prompt Type |
Select what kind of selections should be available in the prompt when the link is opened. Values lets you enter your own list of values to include. This prompt type should only be used if all end users of the information link know which values are valid for the column. Range lets you specify a range of values. This prompt type is suitable for numerical or Date/DateTime/Time columns when a sustained range of numbers or time periods are to be retrieved. Multiple selection presents a list of available values from which you can select multiple values. This type of prompt can be used even if the end users of the information link have no previous knowledge of the data. Single selection presents a list of available values from which you can select a single value only. This type of prompt can be used even if the end users of the information link have no previous knowledge of the data. See also Details on Open Information Link. |
Mandatory |
Select this check box to make it mandatory to select values in the prompt. It is not possible to clear the check box if Single selection has been chosen. For non-mandatory prompts the end user can leave the prompt step dialog untouched in order to retrieve all data for that step. |
Max Selections |
Type the maximum number of selections allowed. It is not possible to specify a maximum number of selections if Single selection or Range has been chosen. |
Add |
Opens the Add Column dialog where you can select a column on which to add a prompt. |
Remove |
Removes the selected column from the Prompts section. |
Move Up |
Click to move an element up. This is used to control the order of the columns with prompts. Filter elements are always applied before prompts regardless of order. |
Move Down |
Click to move an element down. |
Groups... |
Opens the Prompt Groups dialog where you can specify different prompt groups for different prompts, making elements independent from each other. This is used to improve the performance of information links when retrieving data from STAR schema databases. See Using Prompt Groups for more information. |
Option |
Description |
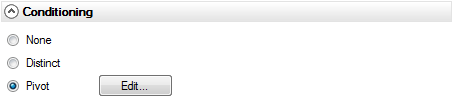
None |
No conditioning. |
Distinct |
Removes all duplicate rows (rows where all fields are identical) from the returned data table. |
Pivot |
Allows you to transform your data from a tall/skinny format to a short/wide format by rotating row and column headings around the core data. Select which columns to work on by clicking Edit.... |
Edit... |
Opens the Pivot Conditioning dialog. |
Option |
Description |
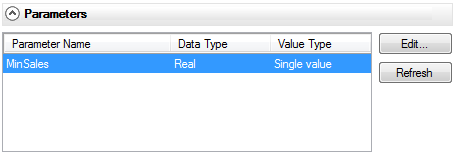
Parameter Name |
Lists the names of all added parameters. Note: You have to click Refresh for parameters to appear in the list the first time you display the list after creating a parameter. If a parameter is not listed even after clicking Refresh, you may have created a parameter containing unsupported characters. See Parameterized Information Links for more information. It is also possible that you have edited the SQL of the information link. In that case, the altered SQL code overrides the parameters settings in the user interface. |
Data Type |
Lists the data type of all added parameters. |
Value Type |
Lists the value type of all added parameters. |
Edit... |
Opens the Edit Parameter dialog which lets you edit the selected parameter in the list. |
Refresh |
Refreshes the list of parameters. Note: You have to click Refresh for parameters to appear in the list the first time you display the list after creating a parameter. |
Option |
Description |
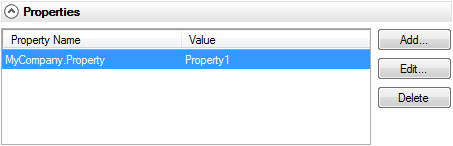
Property name |
Shows the names of custom properties defined for this information link. Custom properties are metadata that can be used when searching in the Library by using the following syntax: <Property name>:<Value>. For example, MyCompany.Property:Property1. |
Value |
Shows the value of each custom property. |
Add... |
Opens the Add Information Link Property dialog where custom properties can be defined. |
Edit... |
Opens the Edit Information Link Property dialog. |
Delete |
Deletes the selected property. |
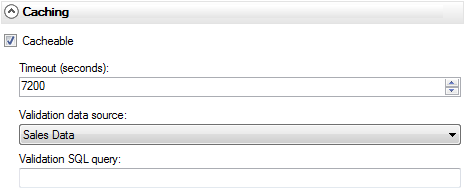
Option |
Description |
Cacheable |
Select this check box to allow caching of the information link. Caching the results of an information link can improve the performance when executing information links that return non-volatile data (especially when the TIBCO Spotfire Server is situated far away from the data source). Note: The information link should not be set as cacheable if the result of the information link is personalized or depending on things beyond the control of Information Services (for example, database row level security). |
Timeout (seconds) |
Allows you to specify a timeout limit for how long the cached data should be valid. When the limit has expired, the information link in the cache is no longer valid so the results will be fetched from the data source again the next time the information link is opened. |
Validation data source |
If your information link contains data from more than one data source you can select on which data source the validation query specified below should be run. |
Validation SQL query |
Allows you to provide a SQL query which gets executed when the result is added to the cache and each time it is later retrieved. The underlying data will be considered to be unchanged if the output is the same as the first time the query was executed. The SQL query should return 0 or 1 row containing a single column. An example could be: select count(1) from TABLE |
See also:
Parameterized Information Links