Managing Projects and Artifacts
TIBCO ModelOps may contain one or more projects. These projects may contain different folders and subfolders within. At the end of the hierarchy, projects contain different artifacts. The ModelOps UI supports different types of artifacts. Some of these artifacts are models and are approvable.
This page shows how to manage projects and artifacts from the Artifacts section in the Project Explorer pane.
Contents
Supported Artifacts
An artifact is an object managed by TIBCO® ModelOps, similar to a file within a file system. It can be created through user interaction with TIBCO® ModelOps or can be created using an external tool and imported into TIBCO® ModelOps. Examples are scoring pipelines, scoring flows, and models. Artifacts can be deployed in a scoring pipeline or to an already running TIBCO® Streaming application.
TIBCO ModelOps supports the following artifact types:
| Artifact Name | Artifact Type Code | Extension(s) | Content Types | Description | Is a Model? | Scoring Pipeline | Streaming Application |
|---|---|---|---|---|---|---|---|
| Apache Avro™ Schema | AVRO_SCHEMA | avsc | application/json | An Apache Avro Schema | |||
| Apache Spark™ ML (Compressed) | SPARK_ML | zip | application/zip | A ZIP encoded persisted Apache Spark™ ML pipeline | |||
| Comma-Separated Values | CSV | csv | text/plain | A Comma-Separated Values file | |||
| Data Channel | DATA_CHANNEL | datachannel | application/json | A Data Channel configuration | |||
| H2O POJO | H2O_POJO | pojo | text/plain | An H2O Plain Old Java Object file. | | ||
| Markdown | MARKDOWN | md | text/markdown | A Markdown file | |||
| Microsoft Excel | EXCEL | xlsx | application/octet-stream | An Excel file | |||
| Predictive Model Markup Language | PMML | pmml | application/xml | A Predictive Model Markup Language (PMML) file | |||
| Python™ Binary | PYTHON_BINARY | pyb | application/octet-stream | A Python™ Binary file | |||
| Python™ Script | PYTHON_SCRIPT | py | text/plain | A Python™ Script file | |||
| R Data | R_DATA | rdata, rda | application/octet-stream | An R Data file | |||
| R Object | R_OBJECT | rds | application/octet-stream | An R Object file | |||
| R Script | R_SCRIPT | r | text/plain | An R Script file | |||
| Scala | SCALA | scala | text/plain | A Scala file | |||
| Scoring Flow | SCORING_FLOW | scoringflow | application/json | A Scoring Flow | |||
| Scoring Pipeline | SCORING_PIPELINE | scoringpipeline | application/json | A Scoring Pipeline | |||
| TensorFlow Graph | TENSORFLOW_GRAPH | tfg, pb | application/octet-stream | A TensorFlow Graph file | |||
| TensorFlow Model | TENSORFLOW_MODEL | tfm, pb | application/octet-stream | A TensorFlow Model file | |
||
| Text | TEXT_FILE | txt | text/plain | A Text file. | |||
| TIBCO® Statistica™ Model | STATISTICA | sdm | application/octet-stream | A TIBCO® Statistica™ Model file | |||
| TIBCO® Streaming Decision Table | SB_DECISION_TABLE | sbdt | application/xml | A TIBCO® Streaming Decision Table file | |||
| Unknown | UNKNOWN | Unknown | application/unknown | Unknown artifact type | |||
| ZIP Archive | COMPRESSED_ARCHIVE | zip | application/zip | A ZIP Archive of artifacts |
Supported Avro Schema Types
A schema is the formal definition of the structure of data that defines types, constraints, and cardinality. TIBCO ModelOps supports the following Avro schema types:
- Schema.Type.BOOLEAN
- Schema.Type.INT
- Schema.Type.LONG
- Schema.Type.DOUBLE
- Schema.Type.FLOAT
- Schema.Type.STRING
- Schema.Type.BYTES
- LogicalTypes.Date
- LogicalTypes.TimestampMillis
- Schema.Type.ARRAY
- Schema.Type.RECORD
Note: Passing an unsupported Avro schema data type to the scoring server results in failure of scoring requests.
Using the Projects section in Project Explorer
This section explains how to navigate the Projects section in the Project Explorer pane to manage projects and artifacts. The available options displayed in the web client vary based on your assigned user role and privileges.
Overview
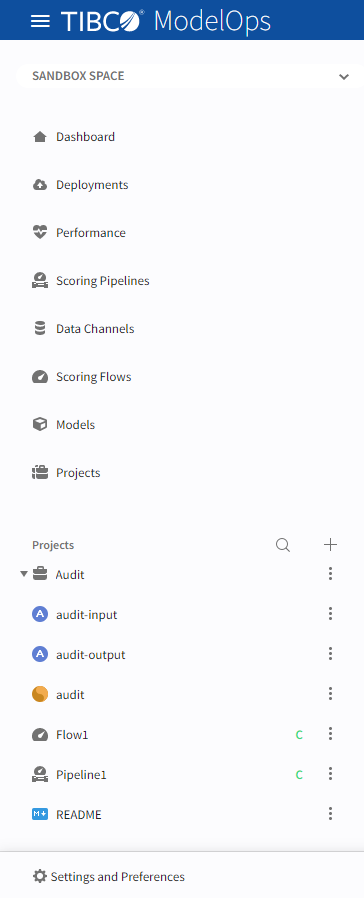
The Projects section in the Project Explorer pane displays the projects to which you have access, including artifacts contained by the project.
The Project Explorer is a drawer on the left side of the web client. On small devices, it is displayed over the layout. On big screens, it pushes the content to the right. You can manually hide or display the Project Explorer by clicking the hamburger icon present in the upper left corner.
The Project Explorer presents multiple options for managing your projects, including:
- Project and artifact creation
- Artifact navigation and display
The Project Explorer includes:
Top-Level Toolbar
Filter (magnifying glass): Enables project and artifact name searches.
Plus button:
- Create new projects
- Import existing projects
- Create new artifacts
- Upload artifacts
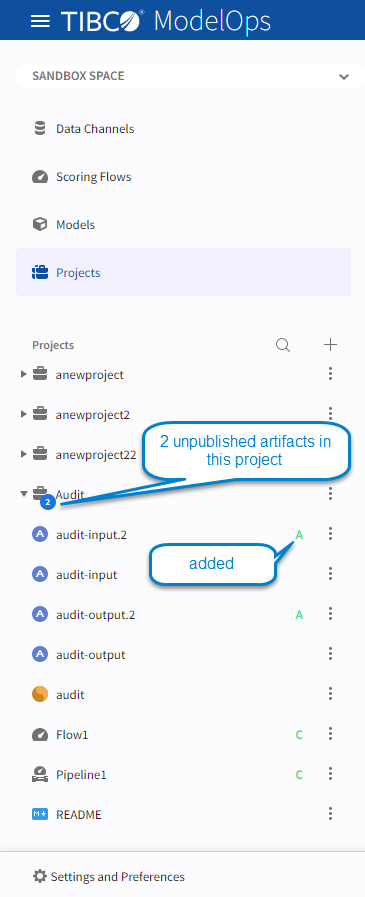
Artifact Decoration
Artifact icons can include indicators to denote their current state. These indicators are seen in the SANDBOX SPACE and SANDBOX SPACE ONLY view and are placed to the right of the artifact name. The indicators show the following states:
- A: The artifact was added.
- M: The artifact was modified.
- D: The artifact was deleted.
- C: The artifact was checked in (that is, it is not ADDED), and it is not modified or deleted.
Projects section navigation
The Projects section provides the following menus per project/artifact. Access them by clicking the three vertical dots. In addition to this, you can click the different artifacts to access them.
Project Menu
| Menu | Description |
|---|---|
| Create New Artifact | Creates a new artifact in the project. |
| Upload New Artifact | Uploads an artifact to the project. |
| Publish | Moves your changes from your private Sandbox Space to the Published Space, at which point your changes become visible to all TIBCO ModelOps users. |
| Remove from Sandbox | Discards changes made in your Sandbox Space. |
| History | Displays the project history. |
| More |
|
Artifact Menu
Artifact menu options vary depending on whether the artifact is checked out or requires synchronization.
| Menu | Description |
|---|---|
| Open | Opens the artifact. |
| Get link | Copies the link of the artifact to the clipboard. |
| Make a Copy | Duplicates the artifact in the same or a different project. |
| Rename | Renames the artifact. |
| Delete | Delete the artifact. |
| Remove from Sandbox | Discards changes made to the artifact in your Sandbox Space. |
| Publish | Moves changes from your Sandbox Space to the Published Space, so they become visible to all TIBCO ModelOps users. |
| Replace With | Replaces the content of an artifact in your Sandbox Space with…
|
| History | Displays the artifact’s history in a separate dialog box. |
| More |
|
Using the Projects tab in Project Explorer
This section explains how to use Projects tab, which is present just above the Projects section in the Project Explorer pane, for managing projects and artifacts.
Working with Projects
Projects are folders where you manage your artifacts. Typically you create a new project or work with an existing one to which you have access. In practice, multiple users may be assigned the same project to manage artifacts either serially or concurrently. At least one project must be available for artifact management.
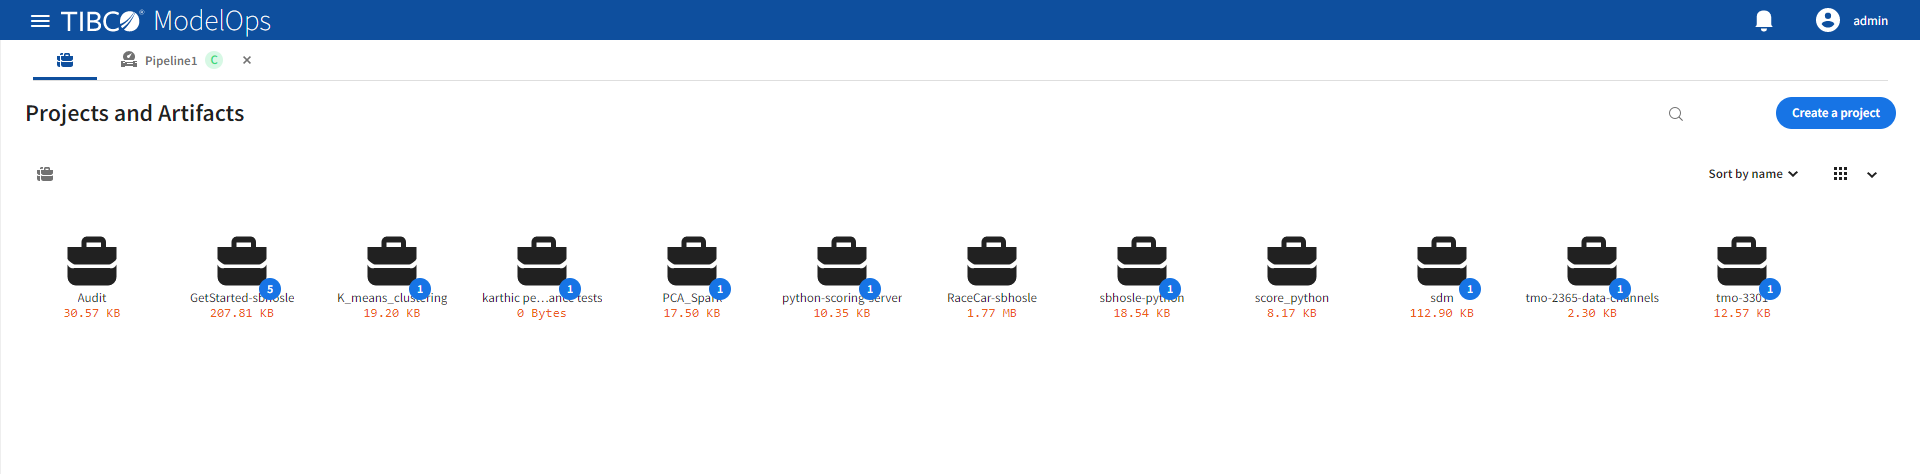
Click a project to expand its contents (artifacts). On the right side of the page, you get these viewing options:
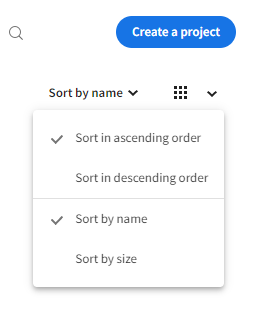

Sort by name: Use the drop-down to sort by name and size. You can further sort each option by ascending or descending order. The default is to sort by name in ascending order.
View items as: Shows projects and their artifacts either in grid (small icons), large grid view (big icons), or list.
Menu Options
The home bar of any project contains the following options:

Content: Displays selected project’s contents
Properties: Displays project’s properties
History: Displays project’s history
Info: Displays selected project’s information
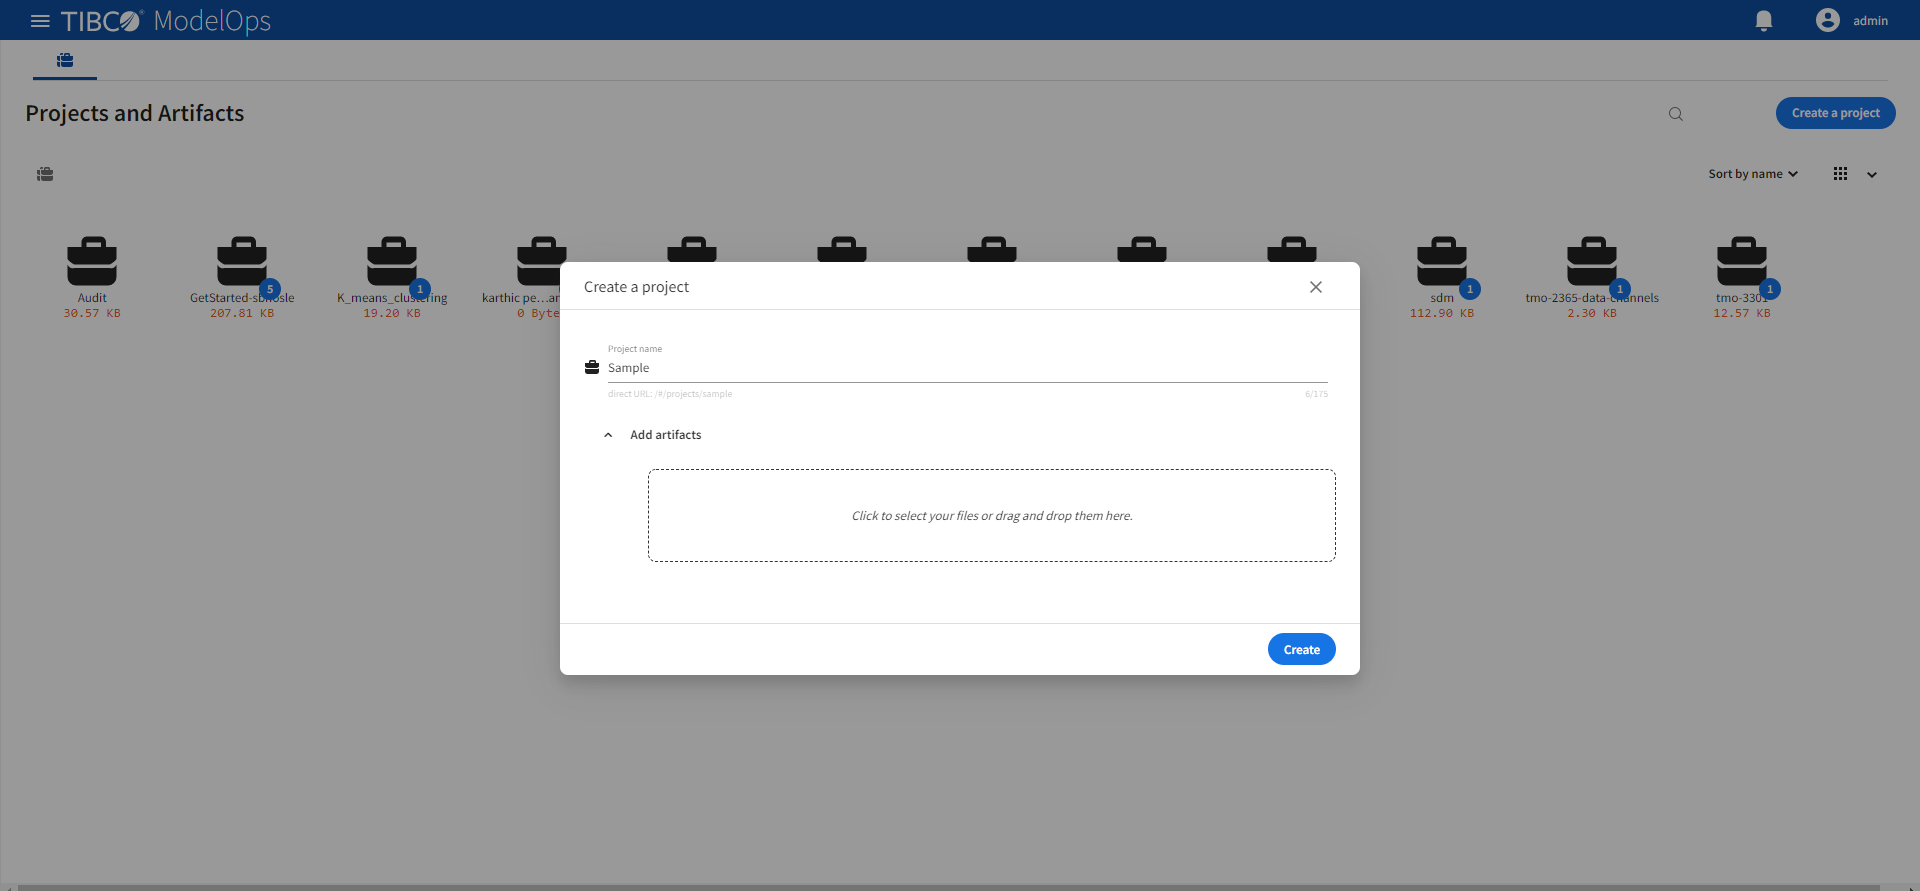
Creating New Projects
Click Create a project on the main page. The project creation wizard appears to guide you through the process.
- Enter project name.
- You can add artifacts or drag and drop them.
- Click Create to create the project.
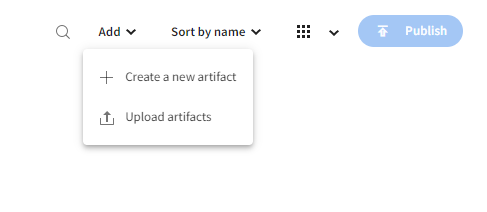
Once the project is created, you get the following option:
- Publish: Publishes the changes made to the current project to Published Space.
- Add: This allows you to create or upload new artifacts.
- Sort by name: Sorts the list by name and size. You can further sort each option by ascending or descending order.
- Show items in list: Toggles the projects displayed between grid, large grid, and list.
Once the project is created, you can edit its artifacts. Edits remain in your Sandbox Space until published to the Published Space.
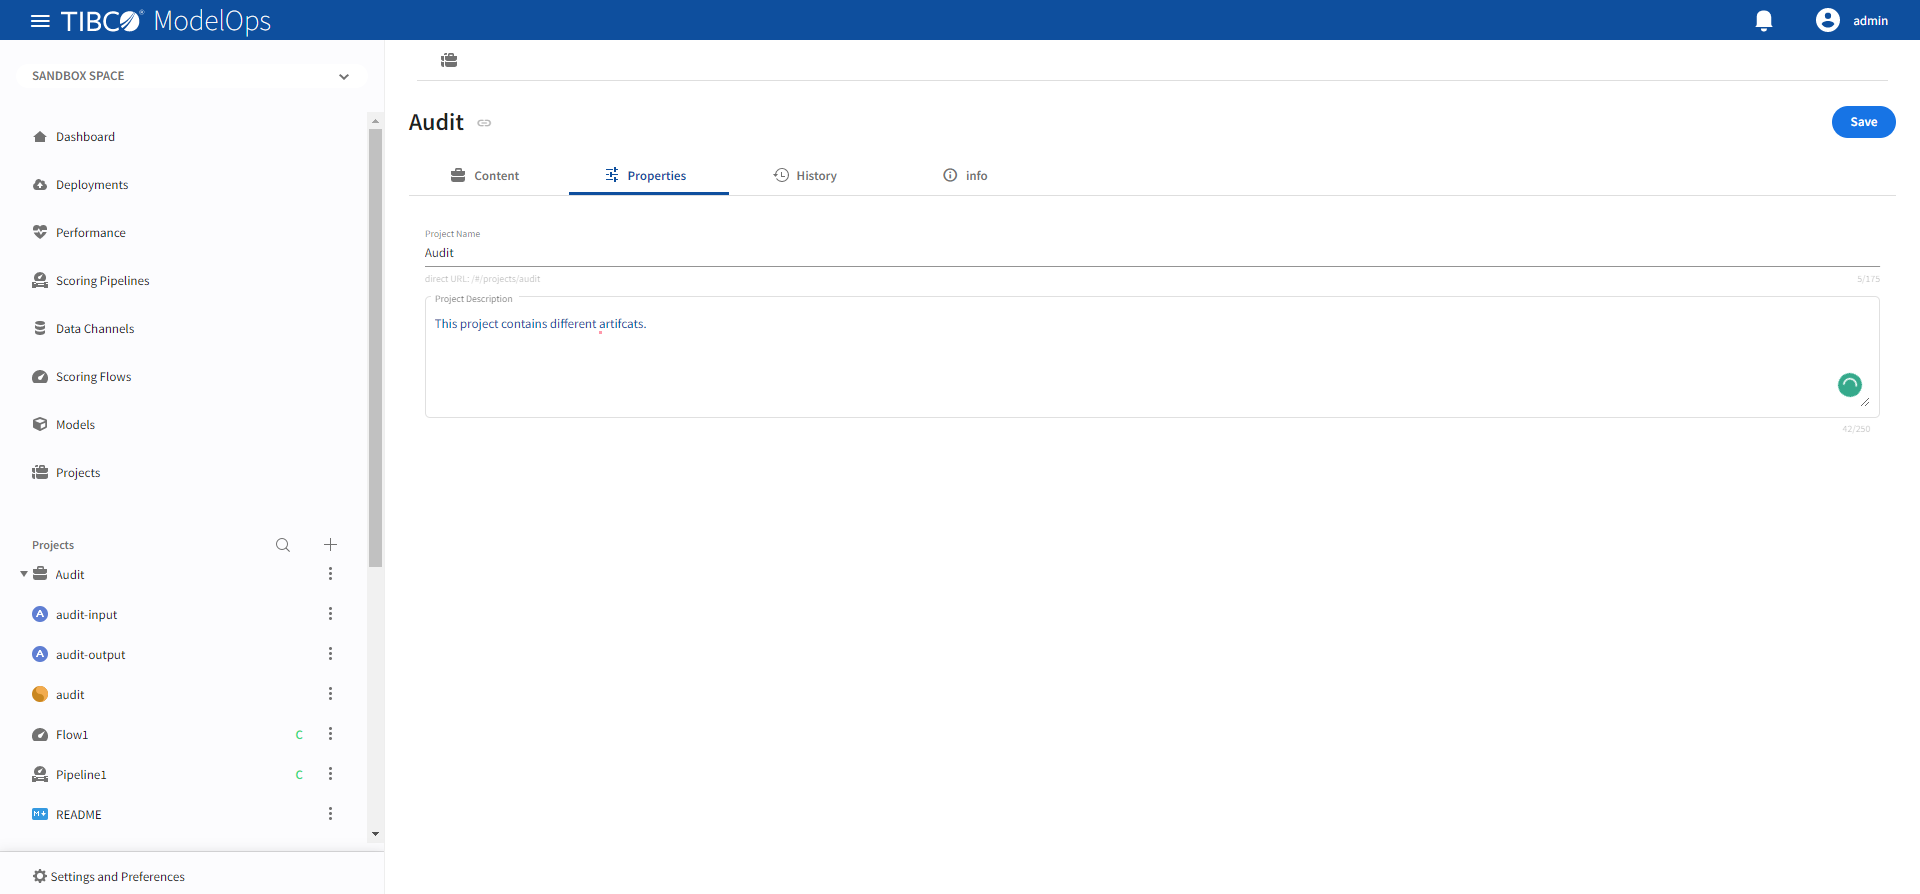
Viewing Project Properties
The Properties menu of the project page displays information related to the selected project. You can edit the project’s name or add a description.
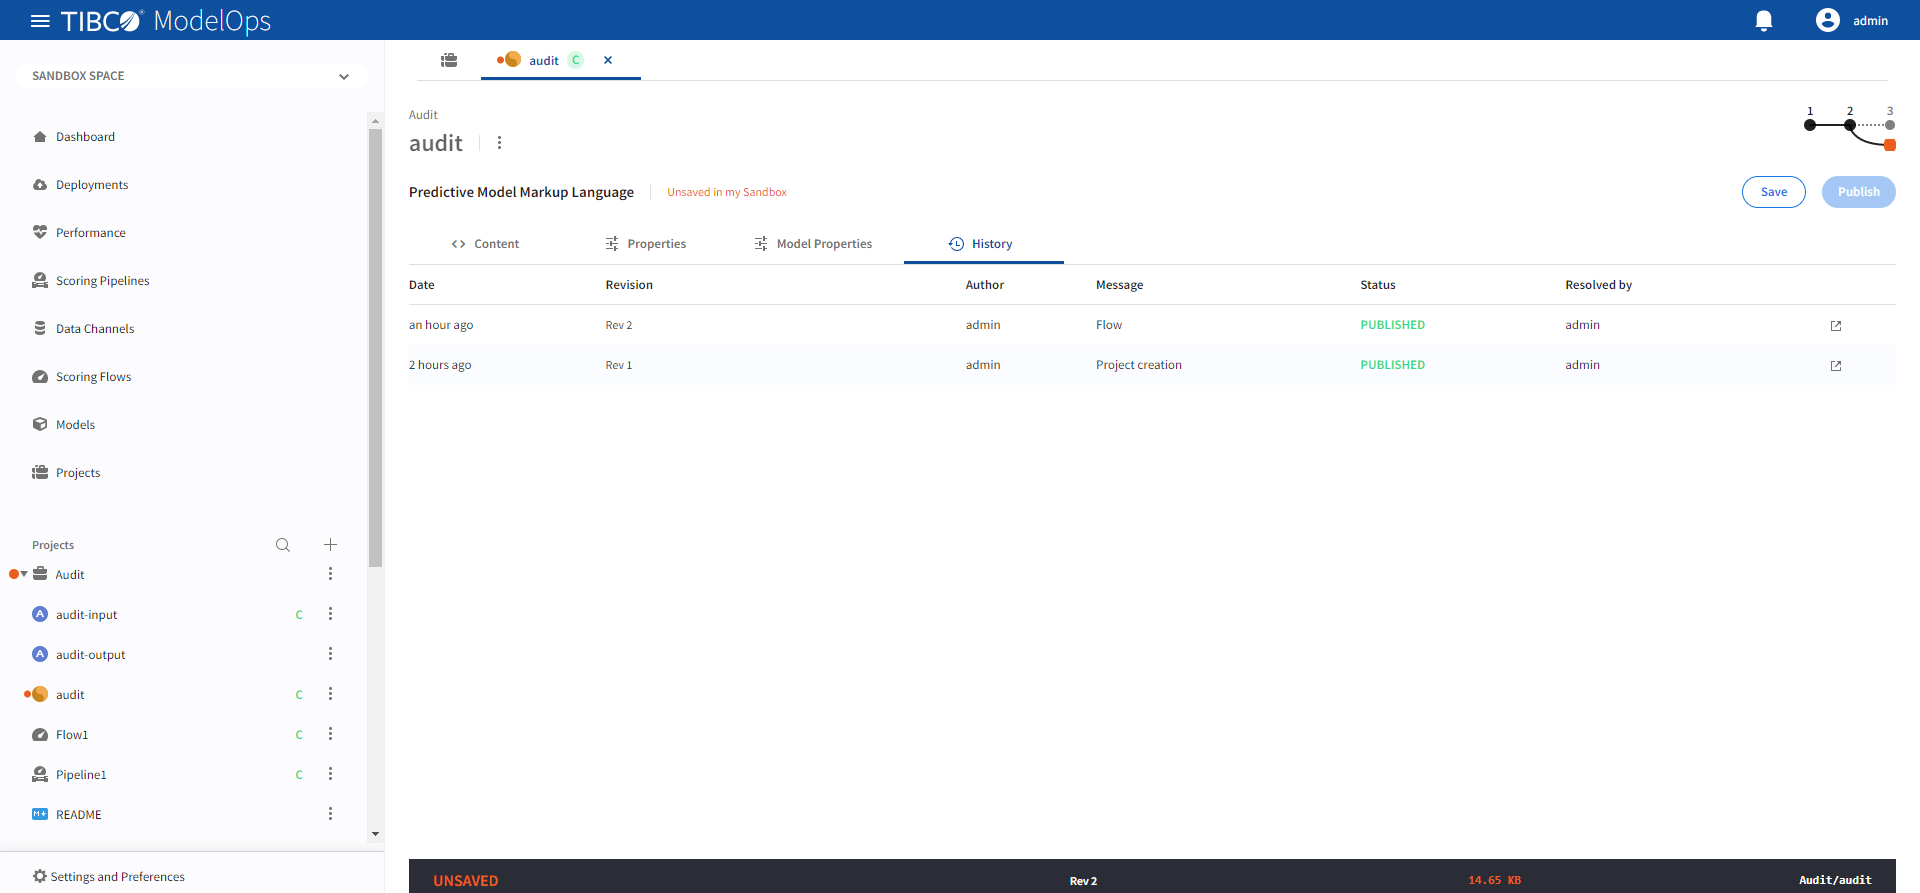
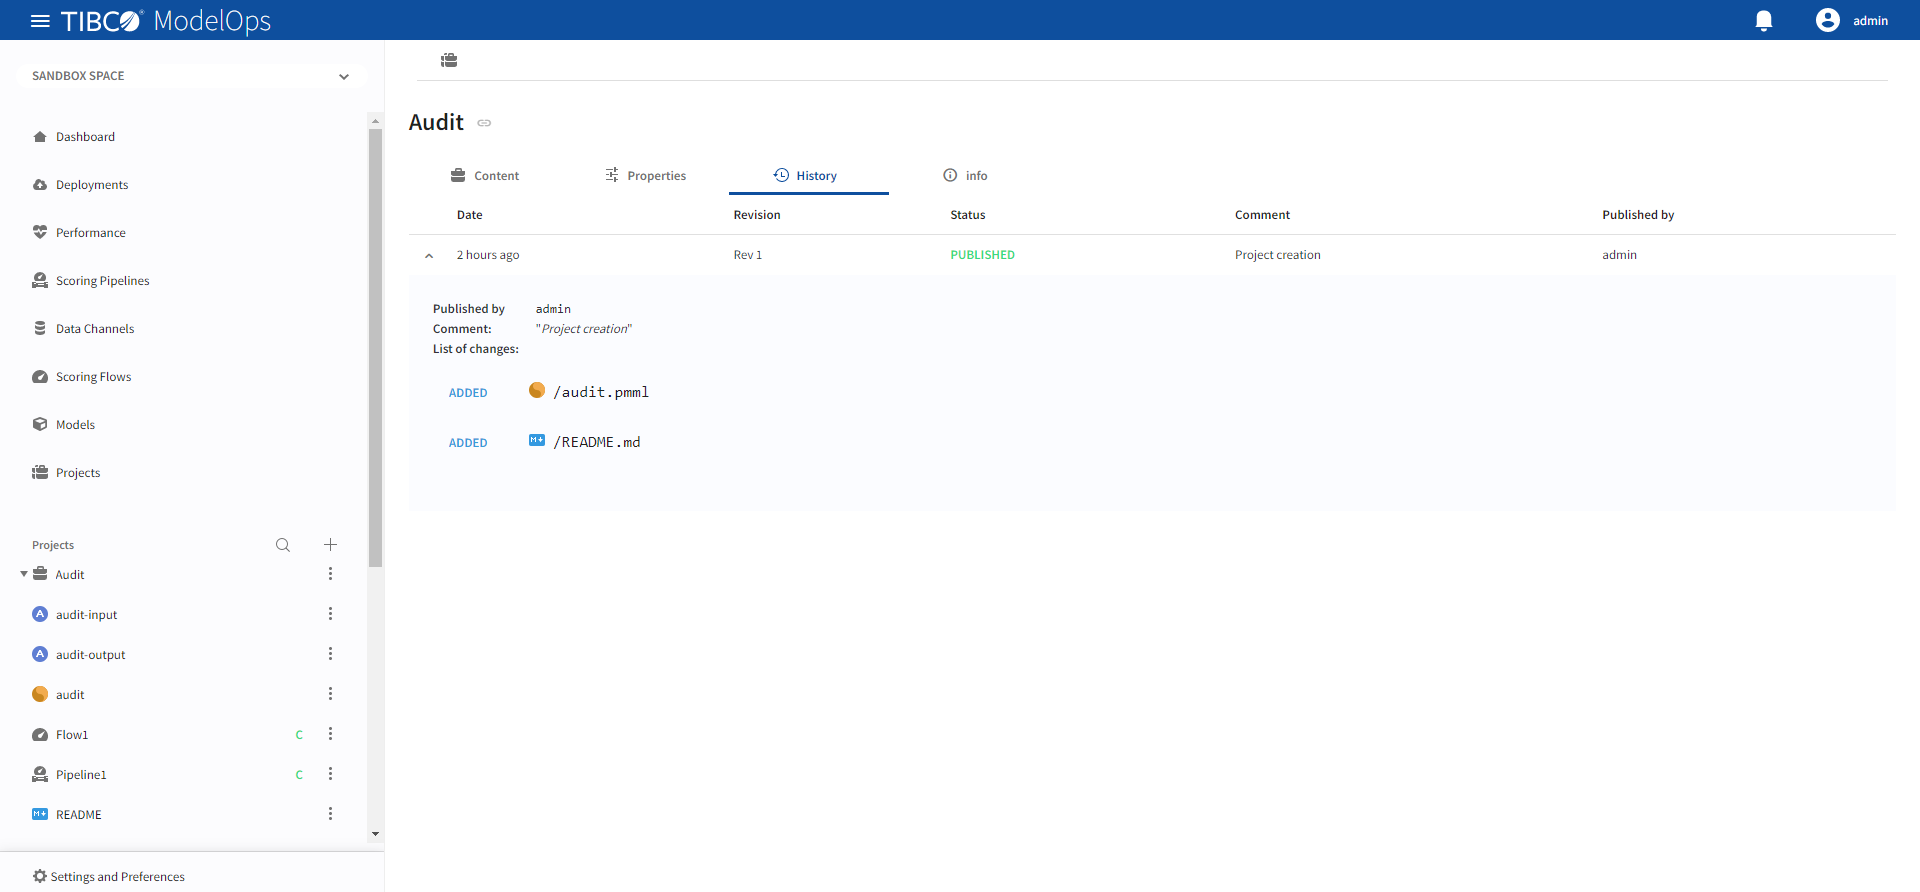
Viewing Project History
TIBCO ModelOps provides a record for every project and its artifacts, including every action related to the artifact workflow. History also displays a description (if any) of what changed between commits, as well as the option to view the actual changed contents.
Click the History button to view the project’s revision history.
Working with Artifacts
Clicking any artifact on the main page displays a view with the following options:
- Content: Views artifact content
- Properties: This allows you to change artifact properties
- History: Shows revision history of that artifact
- Save: Saves the changes to the artifact in your Sandbox Space
- Publish: Publishes your changes in the Sandbox Space to Published Space
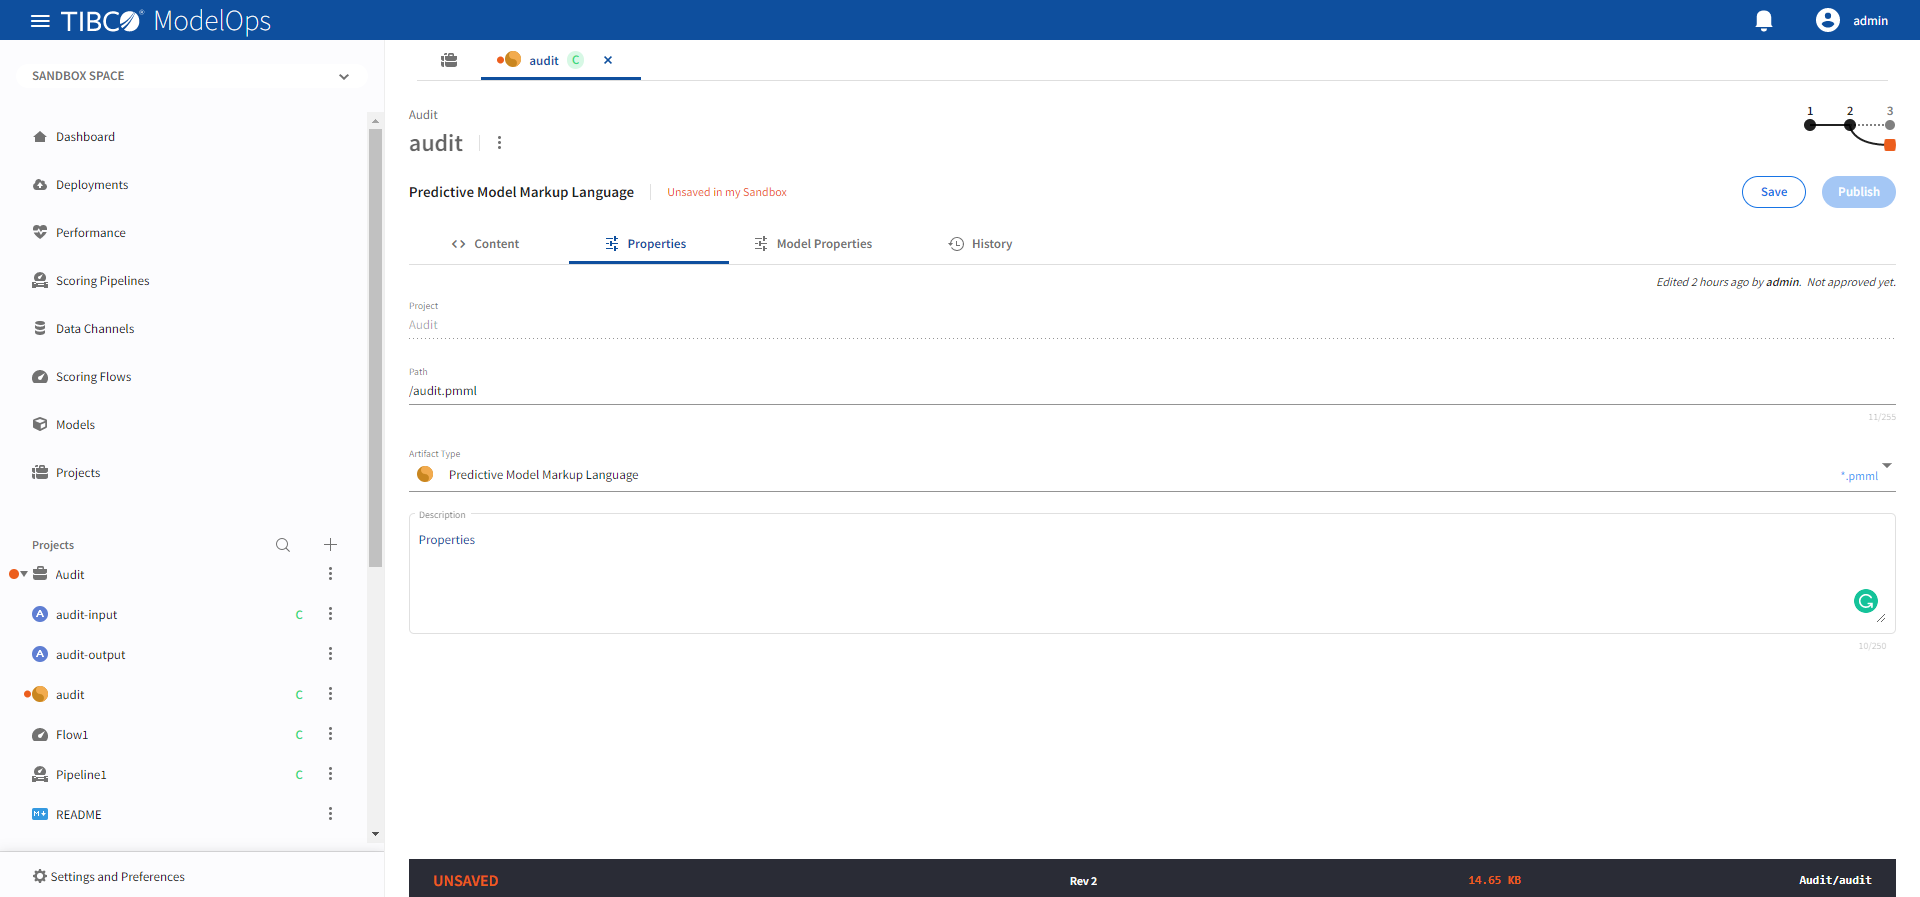
Editing Artifact Properties
Property editing allows to:
- Change artifact name
- Change artifact type via the drop-down click menu
- Add an artifact description
Viewing Artifact History
Clicking the History button on the page reveals the artifact’s lifecycle details.