
Working with Scoring Flows and Pipelines
This page explains how you can create Scoring Pipelines and Scoring Flows.
Contents
Overview
- Scoring Pipeline: A scoring pipeline is a design-time artifact that defines a scoring pipeline. A scoring pipeline defines a data source, a data sink, one or more scoring flows, and zero or more models used in the scoring flow.
- Scoring Flow: A scoring flow is an ordered sequence of processing steps that operate on data received from a data source and sent to a data sink. The data flowing through a scoring flow can be transformed and augmented by processing steps.
Working with Scoring Flows and Scoring Pipelines
Creating a Scoring Flow
- In the Project Explorer pane, under Overview section, click Scoring Flows.
- Click Create a scoring flow to create a new scoring flow. You can also click Add one to add a new scoring flow if there are none present.
- Select the project name from the list.
- Add the flow name. The extension is added automatically.
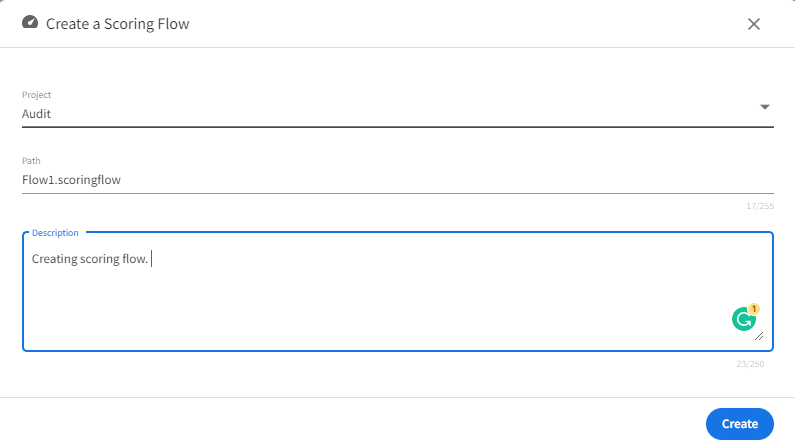
-
Click Create.
Authoring a Scoring Flow
- In the Project Explorer pane, click Scoring Flows.
- Select the scoring flow.
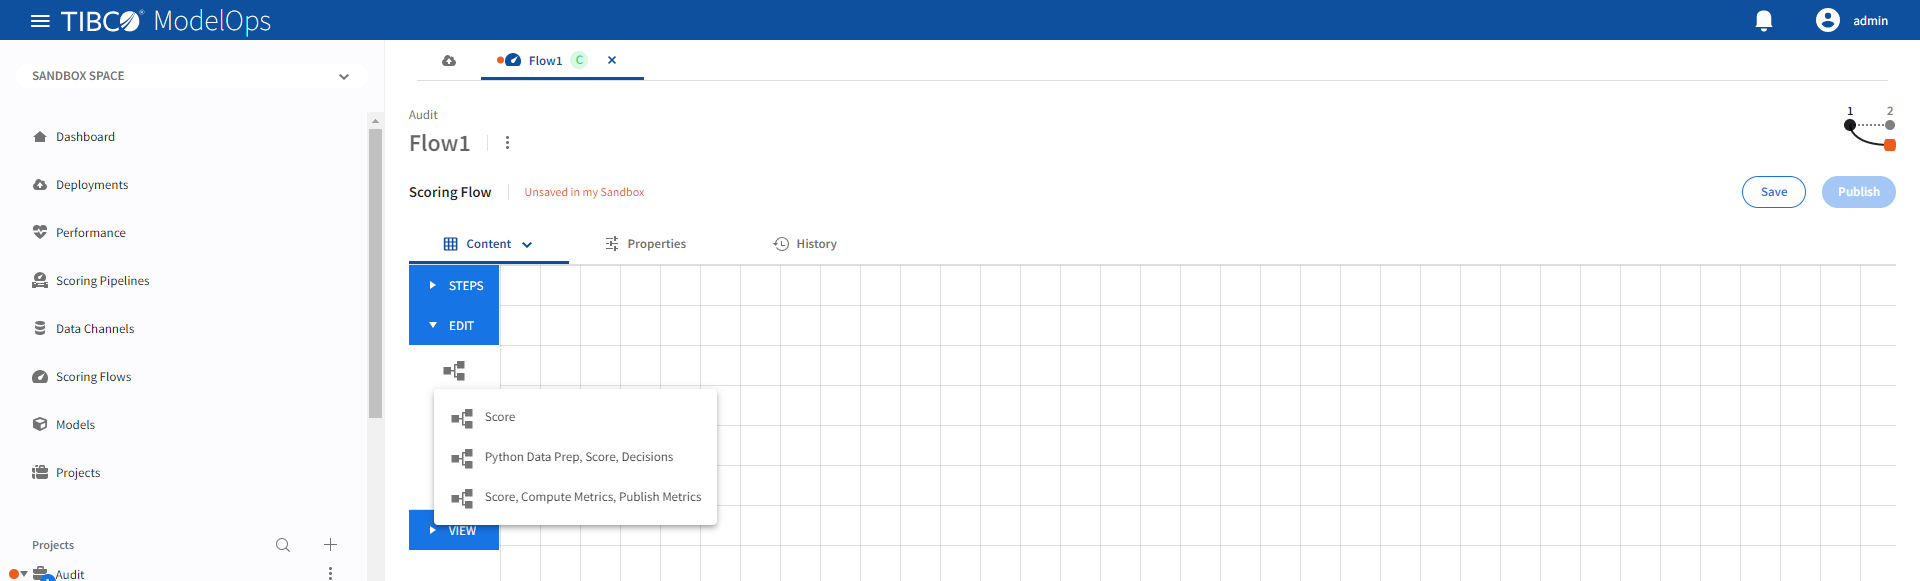
- Select a scoring flow template by clicking the Load template flows option under Edit section.
-
The Score template can be configured by following these steps:
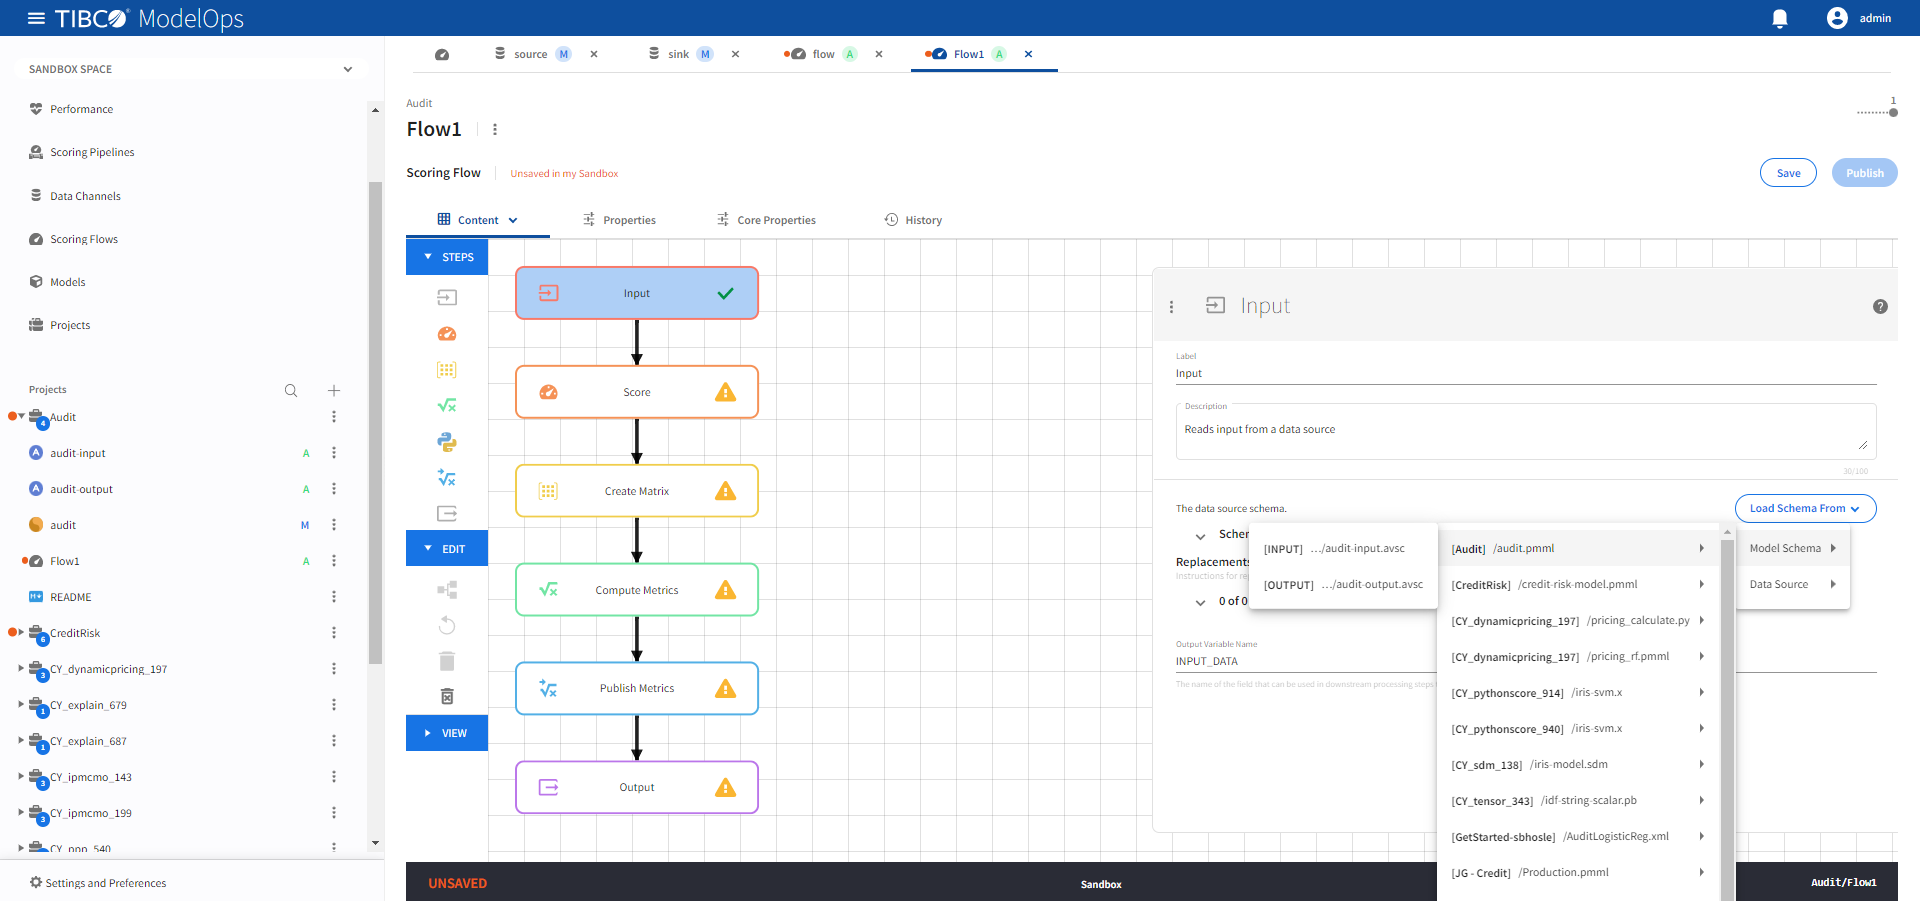
- Configure the Input block.
- Click Input block to open the Input processing step’s configuration form.
- Click the drop-down menu on the Load Schema From > Model Schema > and select the schema that matches with the model
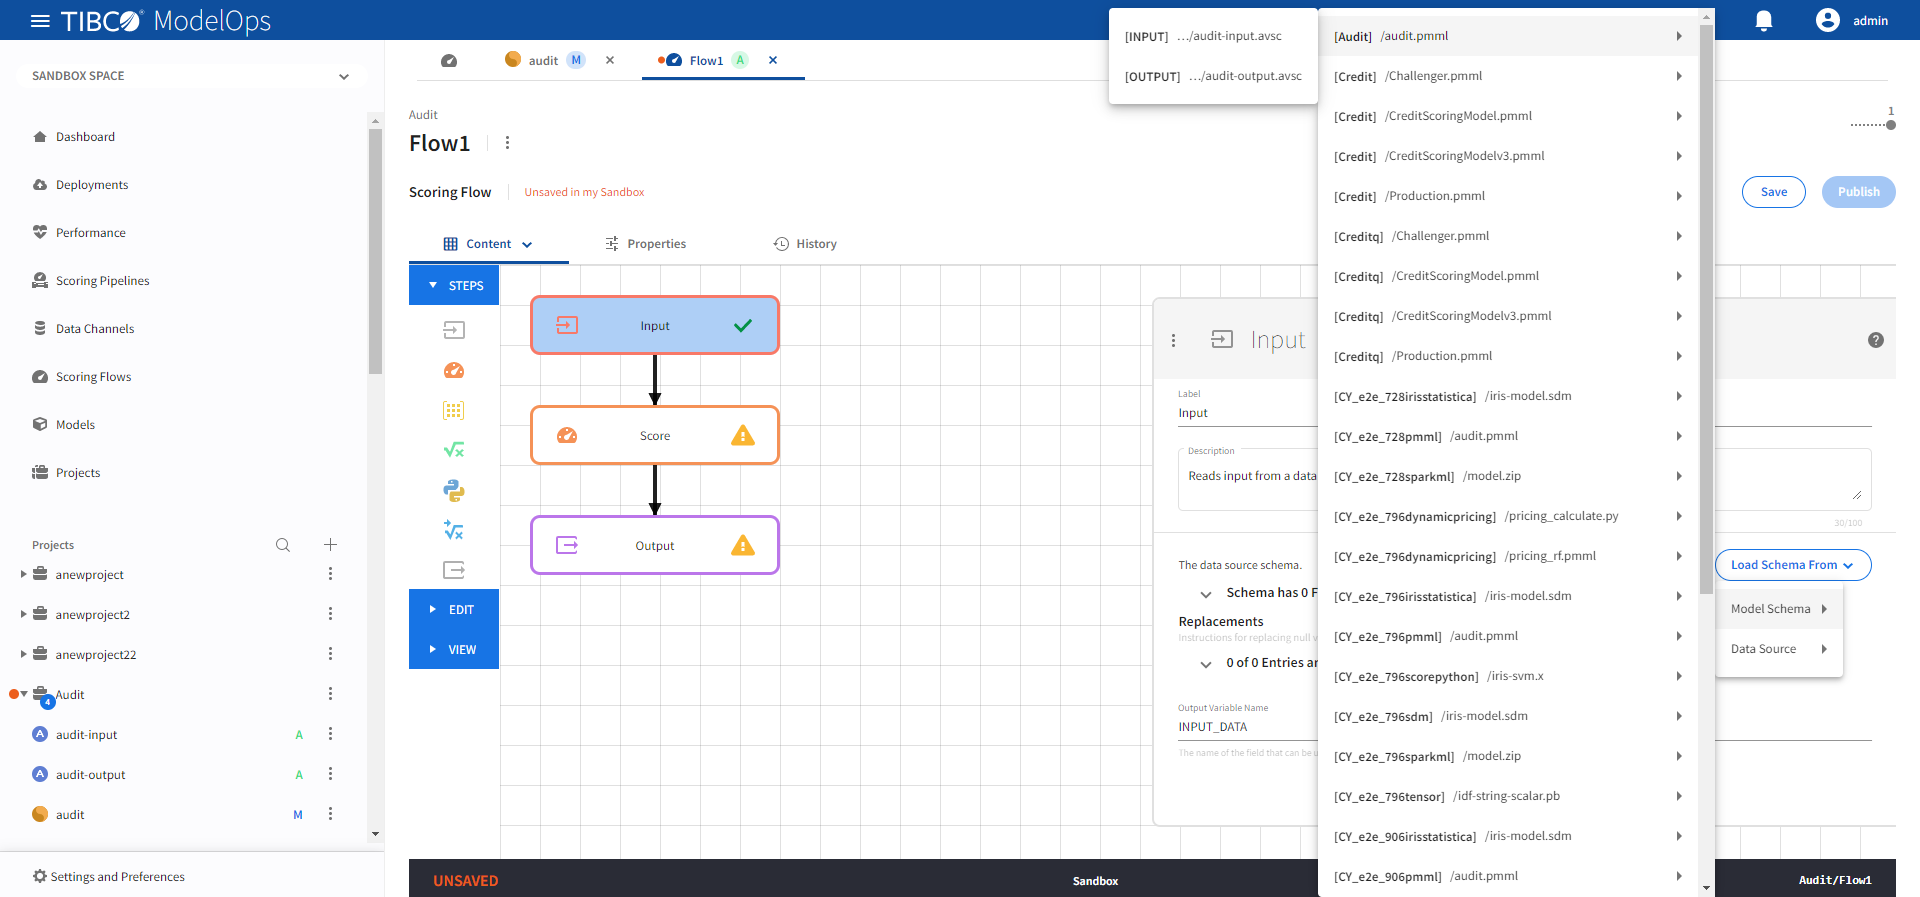
-
Doing this automatically populates the input data source schema fields.
- Click Save.
- Configure the Score block.
- Click Score block to open the Score processing step’s configuration form.
- Under the Model section, select audit.pmml model from the drop-down list.
- Under the Scoring Field Values section, click the Add Input Schema of Selected Model option.
- Next, from Populate unset values with entries list, select “INPUT_DATA” of step “Input”.
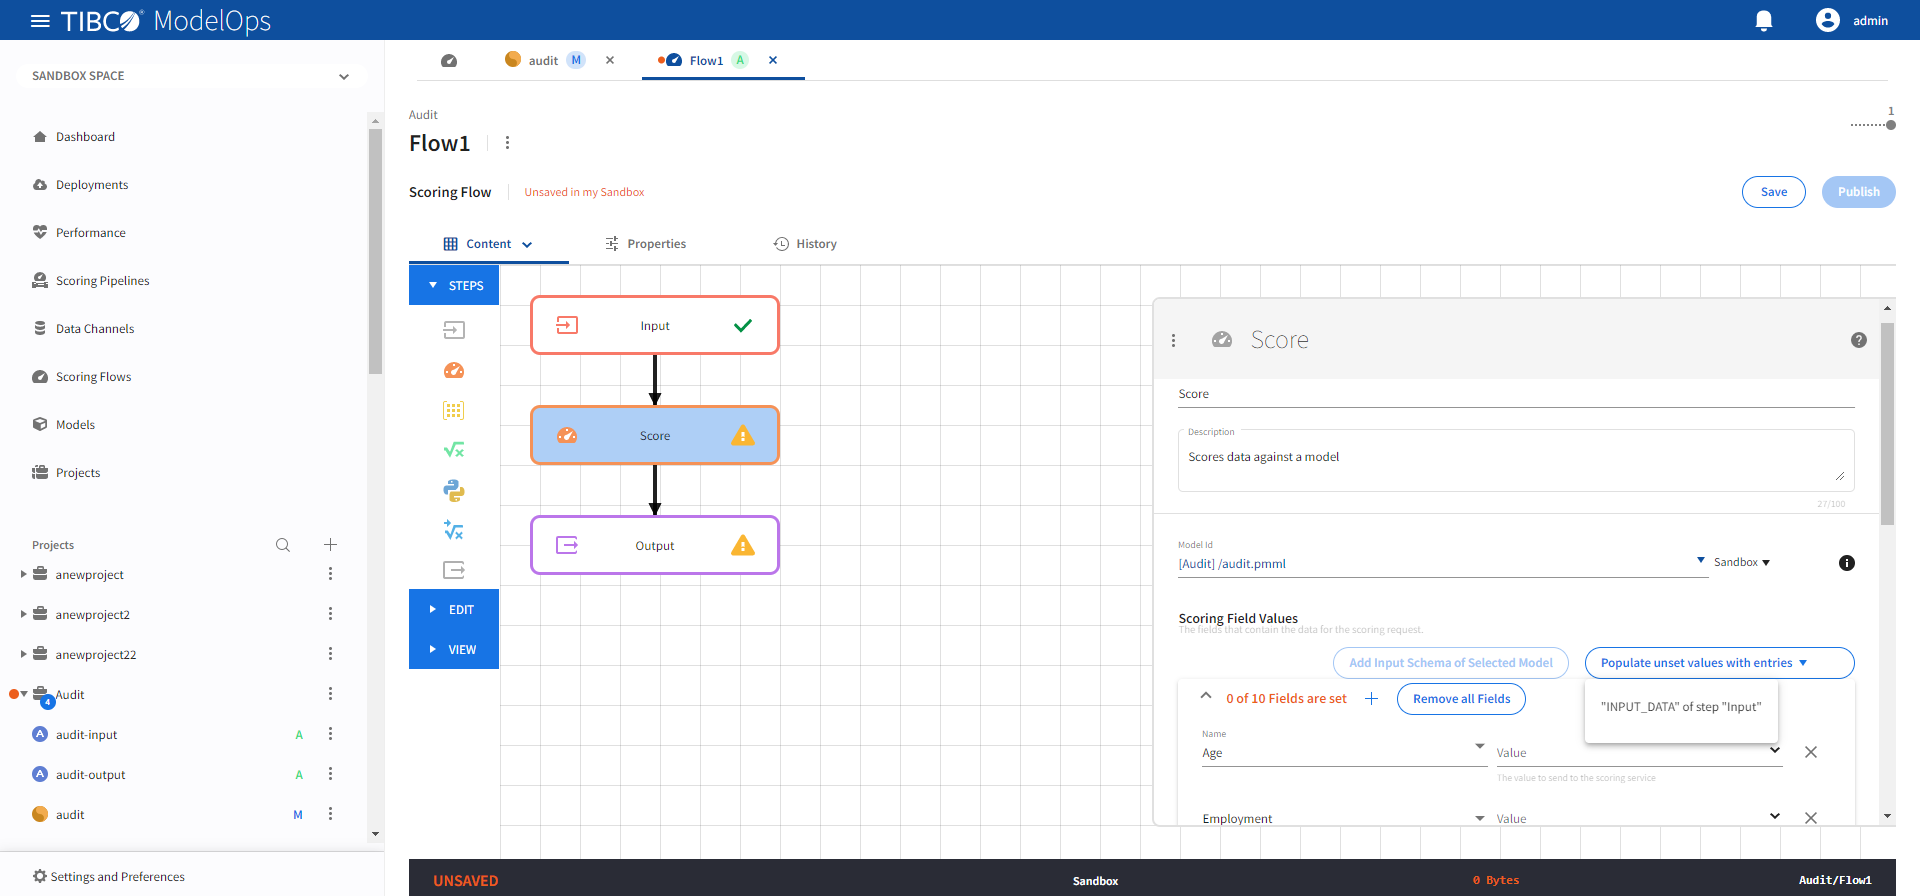
-
Doing so populates all the scoring request fields.
- Click Save.
- Configure the Output block.
- Click Output block to open the Output processing step’s configuration form.
- Click the drop-down menu for the Load Schema from option
- Select Model Schema > audit.pmml > audit-output.avsc schema.
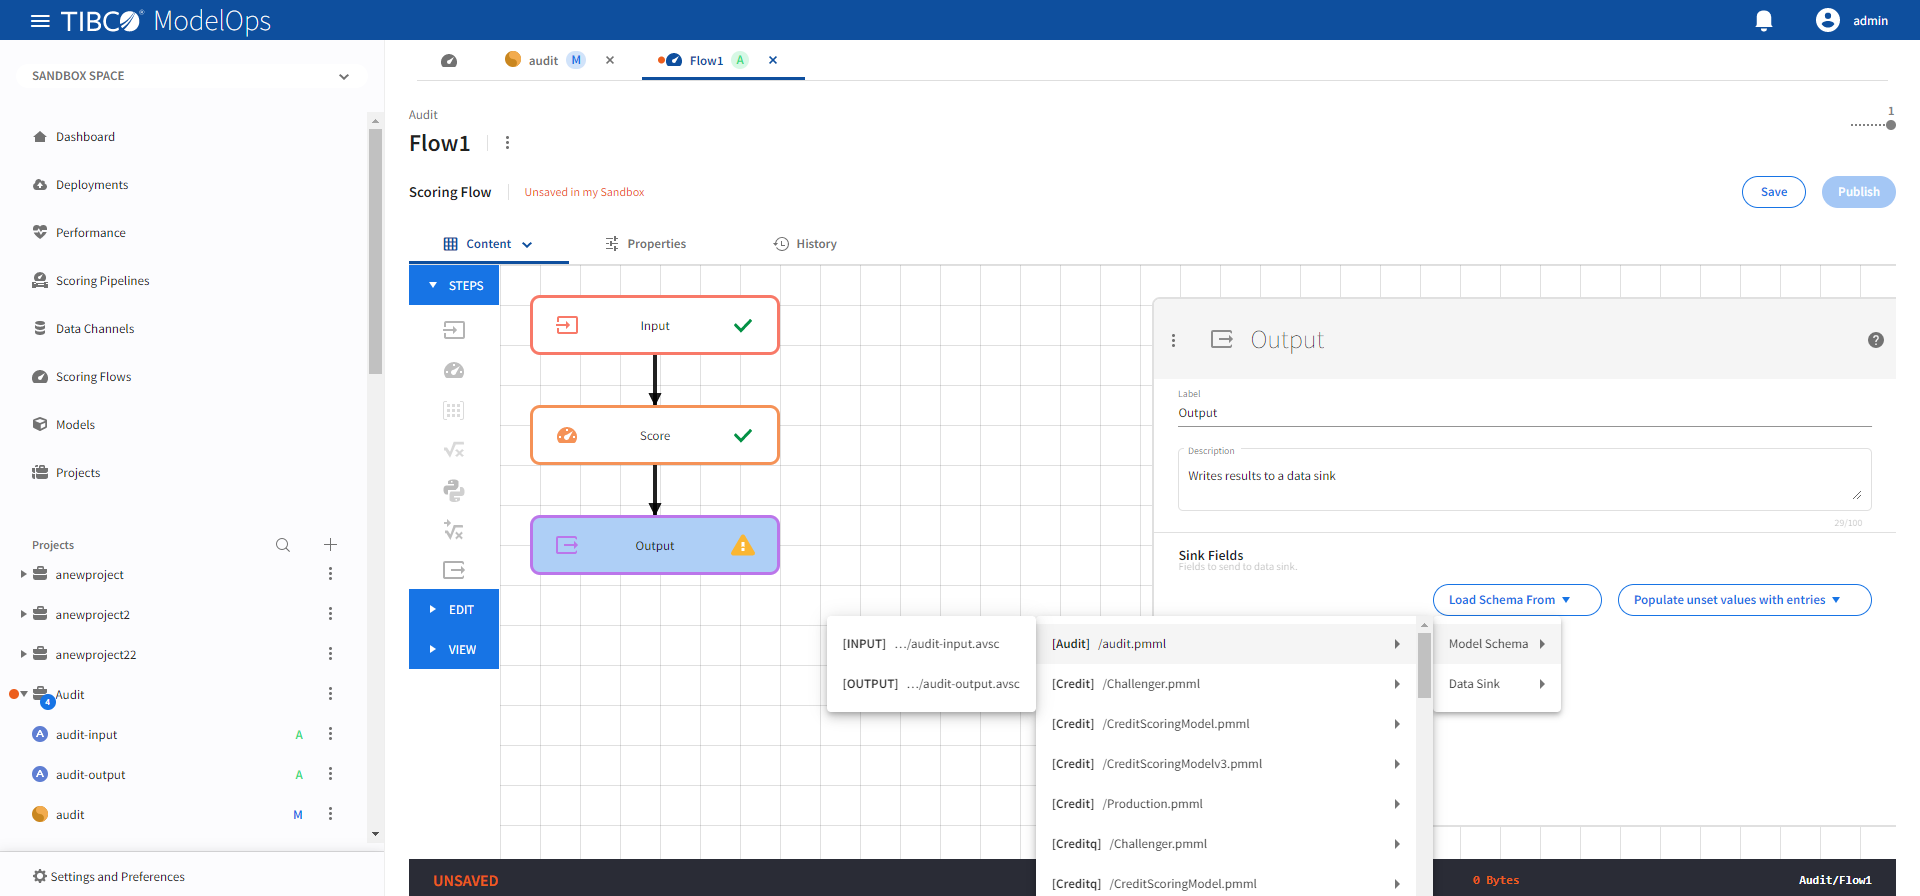
-
Next, from Populate unset values with entries list, select the input from the Score step.
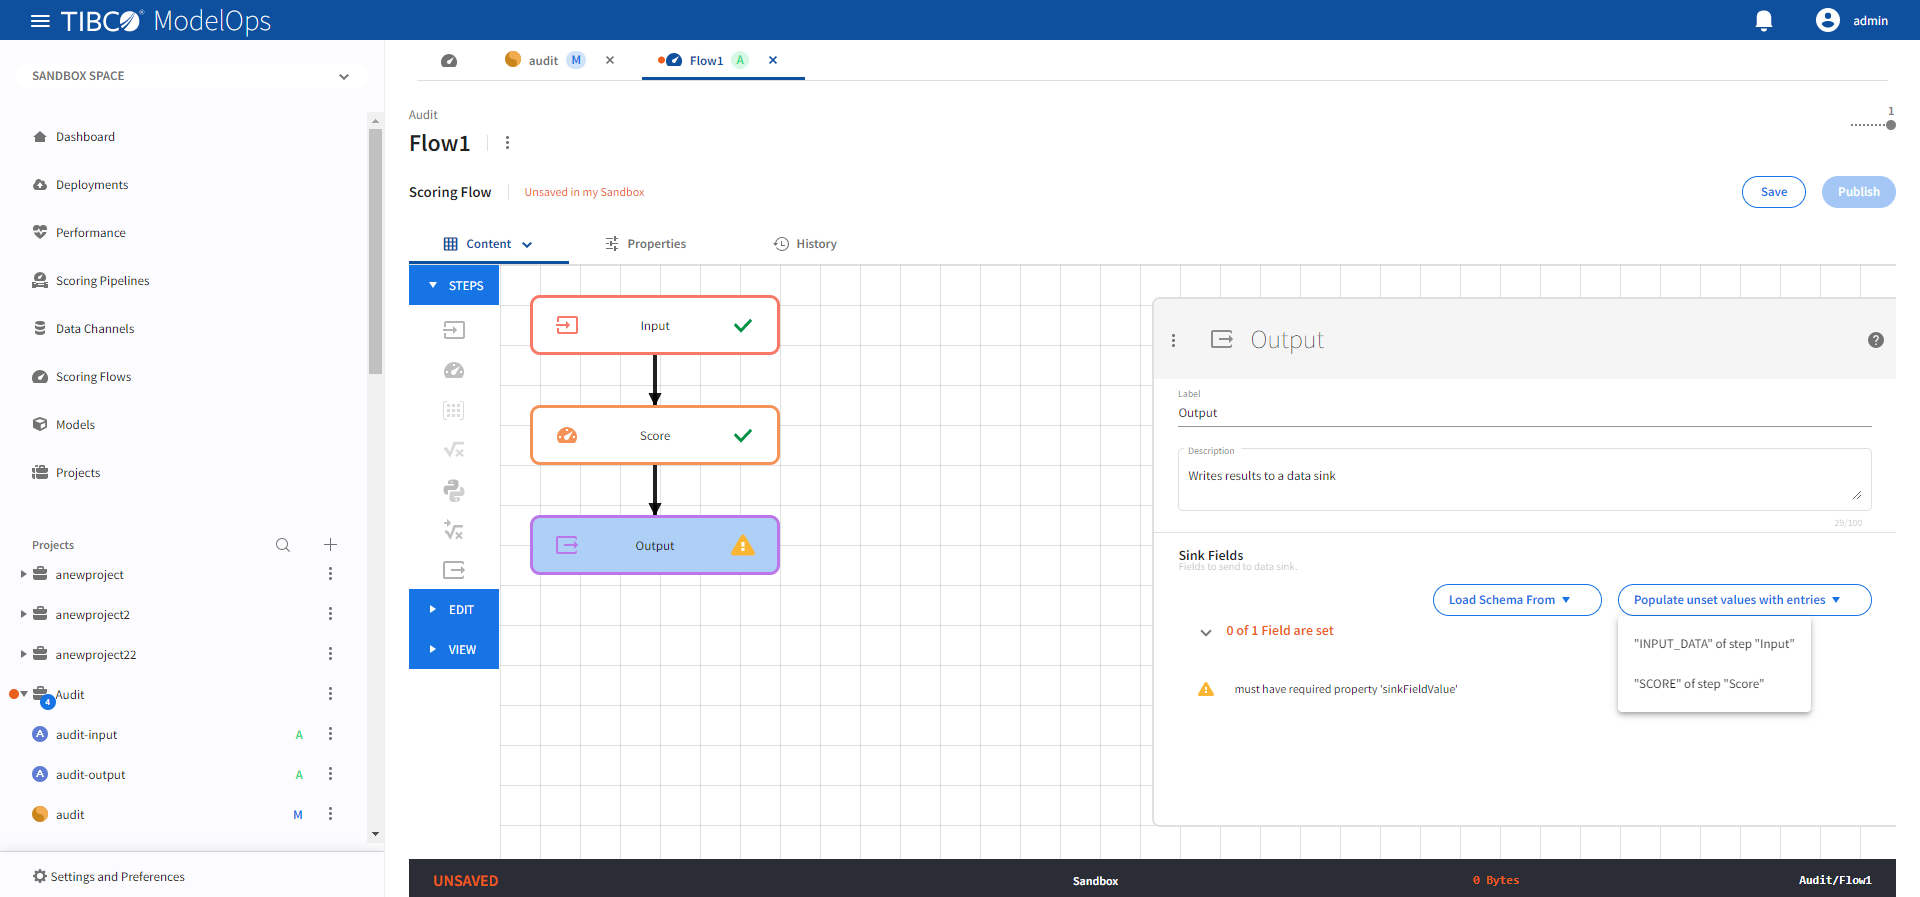
- Click Save.
Once every block is configured and saved, you can publish the scoring flow to Published Space.
- Configure the Input block.
- The Python Data Prep, Score, Decisions template can be configured by following these steps:
- The CreditRisk project works well for this template. Make sure to select this project while creating the scoring flow.
- Configure the Input block.
- Click the Input processing step to open its configuration form.
- Click Load Schema From > Data Source > select the data source whose schema matches with the model.
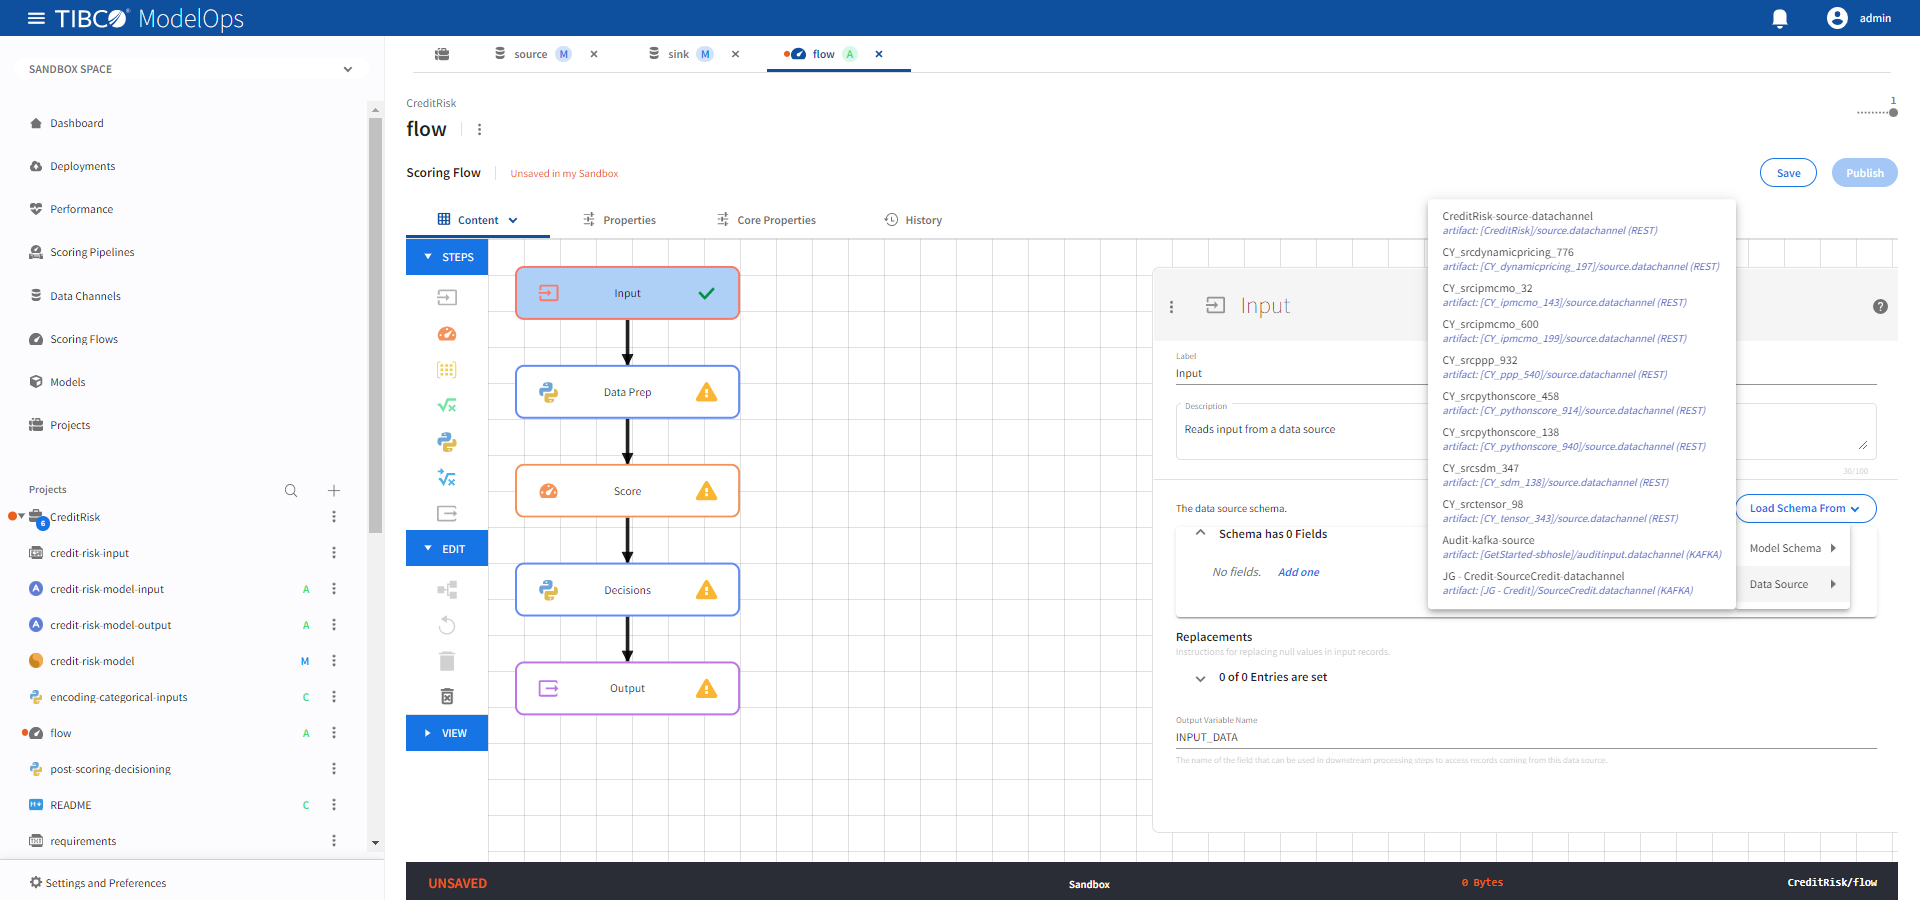
-
Click Save.
- Configure the Data Prep block.
- Click the Data Prep processing step to open its configuration form.
- Under Script, select encoding-categorical-inputs.py.
- Under Input Variable Names, check INPUT_DATA (from “Input”).
- Under Requirements, select requirements.txt.

-
Under Output Fields, click Load Schema From > Model Schema > credit-risk-model.pmml > credit-risk-model-input.avsc.
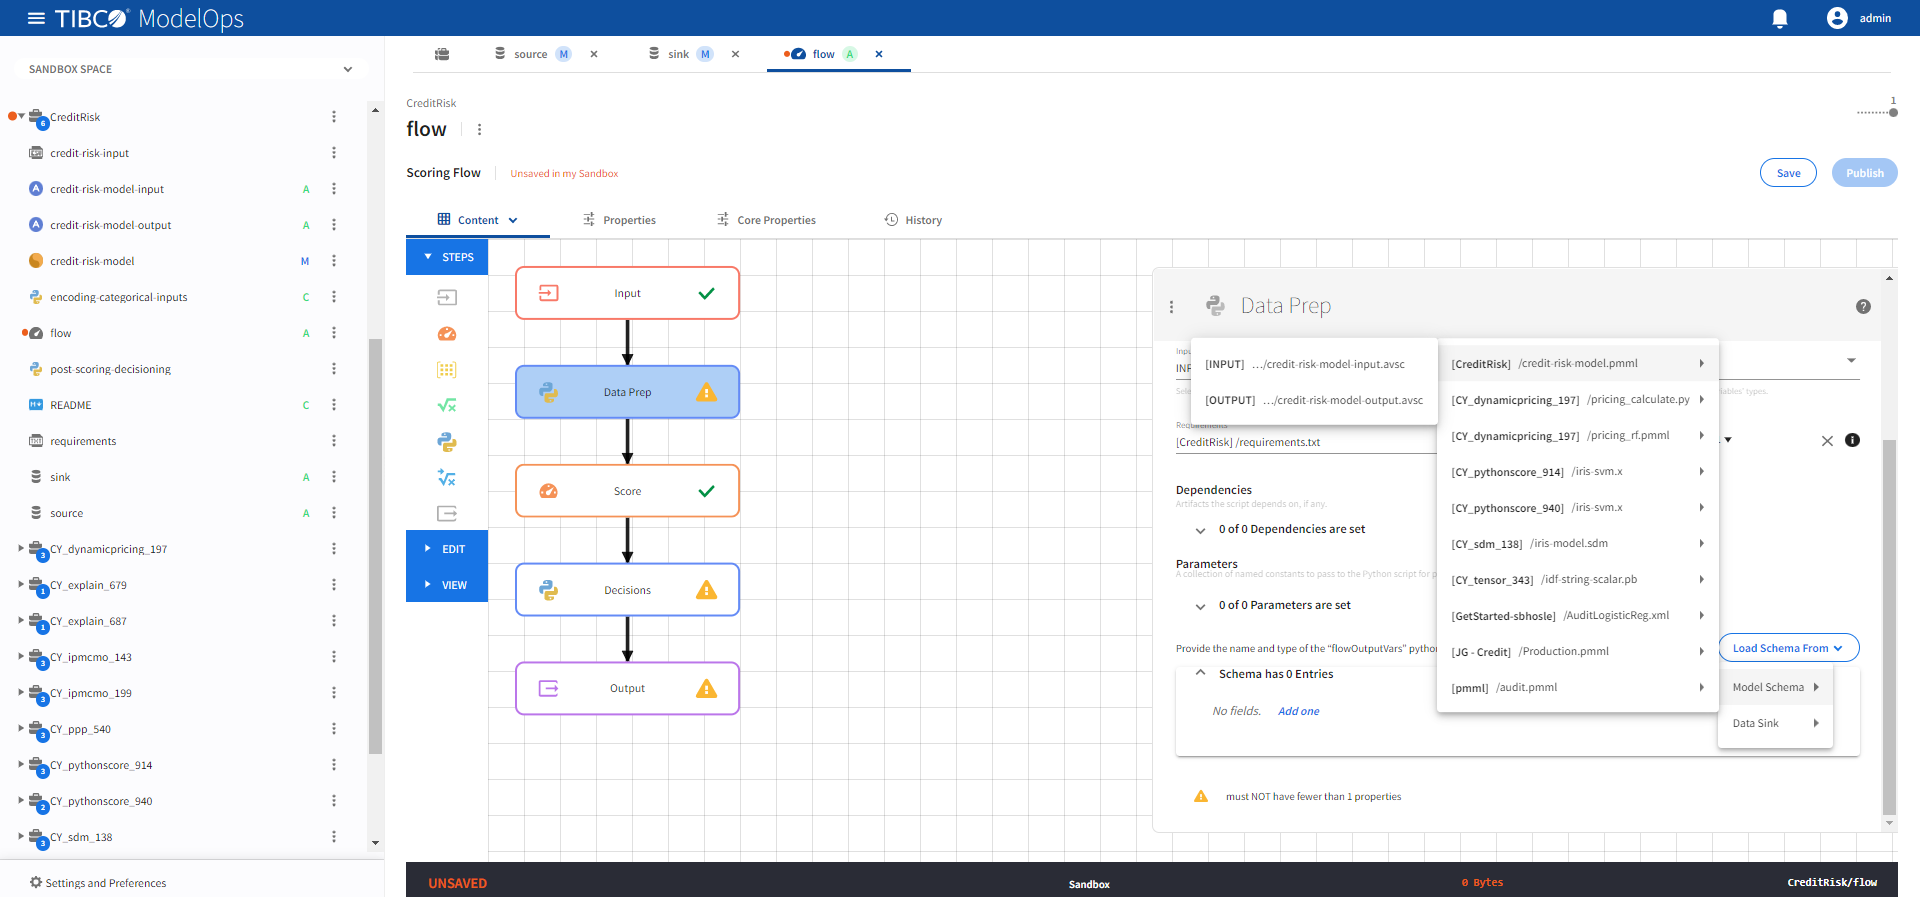
-
Click Save.
- Configure the Score block.
- Click the Score processing step to open its configuration form.
- Select the credit-risk-model.pmml model from the drop-down list.
- Click Add Input Schema of Selected Model and observe 0 of 46 Fields are set.
- From Populate unset values with entries list, populate the values in the appropriate fields.
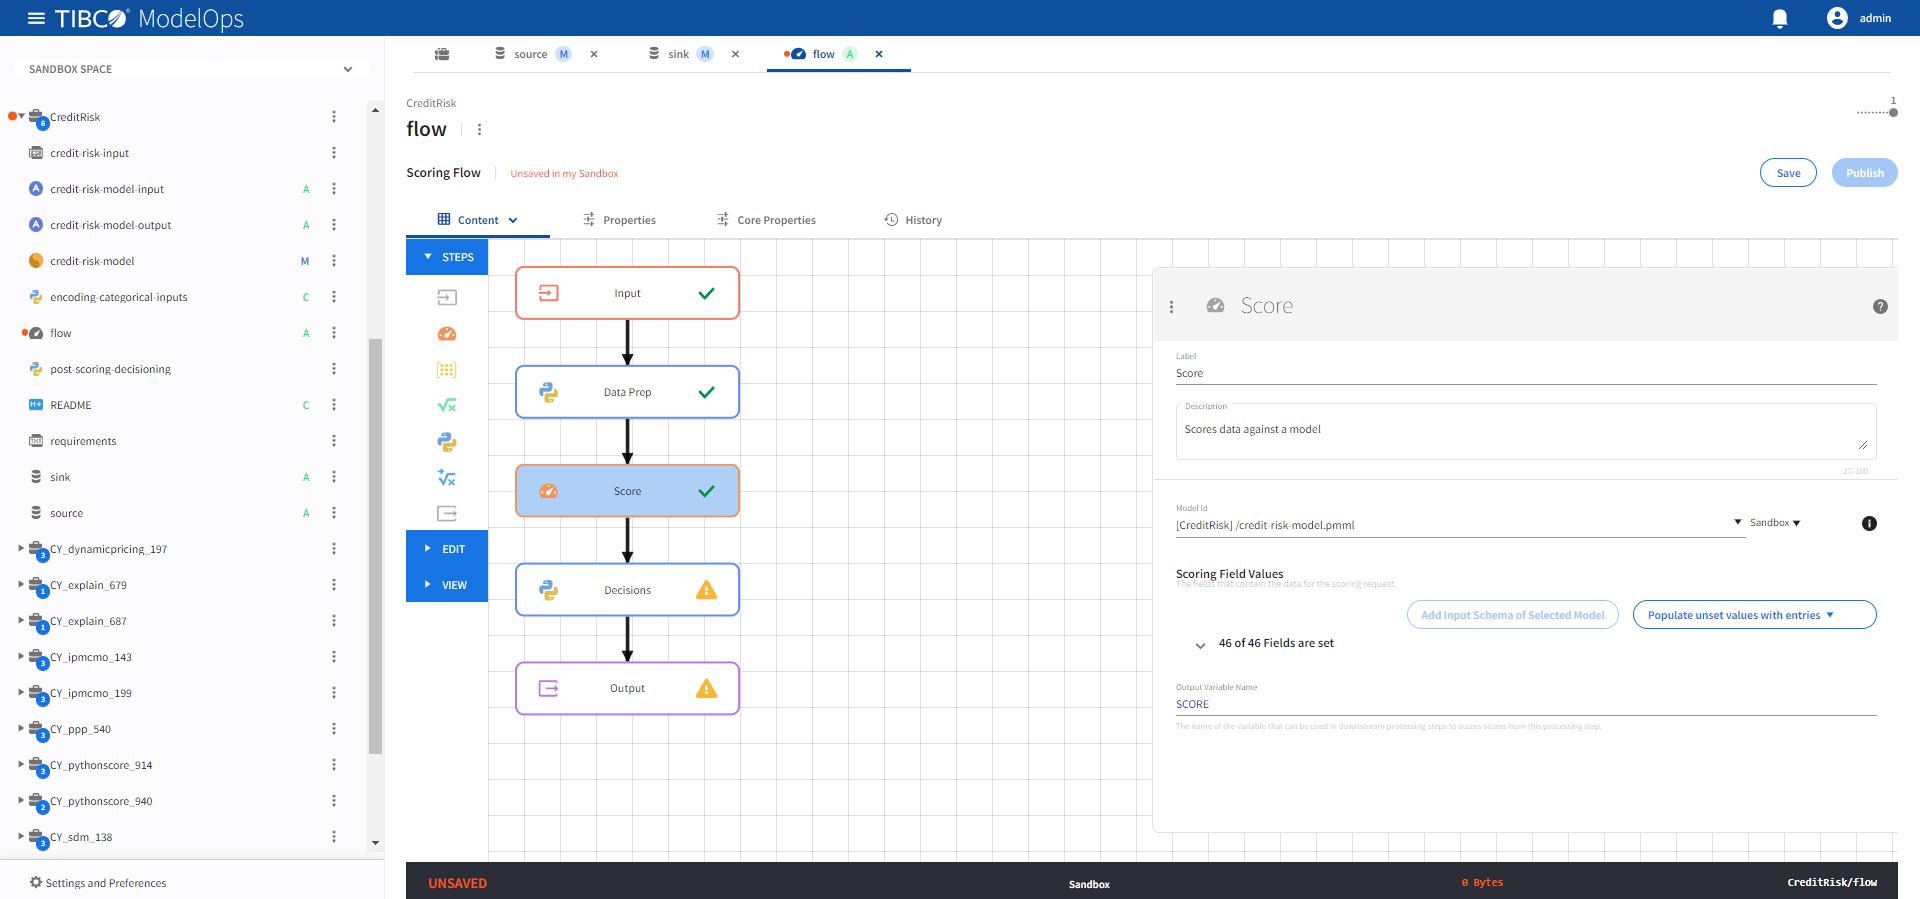
-
Click Save.
- Configure the Decisions block.
- Click the Decisions processing step to open its configuration form.
- Under Script, select post-scoring-decisioning.py.
- Under Input Variable Names, check SCORE (from “Score”).
- Under Requirements, select requirements.txt.
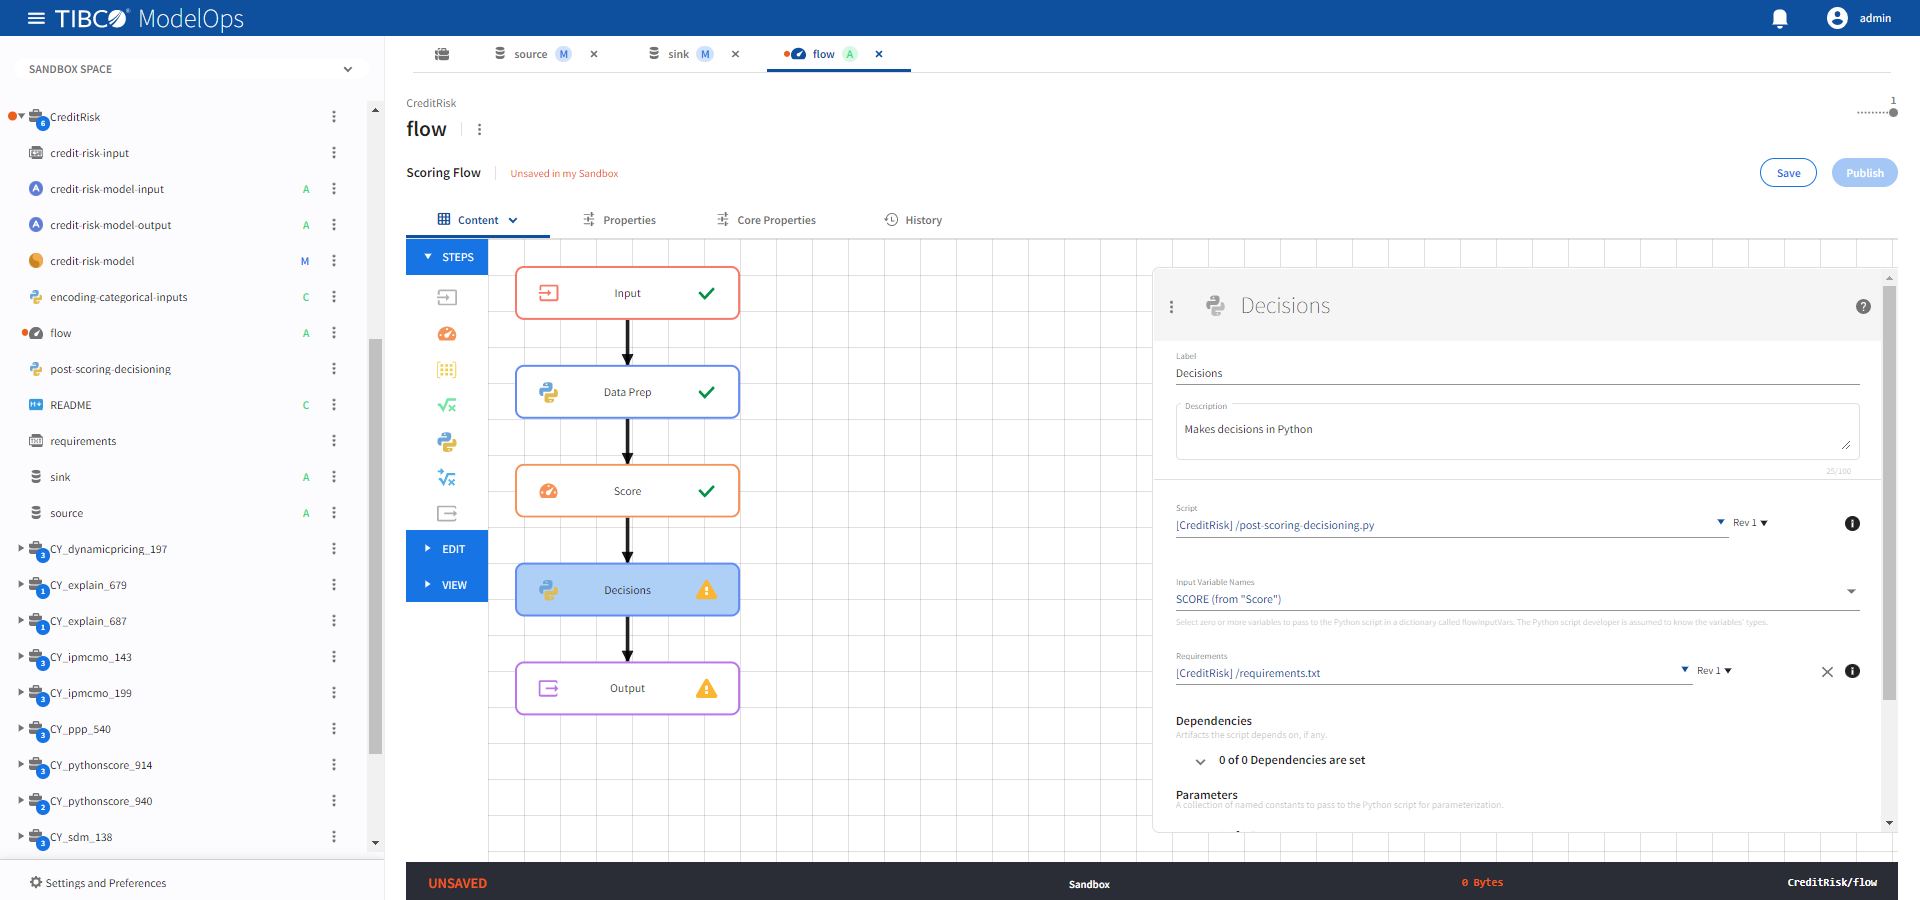
-
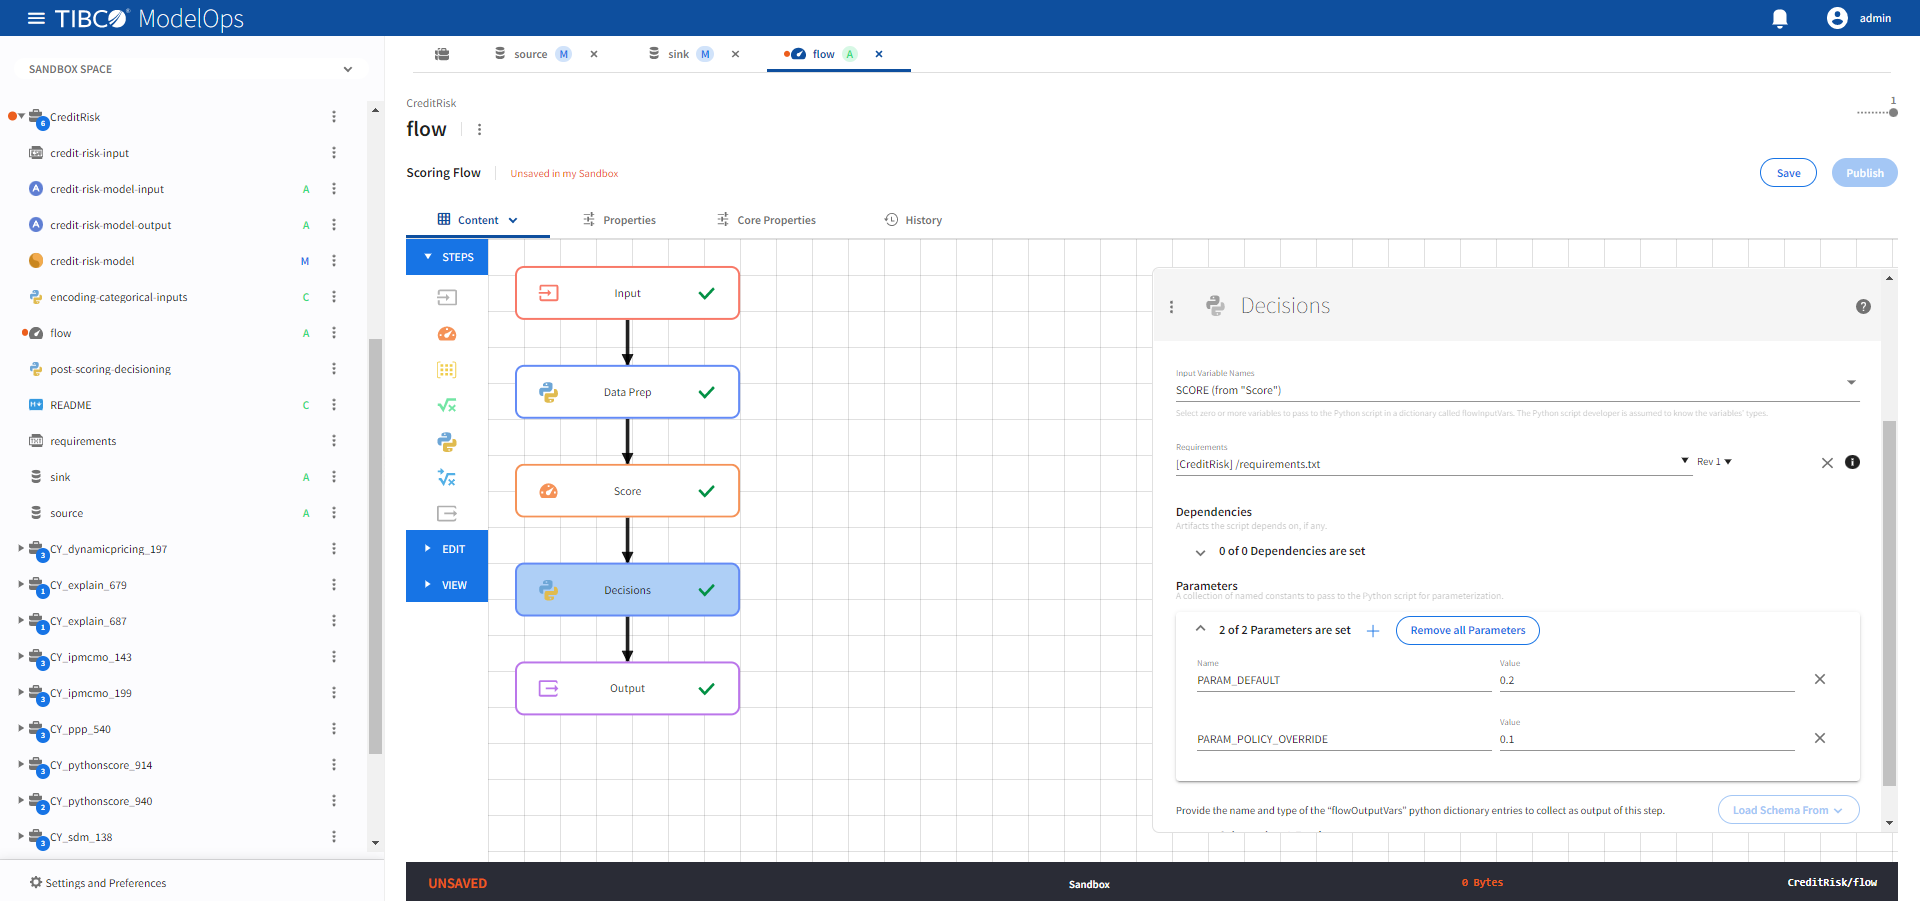
Under Parameters, go to 0 of 0 Output Parameters are set and add the following two parameters:
- Name: PARAM_DEFAULT, Value: 0.2
- Name: PARAM_POLICY_OVERRIDE, Value: 0.1
-
Click Scehmas has 0 Entries and click the plus sign (+) to add a new field.
- Add the following two fields:
- Final_Credit_Approval_Decision (string)
- Policy_Followed (string)
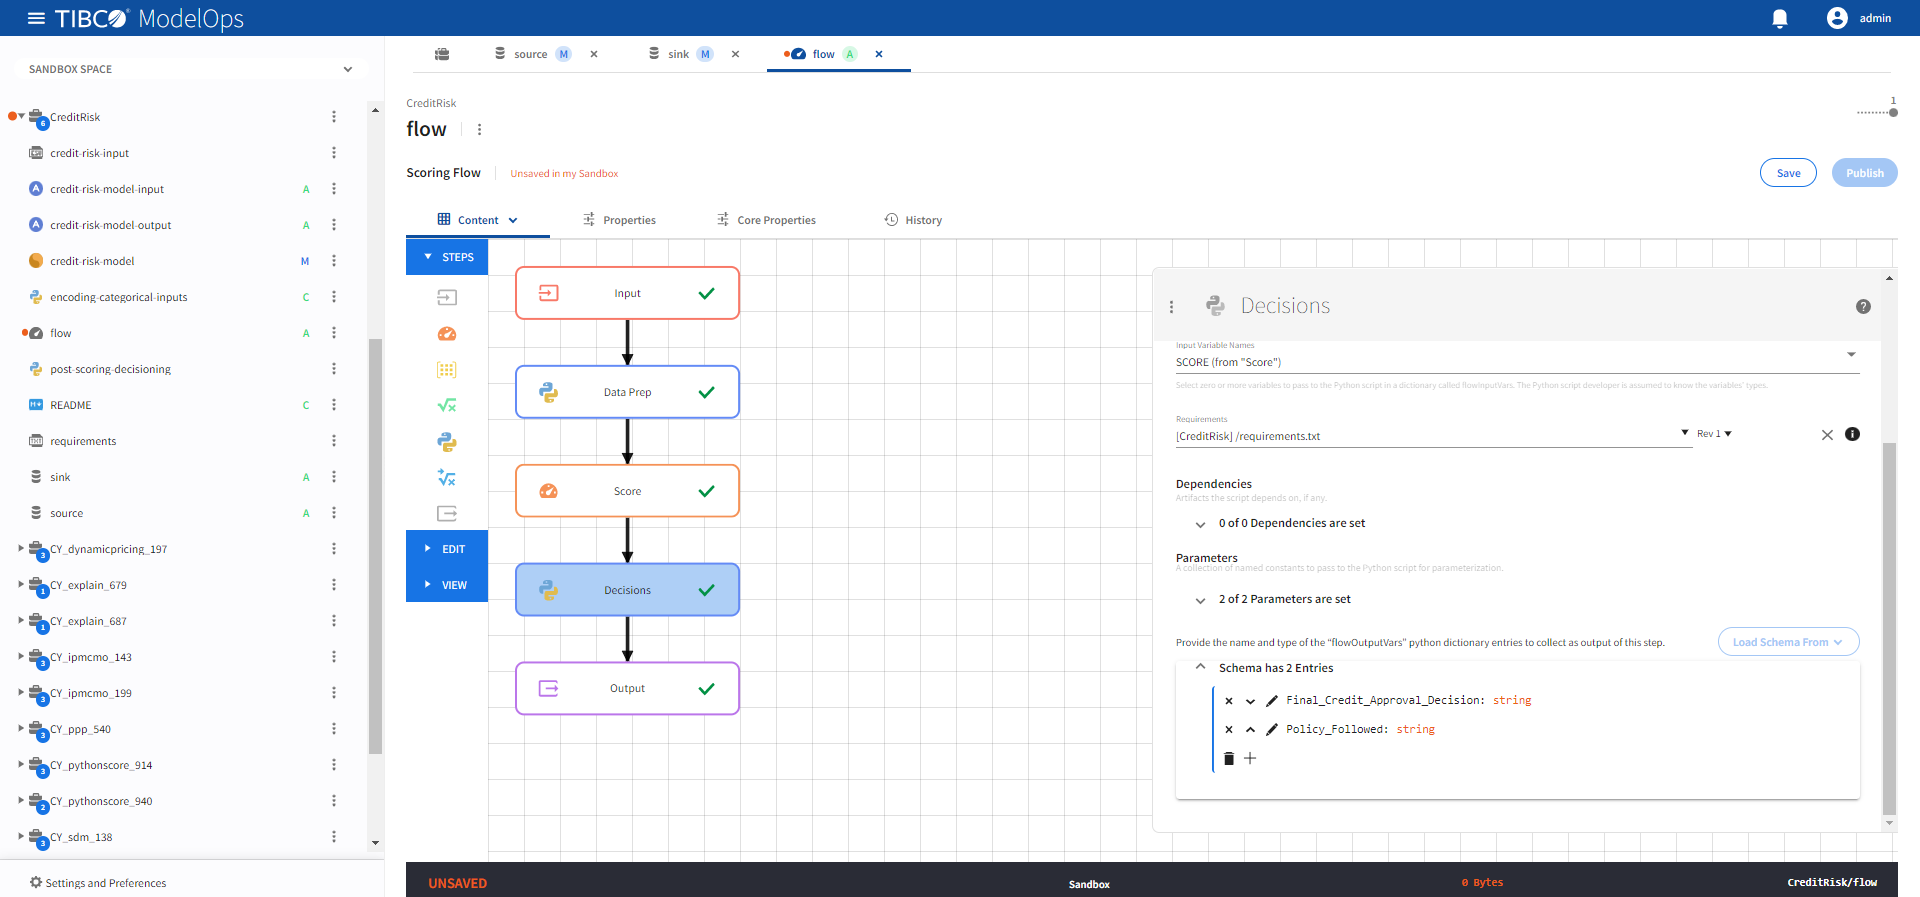
-
Click Save.
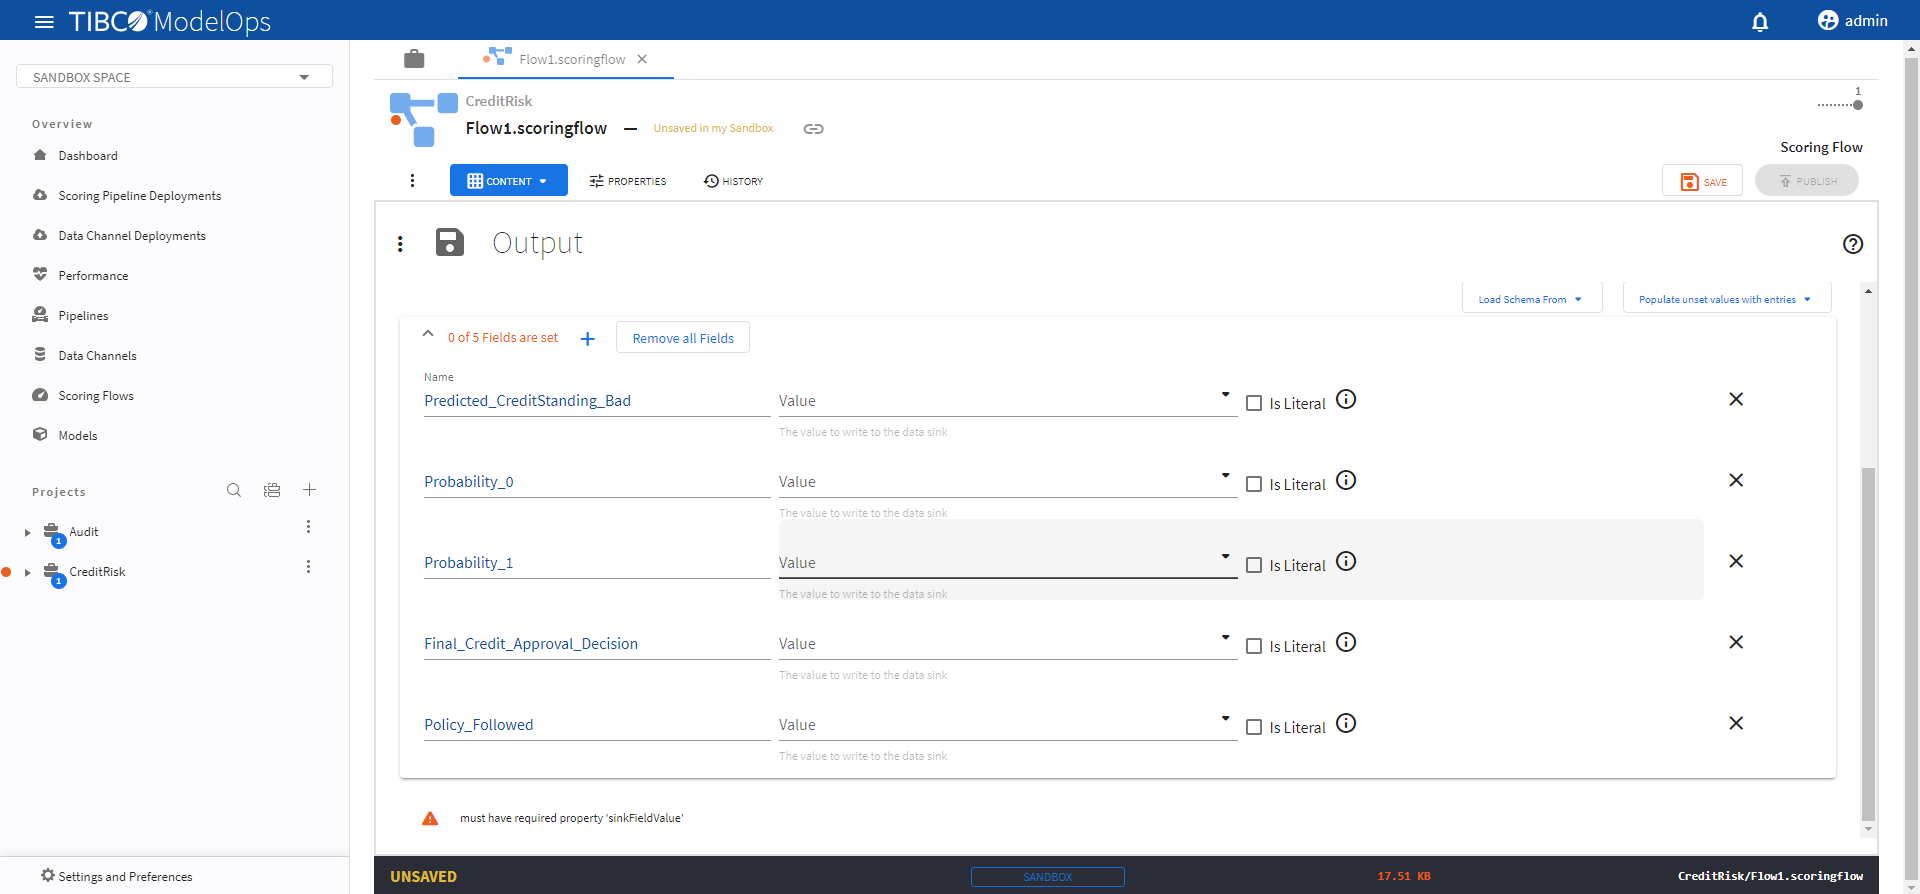
- Configure the Output block.
- Click the Output processing step to open its configuration form.
- Under Output Record, click the plus sign (+) next to 0 of 0 Fields are set and add these 5 fields:
- Name: Predicted_CreditStanding_Bad
- Name: Probability_0
- Name: Probability_1
- Name: Final_Credit_Approval_Decision
- Name: Policy_Followed
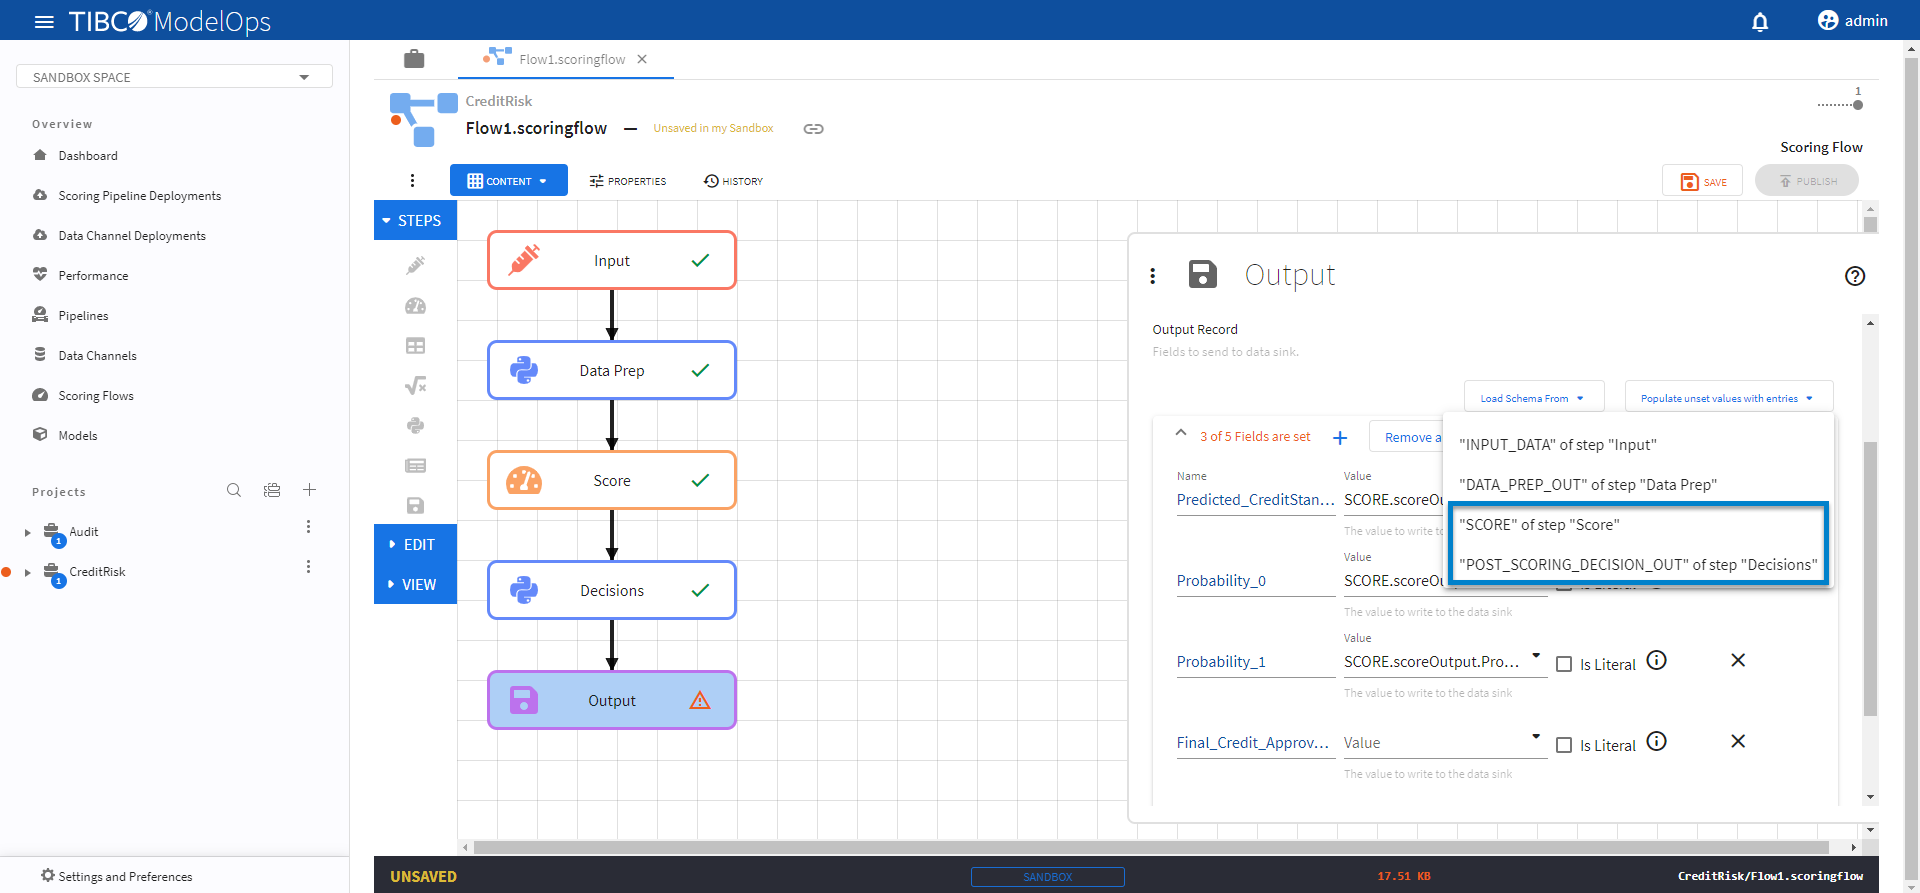
-
To populate the values for these fields, click Populate unset values with entries and select “SCORE” of step “Score”.
- Next, click Populate unset values with entries again and select “Final_Credit_Approval_Decision” of step “Decisions” and “Policy_Followed” of step “Decisions”.
-
Click Save.
- The Score, Compute Metrics, Publish Metrics template can be configured by following these steps:
- The Audit project works well for this template. Make sure to select this project while creating the scoring flow.
- Configure the Input block.
- Click Input block to open the Input processing step’s configuration form.
- Click the drop-down menu on the Load Schema From > Model Schema > and select the schema that matches with the model.
-
Click Save.
- Configure the Score block.
- Open the Score processing step’s configuration form: click the Score block.
- Under Model section, select audit.pmml model from the drop-down list.
- Under Scoring Field Values section, click the Add Input Schema of Selected Model option.
- Next, from Populate unset values with entries list, select “INPUT_DATA” of step “Input”.
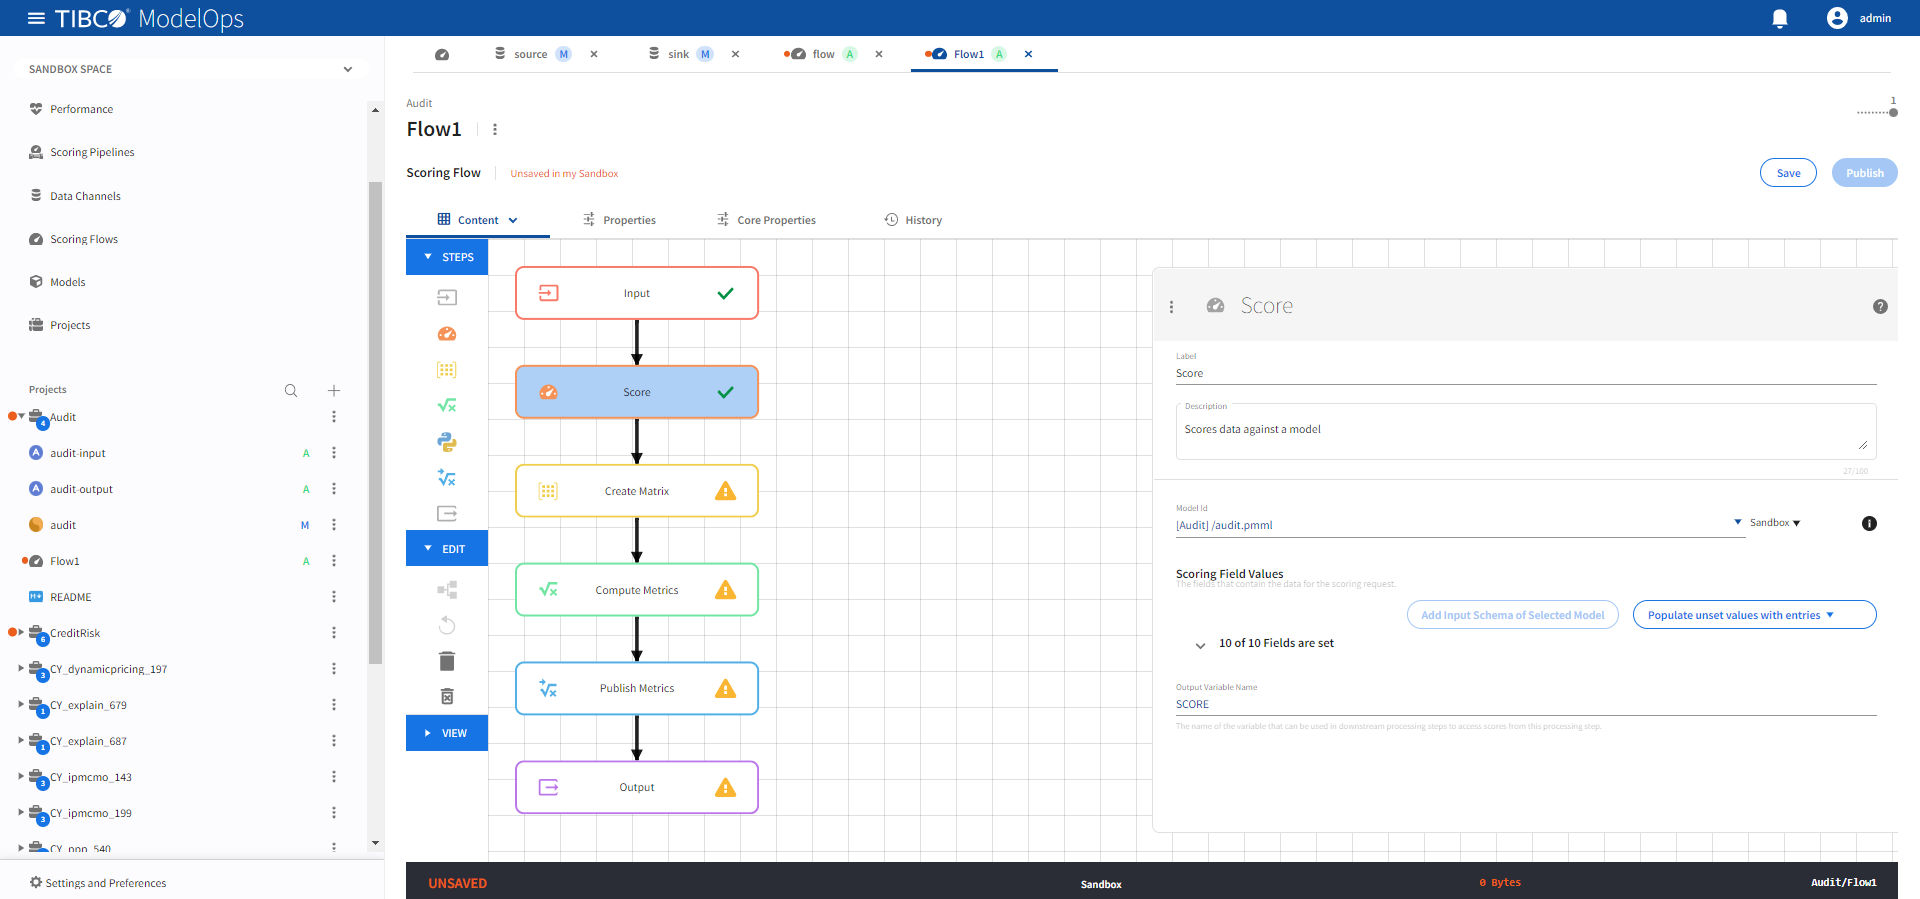
-
Click Save.
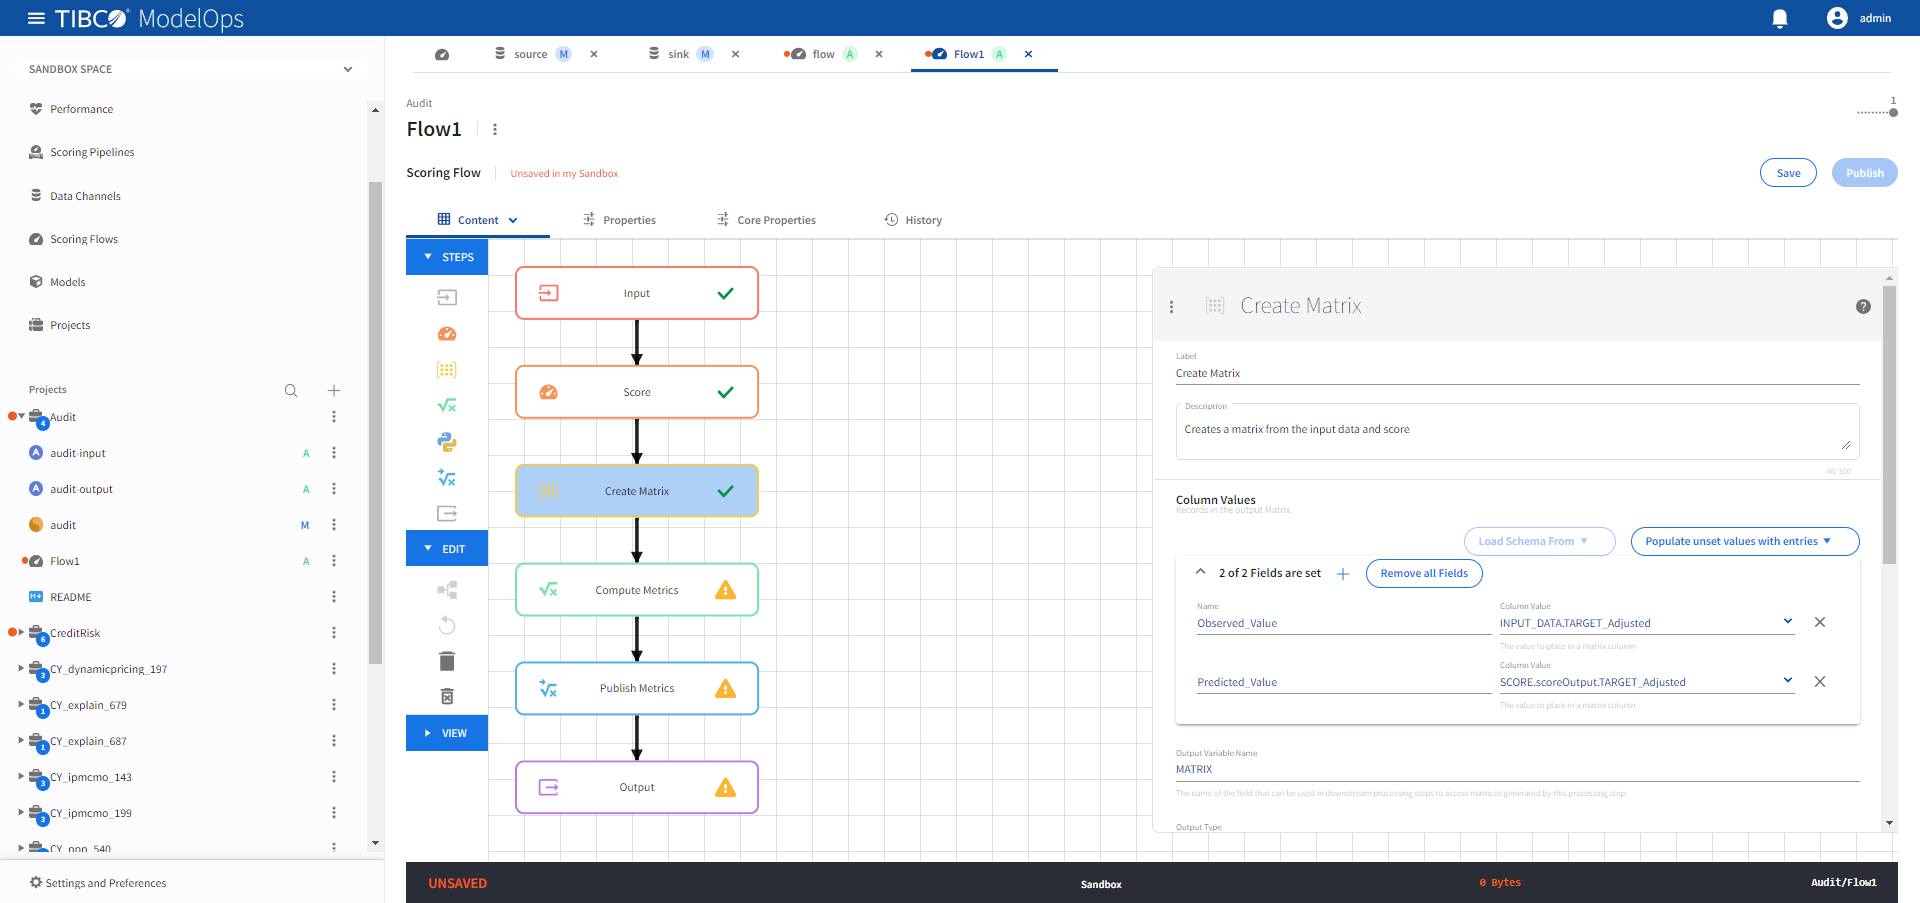
- Configure the Create Matrix block.
- Click Create Matrix block to open the configuration form.
- Click 0 of 0 Fields are set under Column Values section and add the following 2 fields:
- Name: Observed_Value, Column Value: INPUT_DATA.TARGET_Adjusted
- Name: Predicted_Value, Column Value: SCORE.scoreOutput.TARGET_Adjusted
- Add the Output variable Name as MATRIX.
- Under Output Type,select from one of the following options:
- Row added: A matrix is emitted for each record that is added so long as the minimum number of rows has also been reached.
- Any selected fields: A matrix is emitted when the value of any of the fields marked as selected in Output Fields have a value change as compared to the previous row of the matrix. If there is no previous row, a matrix is not emitted.
- All selected fields: A matrix is emitted when the value of all the fields marked as selected in Output Fields have a value change as compared to the previous row of the matrix. If there is no previous row, a matrix is not emitted.
- Interval: A record is emitted at a set interval. Each field of the output record is replaced by any non-null result of evaluating the input record against the expression given in the Output Tab.
- Select a value form the drop-down list for TIme Unit field.
- Select the sorting order under the Sort Field section.
- Add the time between emitting matrix under the Interval section.
- Specifiy the minimum and maximum number of rows in the respective fields.
- Checking off the Clear Matrix On Omit box will clear the matrix when emitted.
-
Click Save.
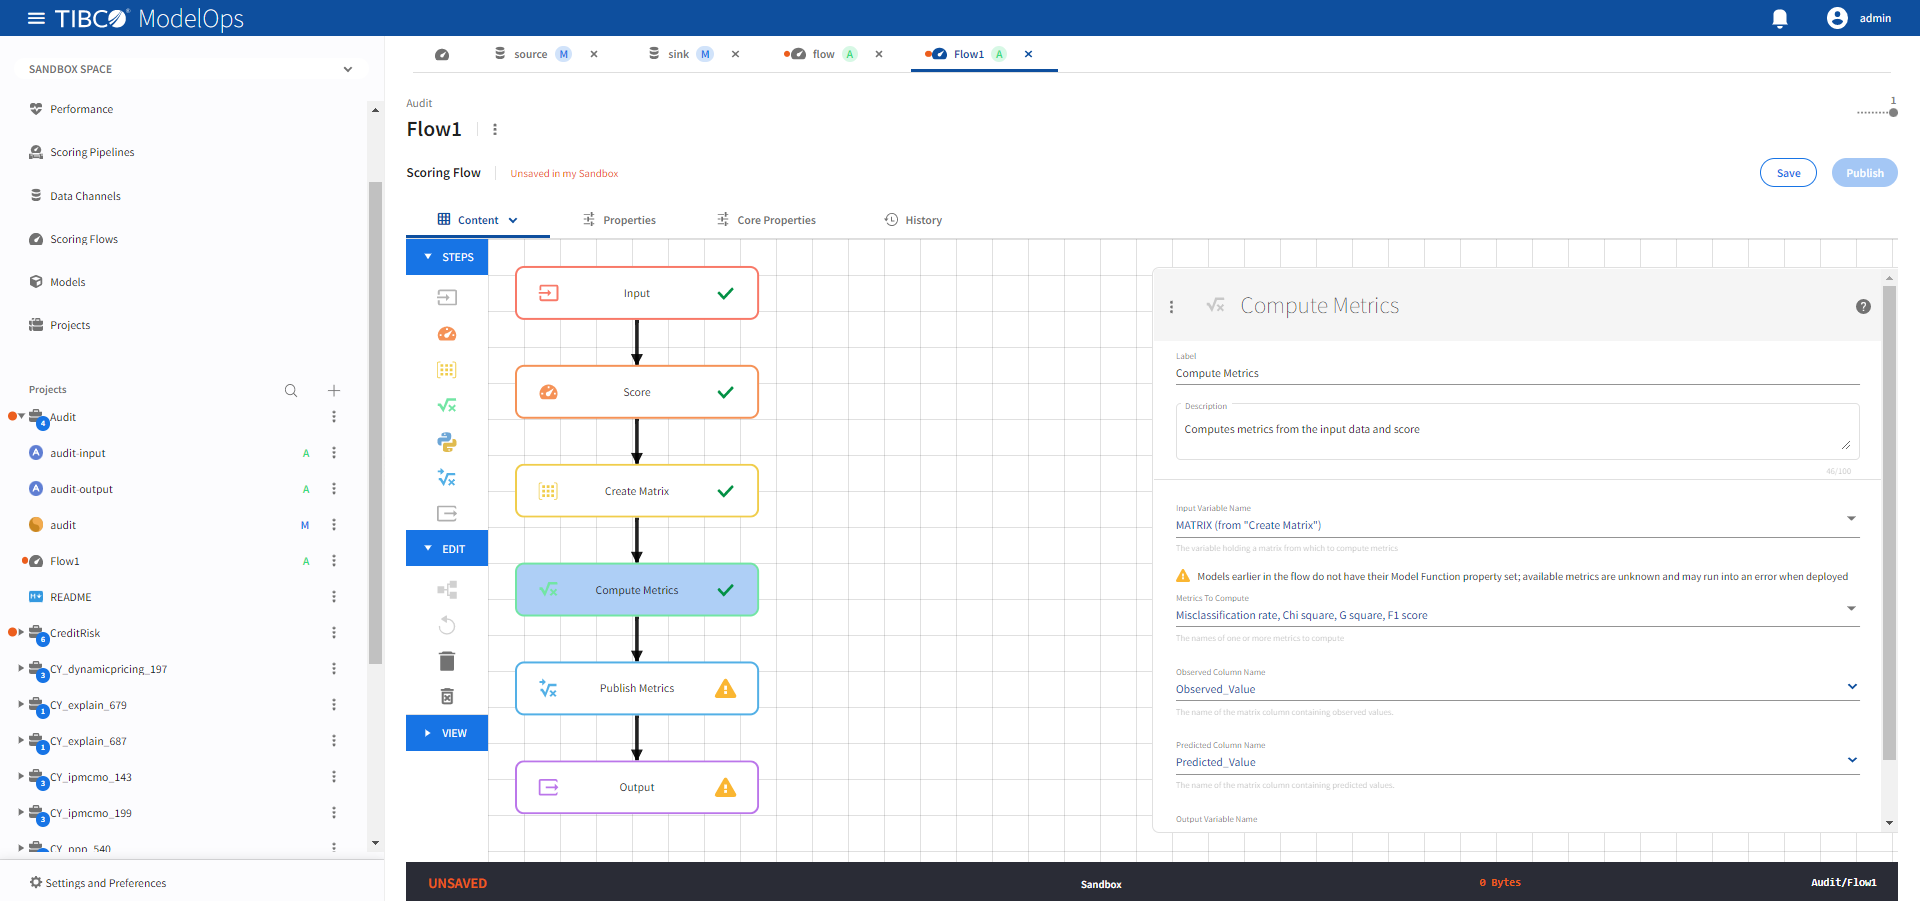
- Configure the Compute Metrics block.
- Click Compute Metrics block to open the configuration form.
- For Input Variable Field Name, select MATRIX (from “Create Matrix”) from the drop-down list.
- For Metrics to Compute section, select Misclassification rate, Chi square, G square, and F1 score from the drop-down list.
- Select Observed_Value for Observed Column Name.
- Select Predicted_Value for Predicted Field Name.
- Under Output Variable Name, add COMPUTED_METRICS.
-
Click Save.
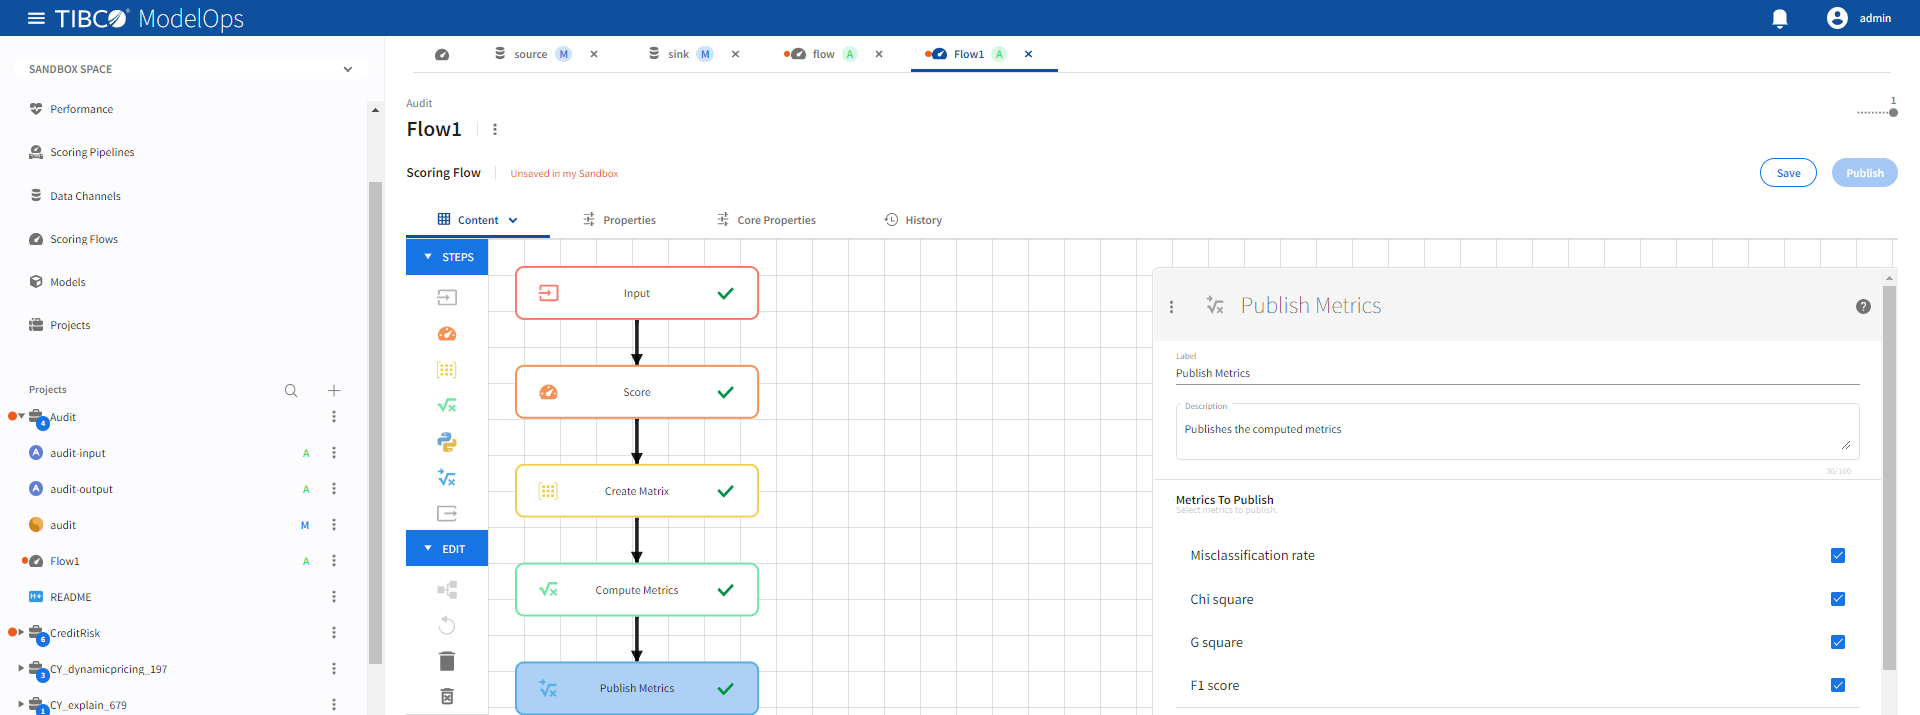
- Configure the Publish Metrics block.
- Click Publish Metrics block to open the configuration form.
- For Metrics to Publish, select Misclassification rate, Chi square, G square, and F1 score.
-
Click Save.
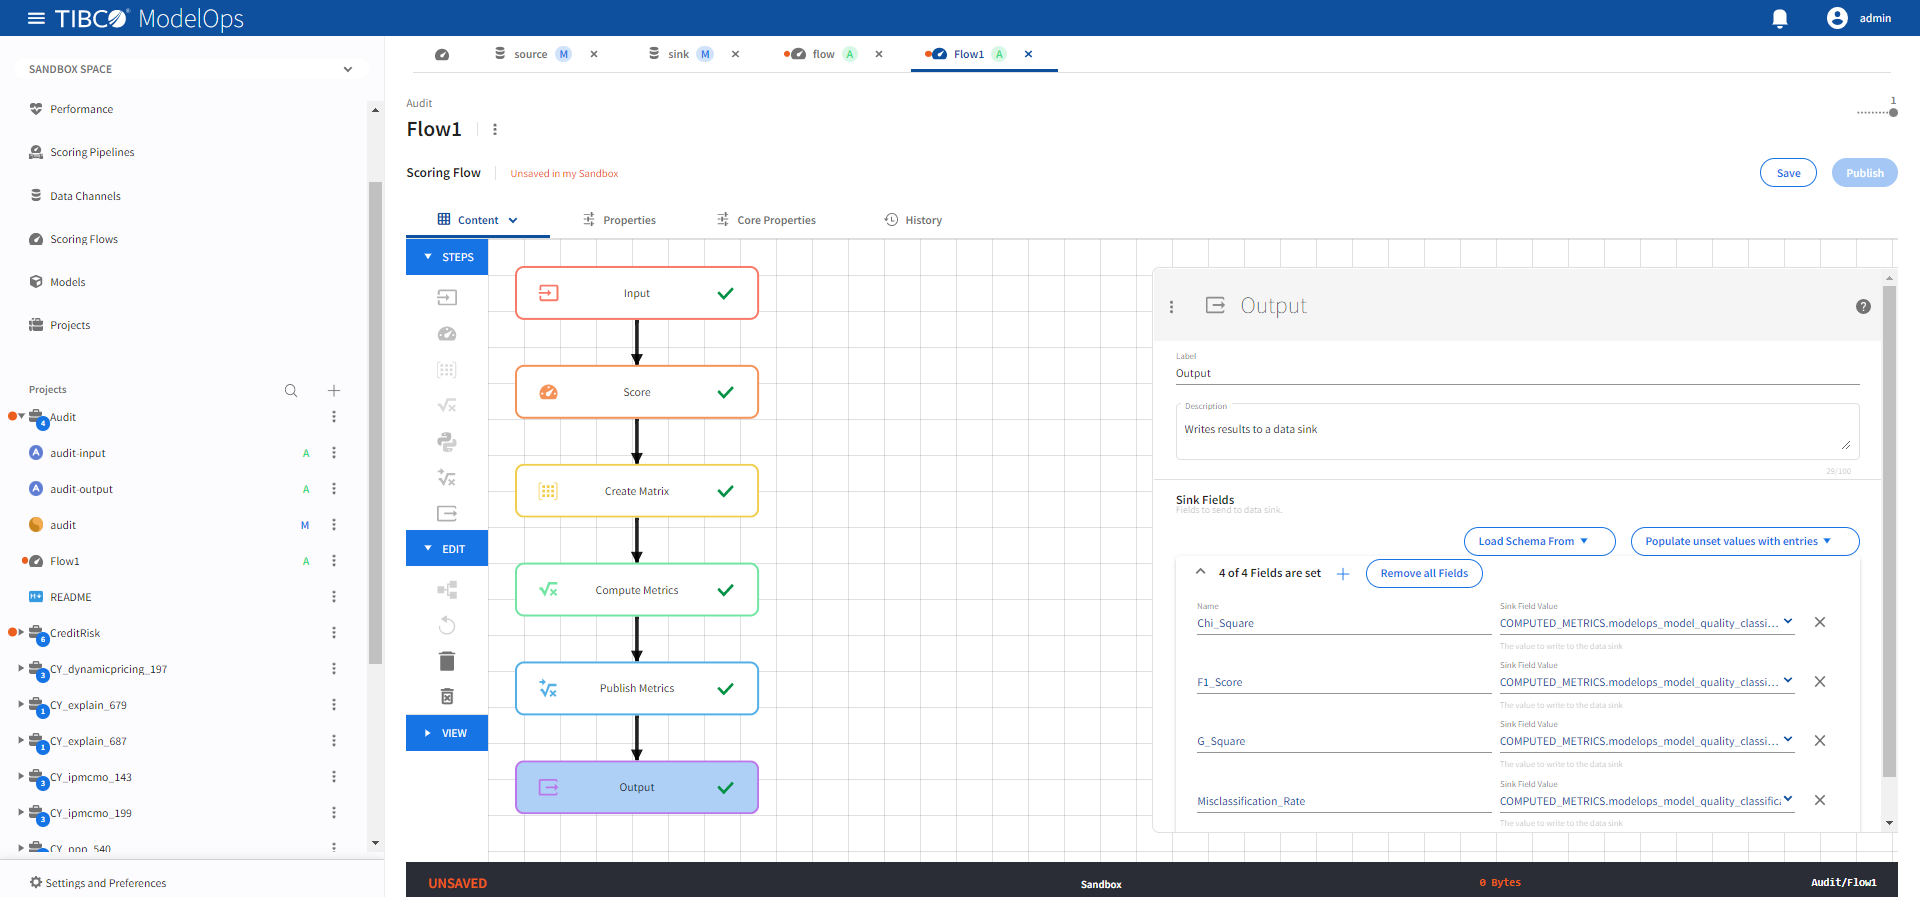
- Configure the Output block.
- Click Output block to open the Output processing step’s configuration form.
- Click 0 of 0 Fields are set under Output Record section and add the following 4 fields:
- Name: Chi_Square, Sink Field Value: COMPUTED_METRICS.modelops_model_quality_classification_chi_square
- Name: F1_Score, Sink Field Value: COMPUTED_METRICS.modelops_model_quality_classification_f1_score
- Name: G_Square, Sink Field Value: COMPUTED_METRICS.modelops_model_quality_classification_g_square
- Name: Misclassification_Rate, Sink Field Value: COMPUTED_METRICS.modelops_model_quality_classification_misclassification_rate
-
Click Save.
Creating a Scoring Pipeline
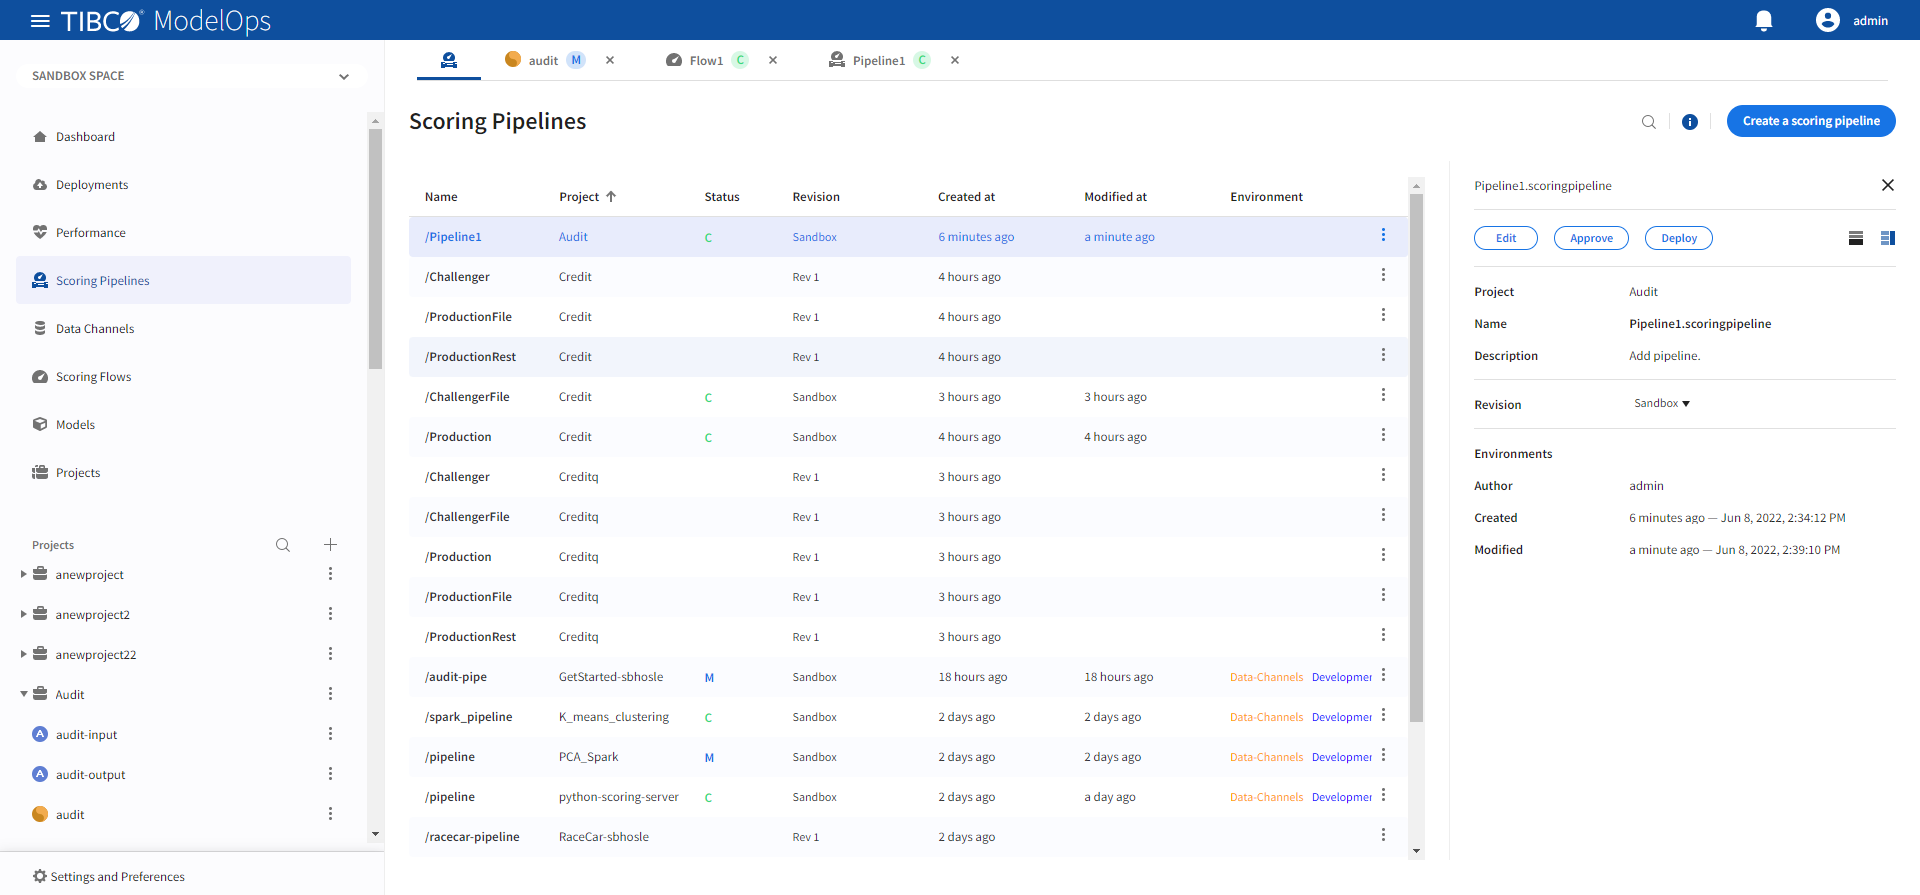
- In the Project Explorer pane, under Overview section, click Scoring Pipelines.
- Click Create a scoring pipeline to create a new scoring pipeline. You can also click Add one to add a new scoring pipeline if there are none present.
- If ModelOps contains only one project, the project name will be selected automatically. Else, you can select the project name from the list.
- Add pipeline name and description.
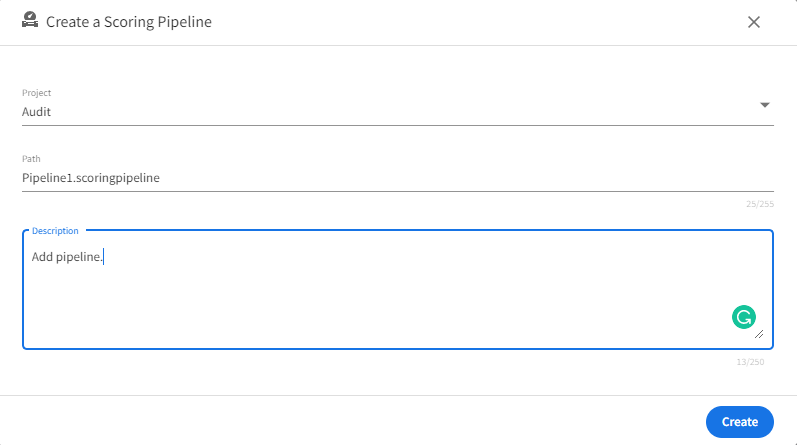
-
Click Create.
Authoring a Scoring Pipeline
- In the Project Explorer pane, click Scoring Pipelines.
- Select the scoring pipeline.
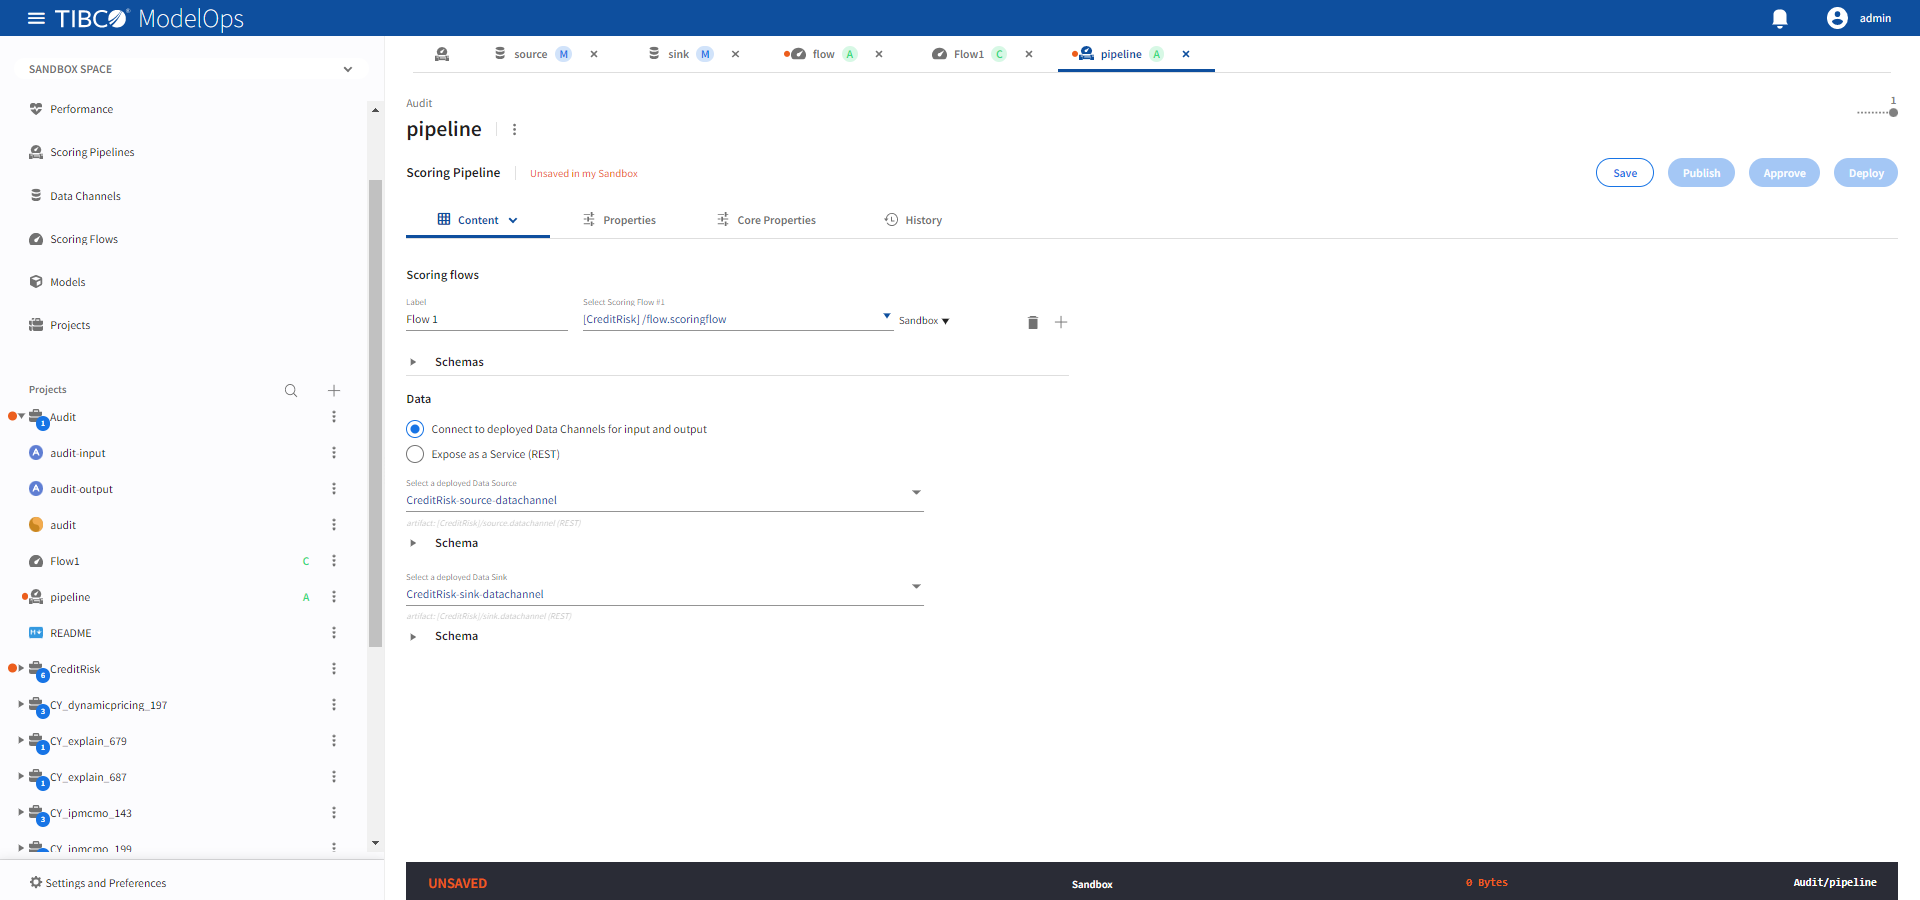
- Select the one of the scoring flows from the drop-down list under the Scoring Flows section.
- Select Connect to deployed Data Channels for input and output or Expose as a Service (REST).
- Configure the Data Channels or REST service depending on the selection above.
- Click Save to save the changes.
Note:
- Only one scoring flow is allowed when exposing the pipeline as a REST service.
- Scoring pipelines can be defined to use data channels or be exposed directly as a REST service.
- When using data channels, the data channels must already be deployed.
- When using a REST service, a REST API is automatically made available for the pipeline.
Using Data Channels
When a pipeline uses data channels, a Data Source provides the input data and a Data Sink receives the output data after processing by a pipeline.
- Select a deployed data source from the Select a deployed Data Source drop-down.
- Select a deployed data sink from the Select a deployed Data Sink drop-down.
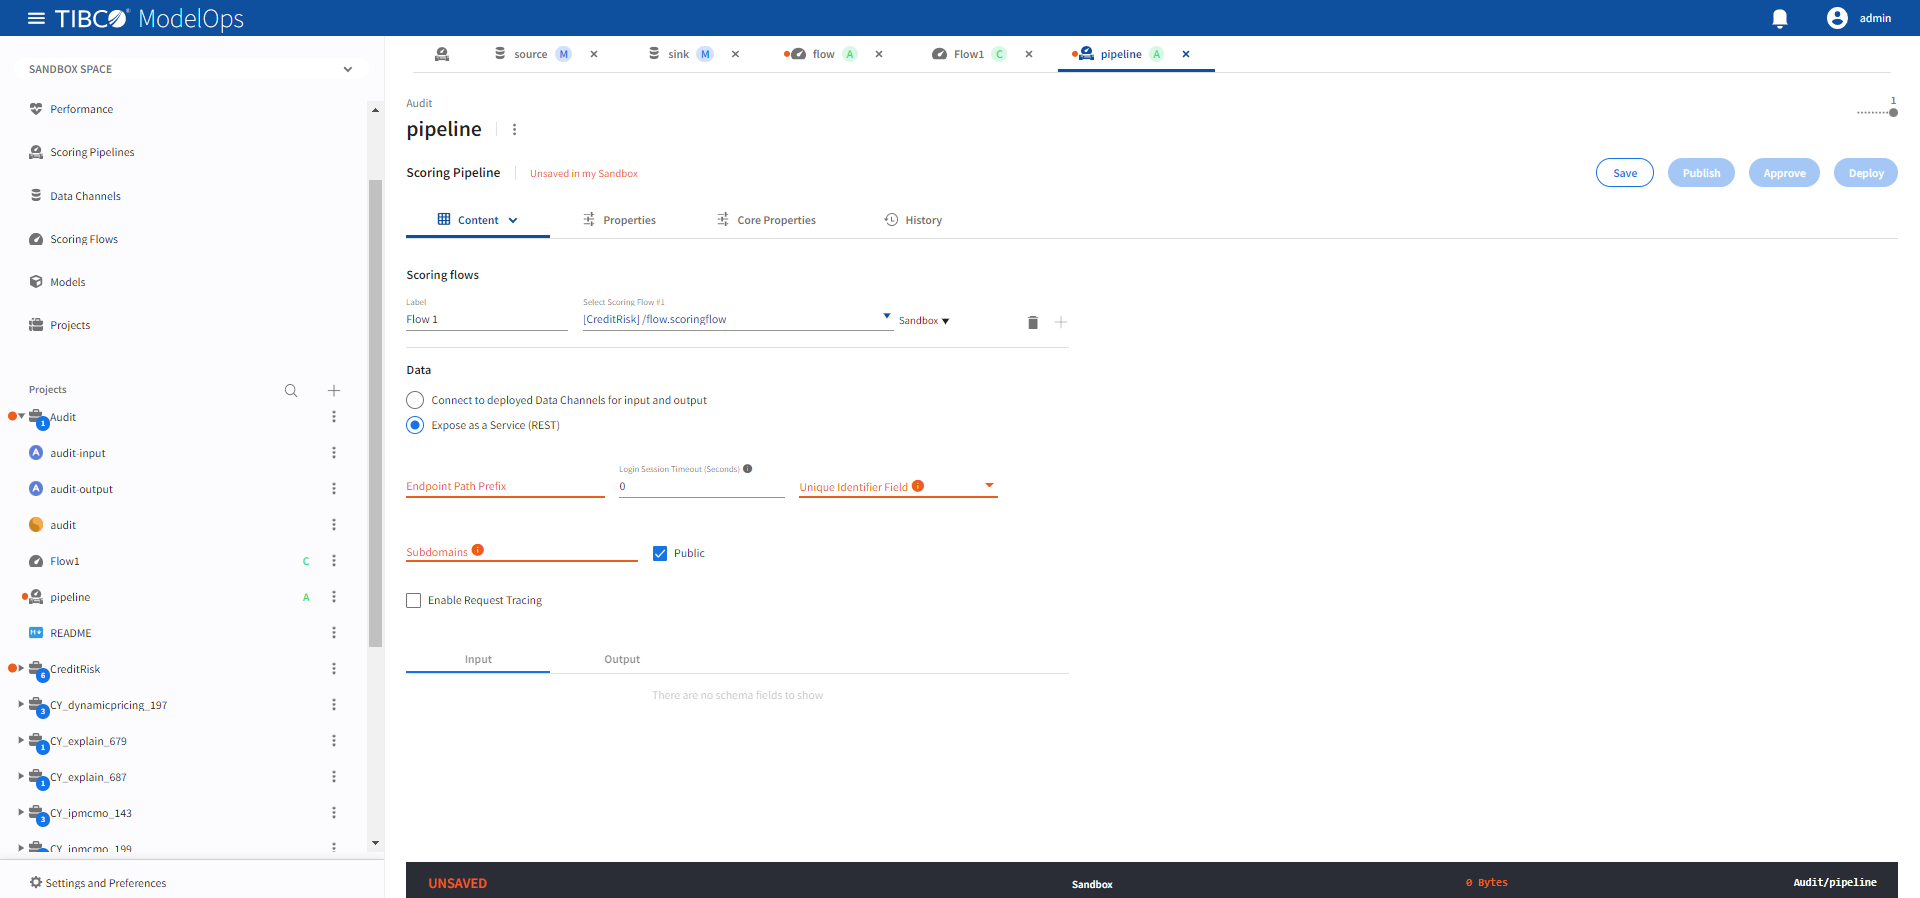
Using a REST Service
When a pipeline is exposed as a REST service, this configuration controls how the REST API is exposed.
For more details on how this configuration is used, see Using the REST APIs chapter .
| Name | Default | Description |
|---|---|---|
| Enable Request Tracing | Unchecked | Enable tracing. |
| Endpoint Path Prefix | None | A unique URL path prefix for the REST API. For more details, see Addresses. Required value. |
| Login Session Timeout (Seconds) | 0 | Idle login session expiration. The login session is terminated if it is idle for a duration longer than this timeout value. A value of zero disables expiration. |
| Public | Checked | Expose endpoint outside of the ModelOps Kubernetes cluster and update DNS with the REST API URL. |
| Subdomains | None | A DNS subdomain for this REST API. Must conform to DNS label restrictions. For more details, see Addresses. Required value. |
| Unique Identifier Field | None | Request field to correlate responses. For more details, see REST Pipelines. Required value |
Promoting a Scoring Pipeline
- In the Project Explorer pane, click Scoring Pipelines.
- Select the pipeline that needs to be promoted.
- Click Approve present in the right panel.
-
Turn on the toggle for Development environment and close the pop-up window.

Pipeline Deployment
- In the Project Explorer pane, click Deployments.
- Click Deploy new and select Scoring Pipeline from the drop-down list.
- Add name and description in the respective field.
- Select scoring pipeline from the drop down list.
- Select a scoring environment from the drop-down list.
- Select when you need to schedule the job from the given options (Immediate, Future, or Periodic).
- Select the duration for which you need to run the job. You can run the job forever or add the duration as per your needs.
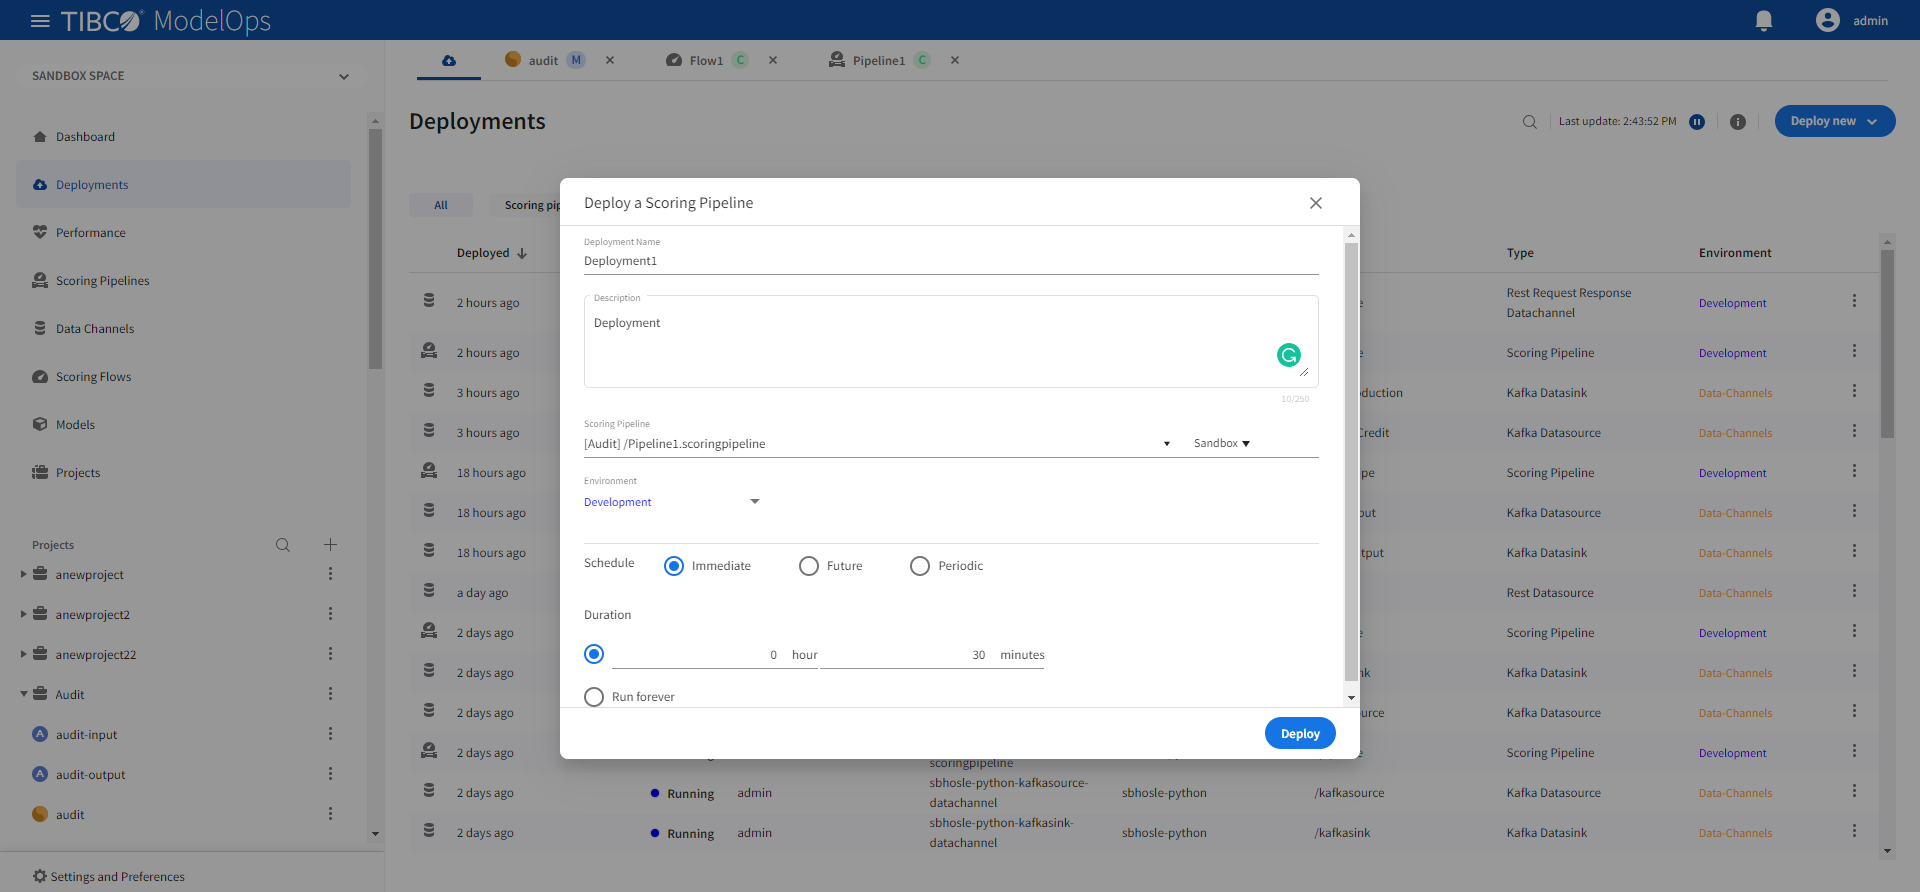
-
Click Deploy. You can see the deployed pipeline in the list on the main screen.

Note: The Scoring Pipeline Deployments section allows you to select the Run forever option. However, after a single file is processed by a File Data Source, the flow would be stopped and marked Complete and no longer accept new input.