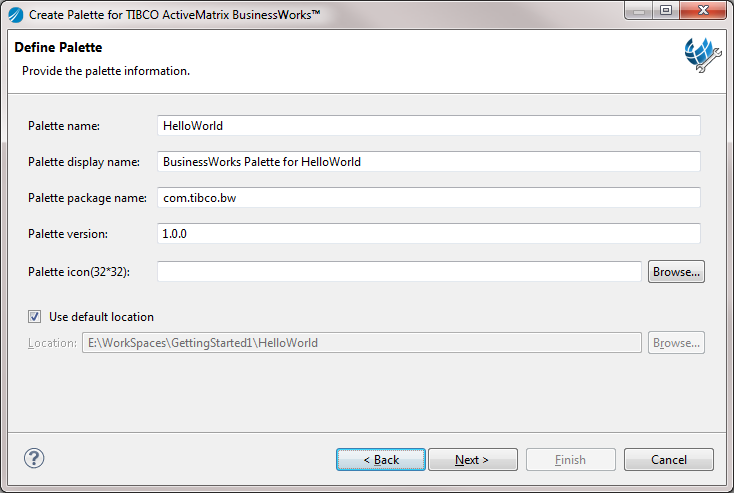
Defining a HelloWorld Palette

The first step in creating the HelloWorld plug-in is to create a SayHello activity in the HelloWorld palette.

Procedure

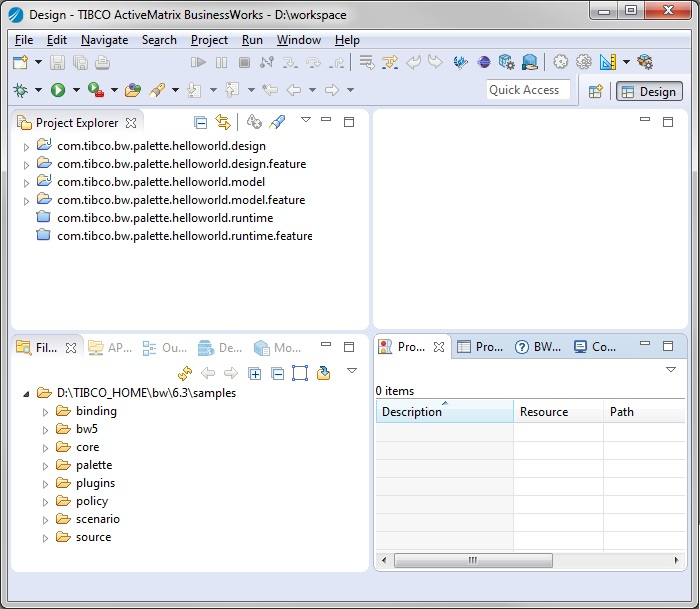
  1. Open TIBCO Business Studio in one of the following ways:
    • Microsoft Windows: click Start > All Programs > TIBCO > TIBCO_HOME > TIBCO Business Studio version_number > Studio for Designers.
    • Linux: run the TIBCO Business Studio executable located in the TIBCO_HOME/studio/version_number/eclipse directory.
    • Mac OS: run the TIBCO Business Studio executable located in the TIBCO_HOME/studio/version_number/eclipse directory.
  2. Open the BusinessWorks Plug-in Development Kit wizard in one of the following ways:
    • From the menu, click File > New > Create a new or modify BW Plug-in Project.
    • On the toolbar, click Create a new or modify BW Plug-in Project .
    • Press Alt+T.

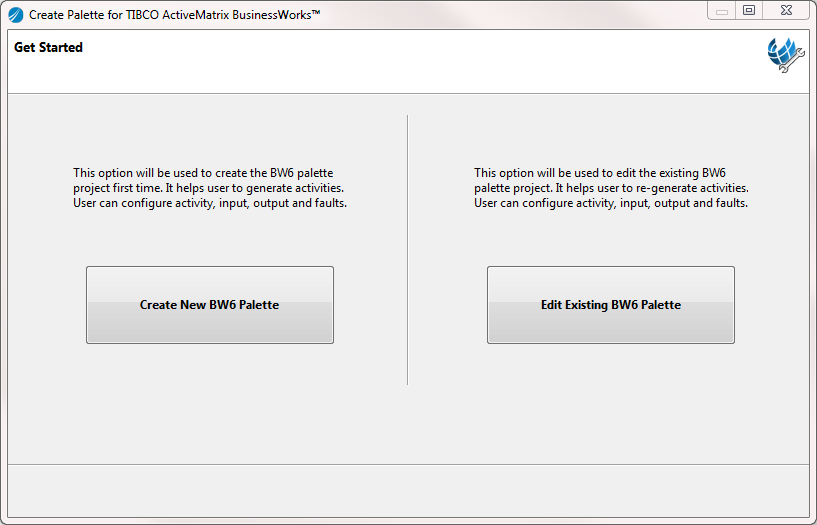
  3. In the Get Started dialog, click Create New BW6 Palette to create a palette:
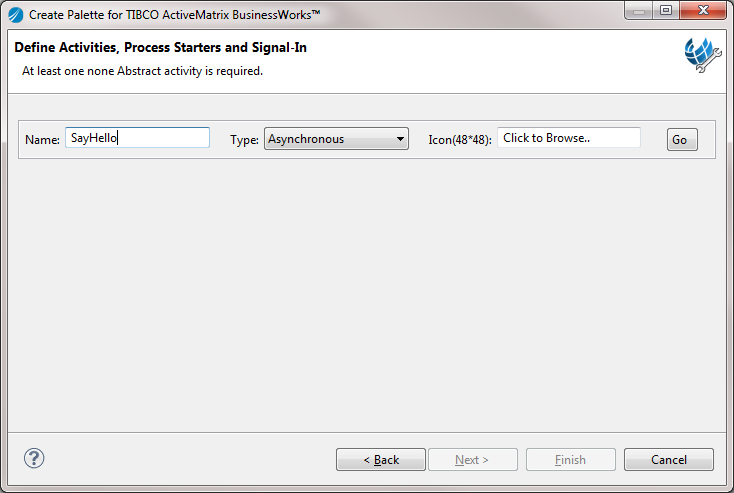
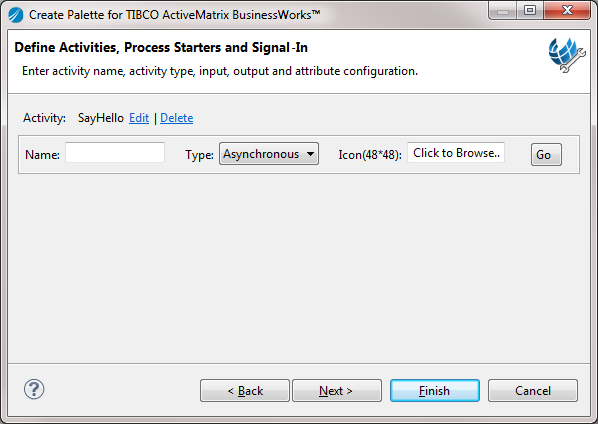
    1. In the Palette name field, enter HelloWorld as the palette name.
    2. In the Palette package name field, enter com.tibco.bw as the package name.
    3. In the Palette version field, enter the palette version that you want to use.
      By default, the palette version is 1.0.0.
    4. By default, is used as the palette icon. If you want to use another icon, click Browse to locate a palette icon.
      The size of the icon cannot be less than 32x32.
    5. Use the default location as the project folder. Click Next.

  4. In the Define Activities, Process Starters and Signal-In dialog, add and configure an activity:
    1. In the Name field, enter SayHello as the activity name.
    2. From the Type list, select Asynchronous as the activity type.
    3. By default, is used as the activity icon. If you want to use another icon, click Browse to locate the icon. Click Go to configure the activity.
      The size of the icon cannot be less than 48x48.
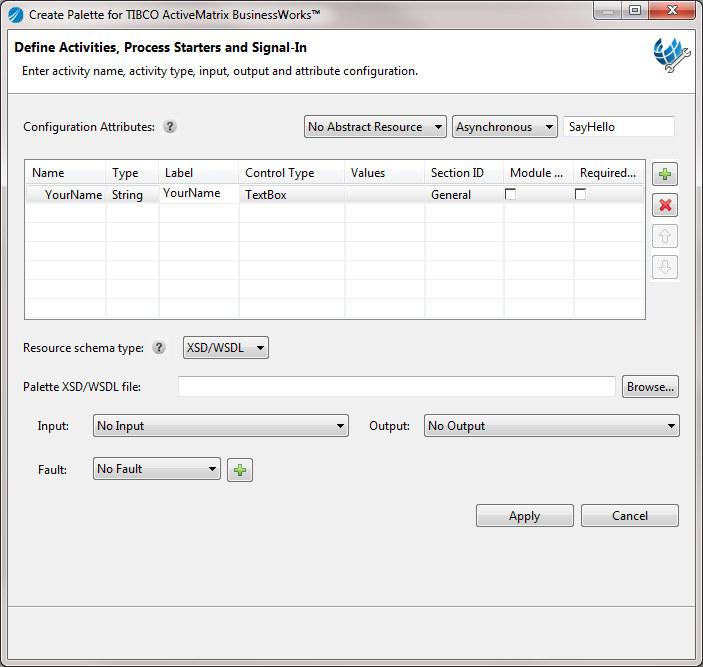
    4. Click to add an attribute for the SayHello activity and configure the attribute as follows:
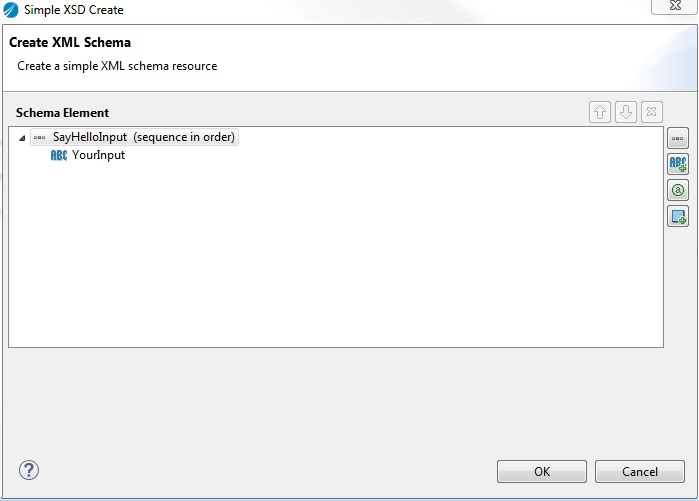
      • Enter YourName as the value of the Name attribute.
      • Select String as the value of the Type attribute.
      • Enter YourName as the value of the Label attribute.
      • Select TextBox as the value of the Control Type attribute.
      • Select General as the value of the Section ID attribute.

    5. From the Resource schema type list, select XSD Editor.
    6. Click Input to create an input schema for the activity.
    7. In the Create XML Schema dialog, click to add a primitive element, and then set the element name to YourInput. Click OK.

    8. Click Output to create an output schema for the activity. In the Create XML Schema dialog, click to add a primitive element, and then set the element name to Output. Click OK.
  5. Click Apply to save your activity configurations.
    You are now brought back to the Define Activities, Process Starters and Signal-In dialog. The configured SayHello activity is displayed.

  6. In the Define Activities, Process Starters and Signal-In dialog, click Next to verify the palette and activity configurations.
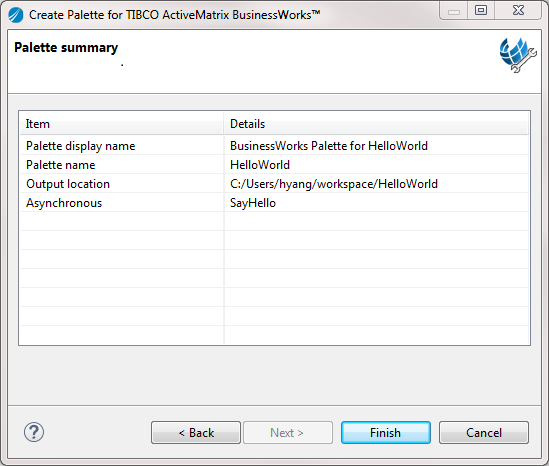
  7. In the "Palette summary" dialog, review the palette information and click Finish to generate the code for the HelloWorld palette and the SayHello activity.

  8. Change the target platform to running platform for the design-time module.
    1. Click Window > Preferences, and then click Plug-in Development > Target Platform.
    2. Click Add to add a running platform for the design-time module.
    3. In the Target Definition dialog, click Default to choose the running platform. Click Next.
    4. In the Target Content dialog, click Finish.
    5. You are back to the Target Platform dialog, select the Running Platform (Active) check box. Click Apply, and then click OK.

    By default, the target platform is bw-runtime after launching TIBCO Business Studio. See Target Platform for more details.

  9. Close the runtime bundle and feature, and open the design bundle and feature.

Result

When the code generation is completed, the design-time, model, and runtime bundles and features are displayed in TIBCO Business Studio.

What to do next

Adding Business Logic