Adding and Configuring Activities
An activity is an individual unit of work in a process. Each activity is represented by an icon in TIBCO Business Studio and consists of a set of configurations.
Procedure
- In the Name field, type a name of the activity that you want to create.
-
By default,
 is used as the activity icon. If you want to change the activity icon, click the text box next to the
Icon field, and select an icon to represent the activity.
The supported image formats are .jpg, .gif, .png, and .jpeg. The size of the icon must be 48x48 or larger. BusinessWorks Plug-in Development Kit automatically generates the icon in size of 16x16, 32x32, and 48x48.
is used as the activity icon. If you want to change the activity icon, click the text box next to the
Icon field, and select an icon to represent the activity.
The supported image formats are .jpg, .gif, .png, and .jpeg. The size of the icon must be 48x48 or larger. BusinessWorks Plug-in Development Kit automatically generates the icon in size of 16x16, 32x32, and 48x48. -
Click
Create to configure the activity. Click
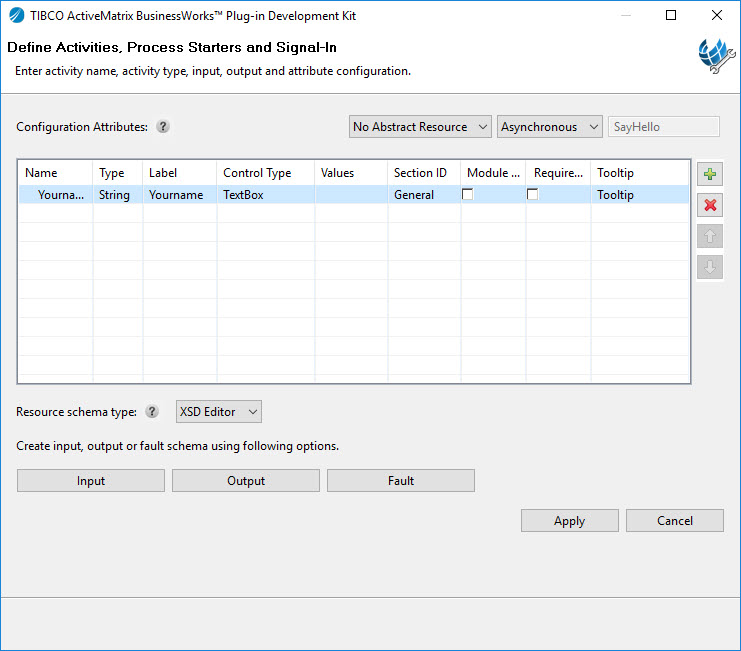
 to add attributes for the activity. Each activity attribute contains the following properties:
The below table describes the attributes for the activity which you have created.
Attributes Description Name Name of the activity. Type Type of the attribute. Label Display name of the attribute. The display name is the field name displayed in TIBCO Business Studio. Control Type Control type of the attribute. The following types are supported: Hide, TextBox, FilePickerField, ComboViewer, Button, PasswordField, DirectoryPickerField, ActivityReferenceField, PropertyField.
BusinessWorks Plug-in Development Kit automatically selects a control type according to the selected attribute type.Note: If you set the control type of an attribute to Hide, the attribute of the activity is not displayed on UI.If you want to use shared resources, select PropertyField from Control Type list. For more details, see Using Shared Resources.
Values Values to be displayed as default options. Use comma (,) to separate values when the control type is ComboViewer.
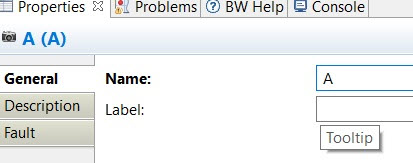
Section ID Name of the section that the attribute belongs to. The following three options are supported: Module Property Whether the attribute supports the module property feature or not. Required Field Whether the attribute is required or not. Tooltip You can specify for activity fields. The content will be shown in the General tab of the Properties view.