Configuring Sybase Database by Using Custom JDBC Driver
You can configure Sybase Database by using the custom JDBC driver.
Procedure
Note: Follow the same steps to configure the Sybase database by using JDBC custom driver on TIBCO BusinessWorks™ Container Edition Studio.
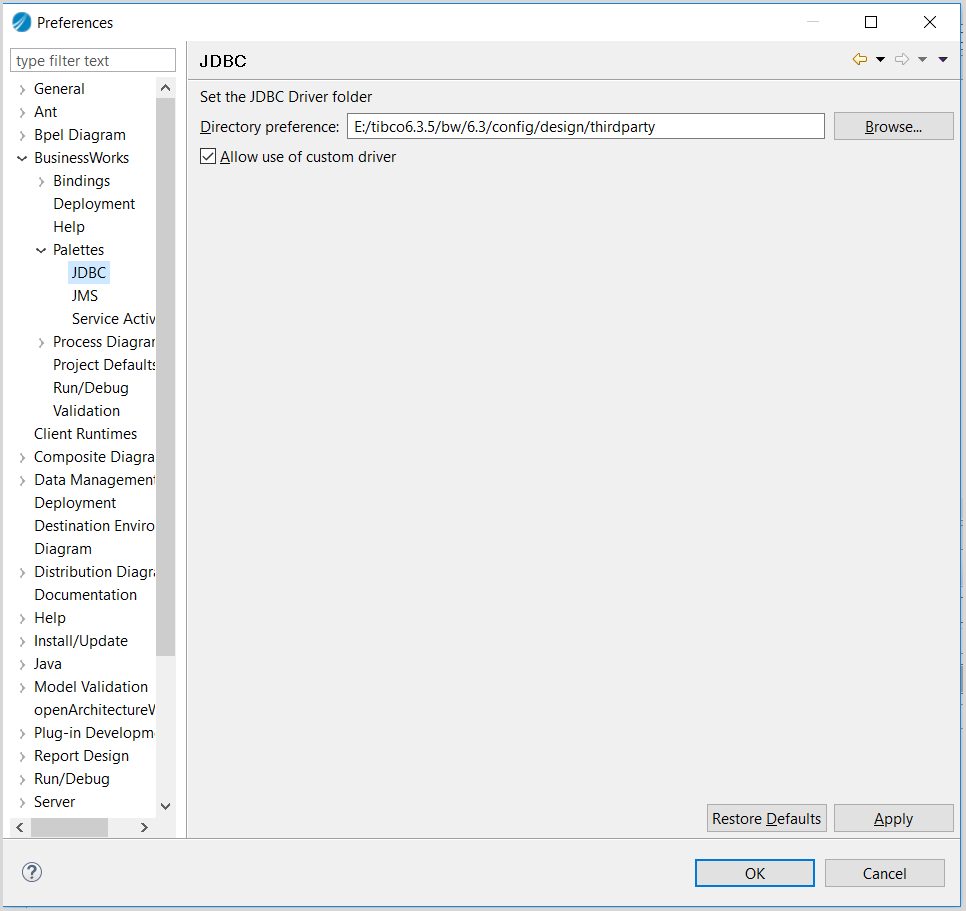
- Select the option Allow use of custom driver under BusinessWorks > Palettes > JDBC, click Apply, and then click OK.
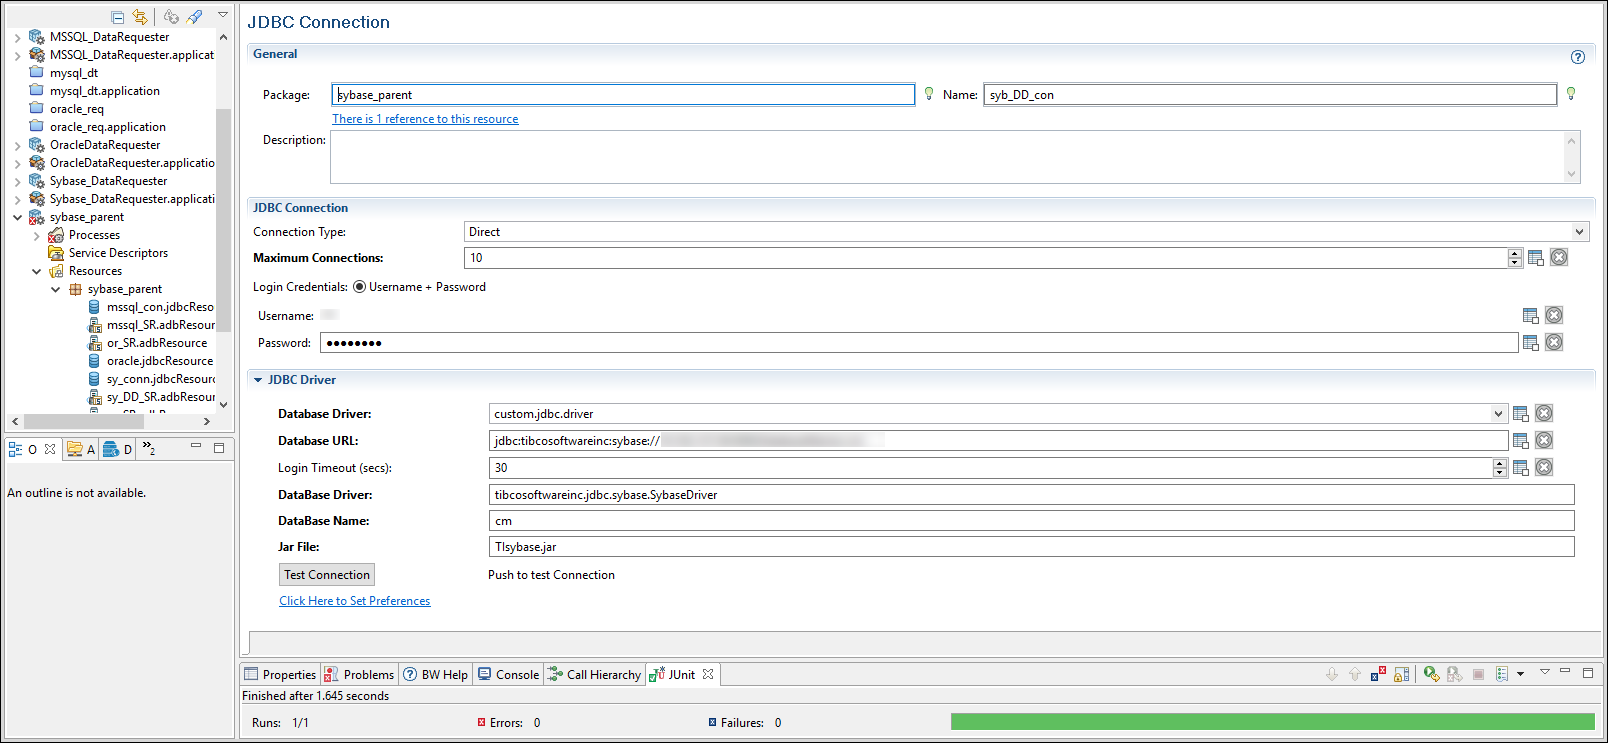
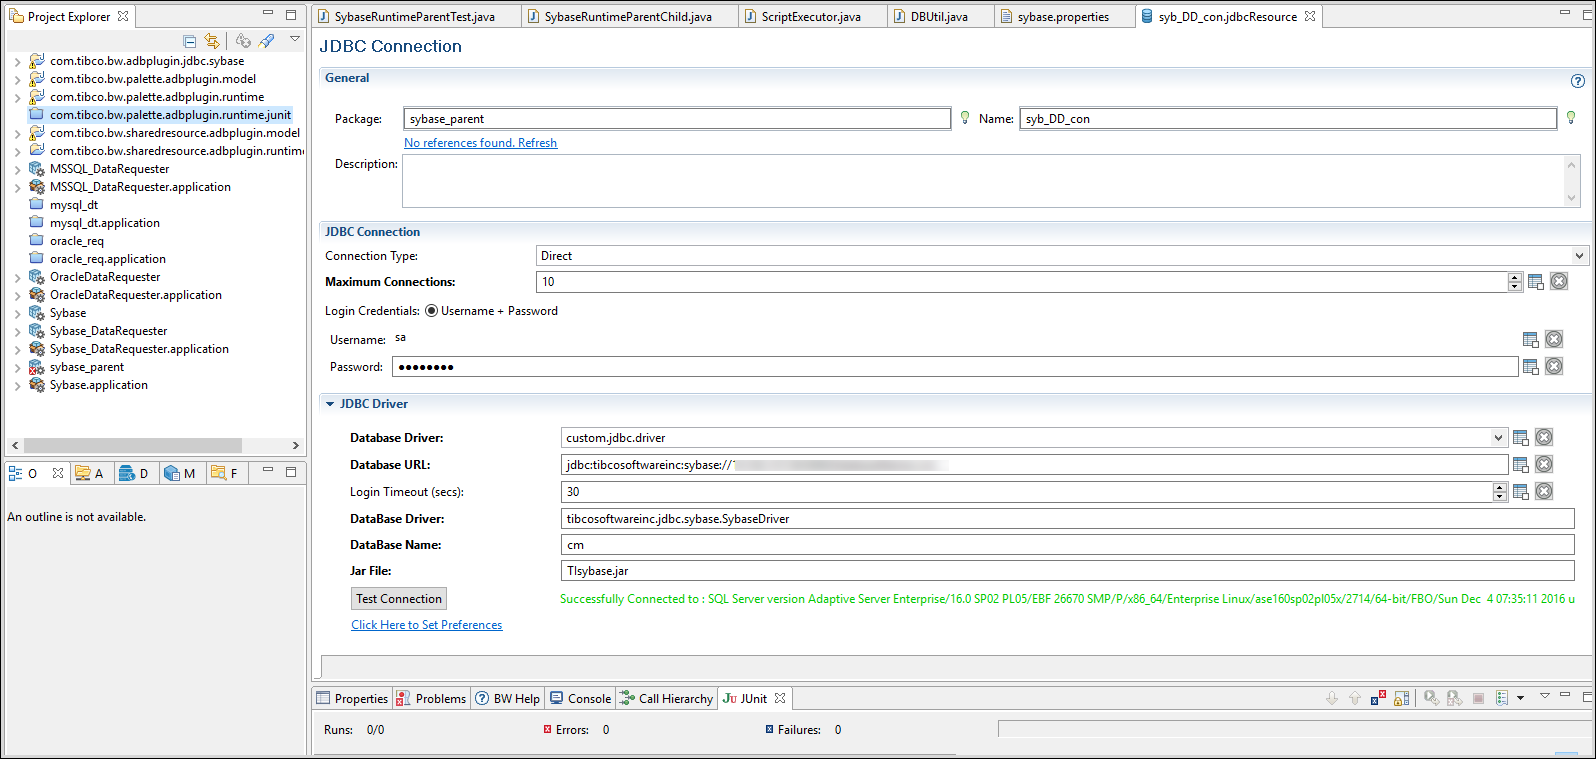
- Create a new JDBC connection resource and select custom.jdbc.driver from the Database Driver list. Enter the Driver details and user credentials in the project that you have created.
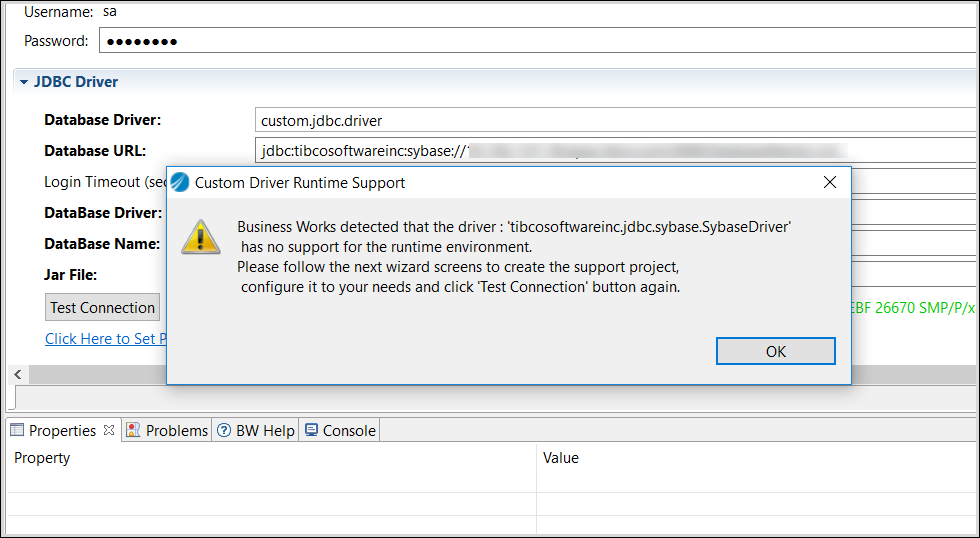
- Click Test Connection. A pop-up window is displayed.
- Click OK. A new Plug-in Project with a prepopulated project name is displayed. Click Next.
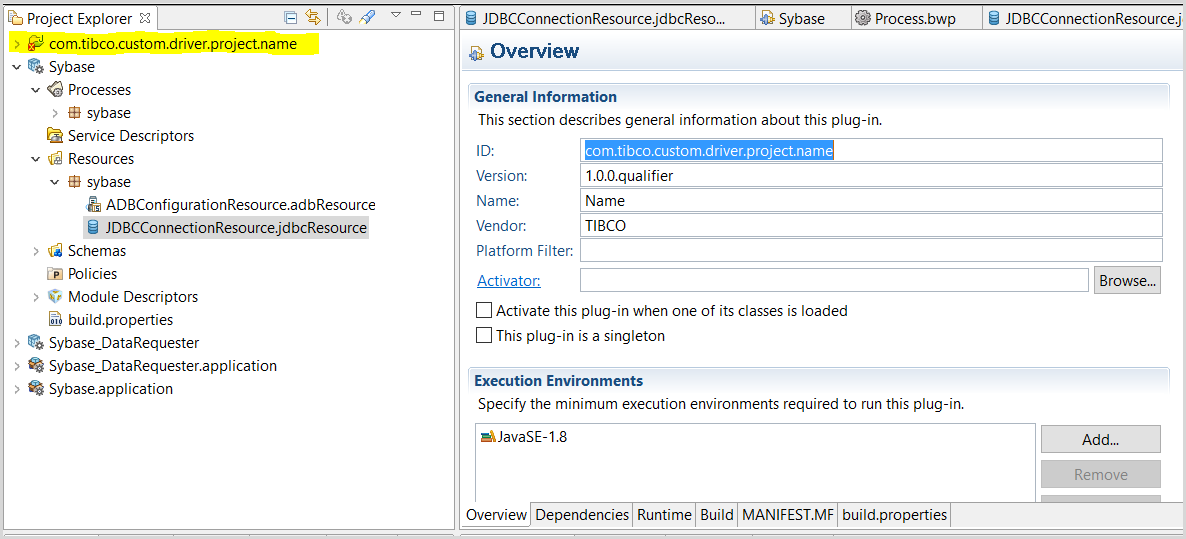
- Click Finish. A custom project is created in the workspace named as com.tibco.custom.driver.project.name with compilation errors.
-
Go to JDBC connection resource and click
Test Connection again. A connection is established successfully.
After the connection is established successfully, delete the custom plug-in project "com.tibco.custom.driver.project.name" from the workspace that was created earlier and run the activity. The activity runs successfully.Note: If the custom project is not present in the workspace and if you click again on the Test Connection button in the JDBC Connection shared resource, then every time the custom project is created in the workspace as mentioned in the steps in this section. You have to delete the same custom project before running the activity.

Copyright © 2021. TIBCO Software Inc. All Rights Reserved.