Installing the Feature from the Repository

You can now install your feature into multiple TIBCO Business Studio installations on different machines.

Procedure

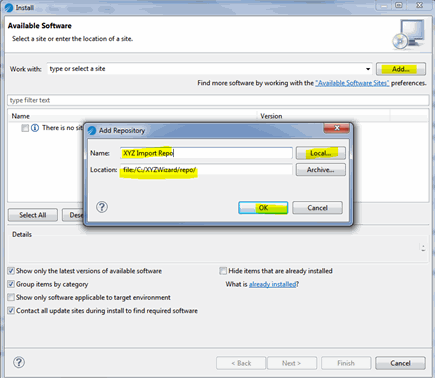
  1. Click Help > Install New Software… and press Add… to add a new repository. Click Local… and choose C:\XYZWizard\repo folder, then set the name of the repository (for example, XYZ Import Repo). Click OK .
  2. Select your feature to install and click Next and you see the Install details. (If you haven't specified a category you may need to clear the Group items by category check box to be able to see and select the feature to install.)
  3. Click Next to accept the licenses (this can be filled in in the feature editor) and click Finish. Accept the warning about unsigned content by clicking OK, and restart Eclipse at the end of the installation.
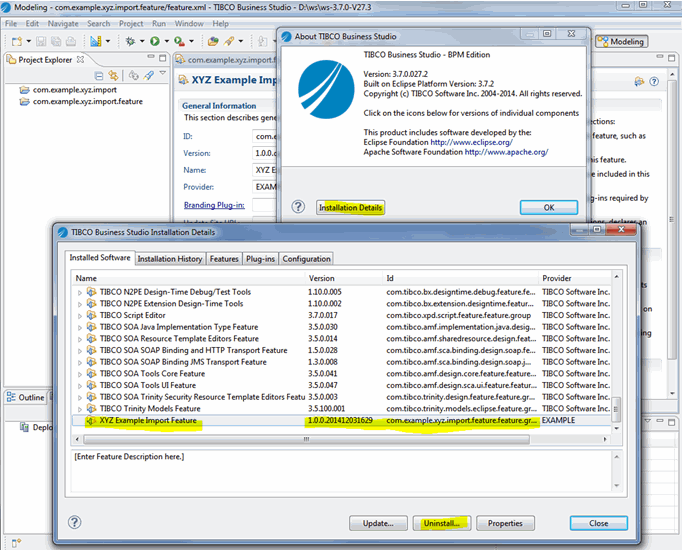
  4. After restarting Eclipse you can confirm that your feature has been installed successfully by clicking Help > About TIBCO Business Studio and clicking Installation Details.

What to do next

The feature can be uninstalled by clicking Uninstall….

You must switch back to the TIBCO ActiveMatrix Runtime target platform when you have finished creating your P2 Repository. See Recreating TIBCO Active Matrix Runtime Target Platform Definition for steps to take if your TIBCO ActiveMatrix Runtime target platform is missing.