CDS Client Service
The CDS Client Service is a simple example of a user interface that demonstrates CDS Services and Hook discovery by using the CDSServices palette.
For more information about CDS Hooks services and discovery, see
CDS Hooks documentation.
Prerequisites
- On Google Chrome browser, install Moesif Origin & CORS Changer extension tool then enable it and turn it on.
- From the https:// edelivery.tibco.com, download and copy the CDS_Services_Client.zip file to a test folder and extract it.
- Start a
ActiveMatrix BusinessWorks CDS Services process.

Example 1: CDS Client Service User Interface
This example consists of two html pages - ConnectionTest.html and index.html. Open the ConnectionTest.html in the Google Chrome browser.
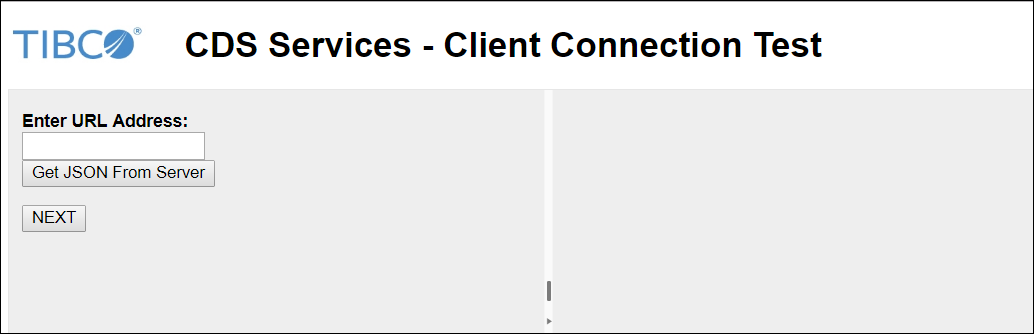
Example 2: Connection Test
The example illustrates how to test the connection and display the available CDS Services in JSON in CDS Hook services discovery format.
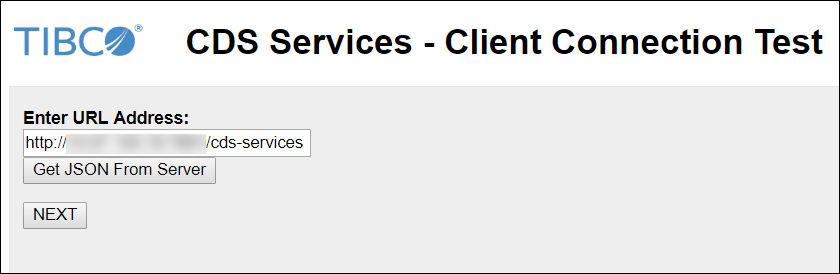
- Enter the CDS Services URL address that points to the server, which offers the CDS Hooks services discovery. This can be a CDSServices ServicesDiscovery sample process or can be any server offering CDS Hooks patient-view services.
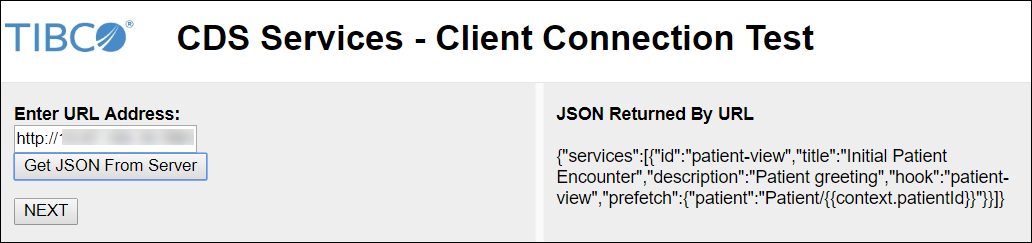
- A successful test returns the CDS Services available in a JSON format in the adjacent pane on the right side.
An unsuccessful test returns the following errors:
- After the URL is successfully tested, click Next to test the CDS patient-view service discovery.
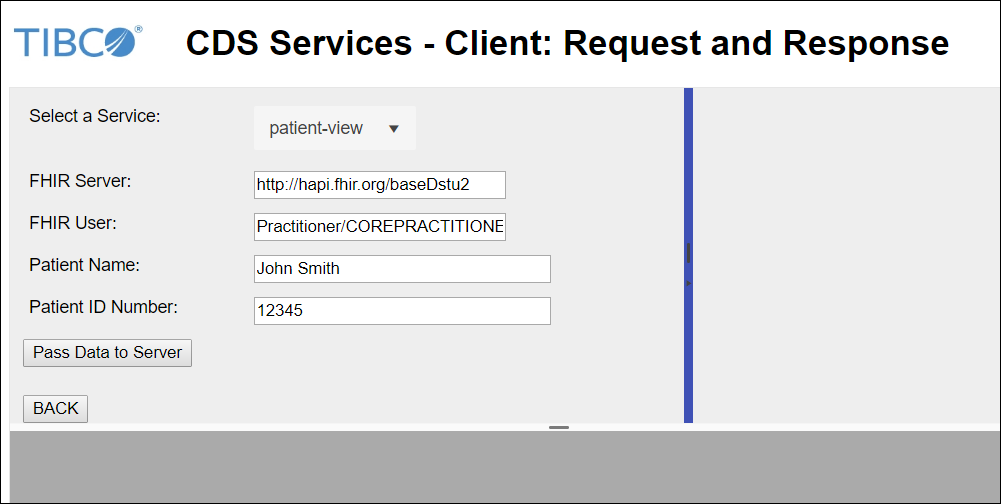
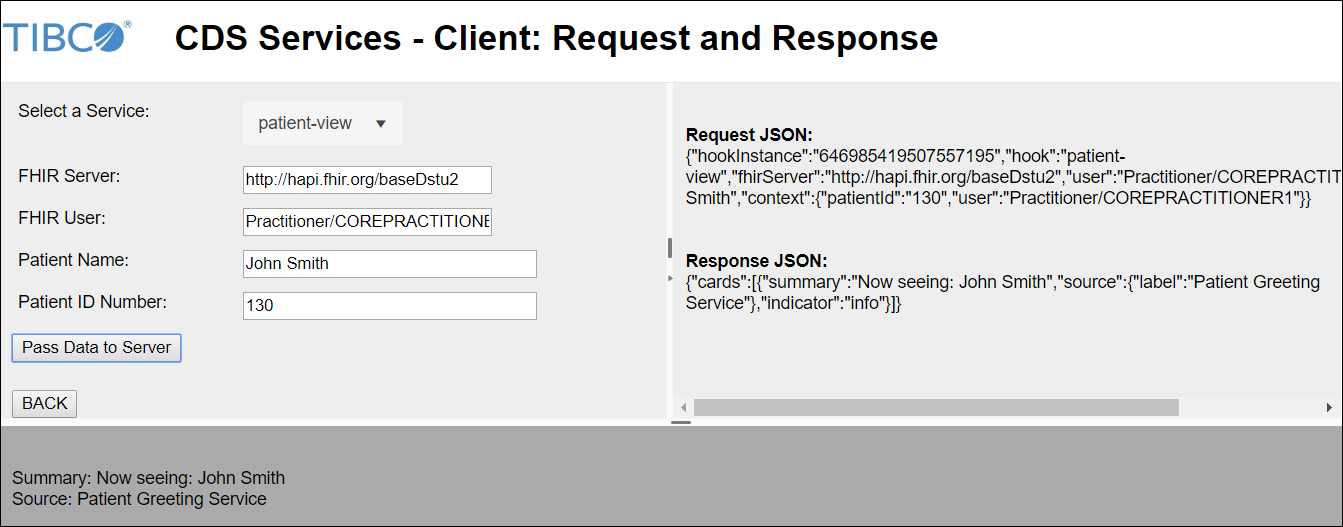
Example 3: CDS Service Patient-View Hook
Open the ConnectionTest.html in the Google Chrome browser. The patient-view hook example illustrates how a patient-view hook can invoke a remote service that returns the CDS patient-view response card.
- Select a service from the list.
- Enter the address of the FHIR server. You can use any one of the following sample servers:
- Enter the value in the FHIR User and Patient Name fields
- Enter the Patient ID Number. You can use the following values:
- Click Pass Data to Server to send the request to the remote service. The request posted to the server and the response received are displayed in the adjacent pane on the right side. The request and the response are displayed in JSON format.
- The CDS card that is returned is displayed in a readable format in the lower pane.
Copyright © 2021. Cloud Software Group, Inc. All Rights Reserved.