Defining an Organization Model for the Process
An organization model captures and defines information about how an enterprise is organized. The model represents the different entities in the organization (such as positions, organization units or groups), their organizational structure and the relationships between them.
The model can also describe characteristics that can be possessed by those entities—such as privileges, capabilities or location—but this simple tutorial does not include any of these characteristics.
A process designer can use the information defined by the organization model to ensure that the process sends the right work to the right people at the right time.
Only entities defined in the organization model can be assigned (as participants) to perform user tasks in processes. See Adding a Position as a Participant to the Process.
Procedure
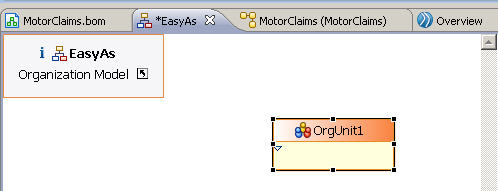
- Click the EasyAs organization tab. The Organization Editor opens. You use the Organization Editor to produce an organization diagram, showing the structure of an organization, the organization units and positions it contains, and the relationships between them. The Organization Editor:
- Position the mouse pointer anywhere in the Organization Editor canvas, then click to add an organization unit to the organization. Or select the Organization Unit from the palette and drag and drop it.
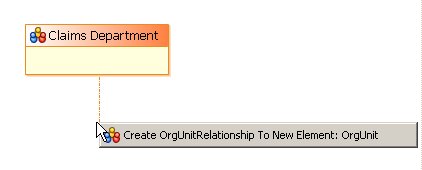
- Click the Hierarchy tool in the palette. Click on Claims Department, hold the mouse button down, and drag the pointer downwards a short distance. When you release the button, the label Create OrgUnitRelationship to New Element: OrgUnit displays.
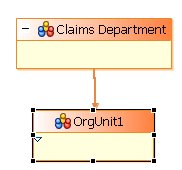
- Click on that label and a new organization unit is added. It is linked by a Hierarchy link to Claims Department, indicating that the new unit is subordinate to Claims Department.
-
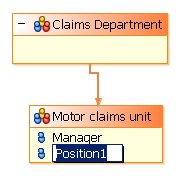
Change the label of the new unit to Motor claims unit.
Drag and drop Position
 from the palette into the Motor claims unit. A position called Position1 is created within the unit.
 - Click Position1 to allow you to change the label for it to Manager. Click away from the field in the Organization Editor to save your label change.
Result
Click ![]() or press Ctrl+S to save your changes to the organization model.
or press Ctrl+S to save your changes to the organization model.
Next you should complete Adding a Position as a Participant to the Process