Creating Message Signatures
Procedure
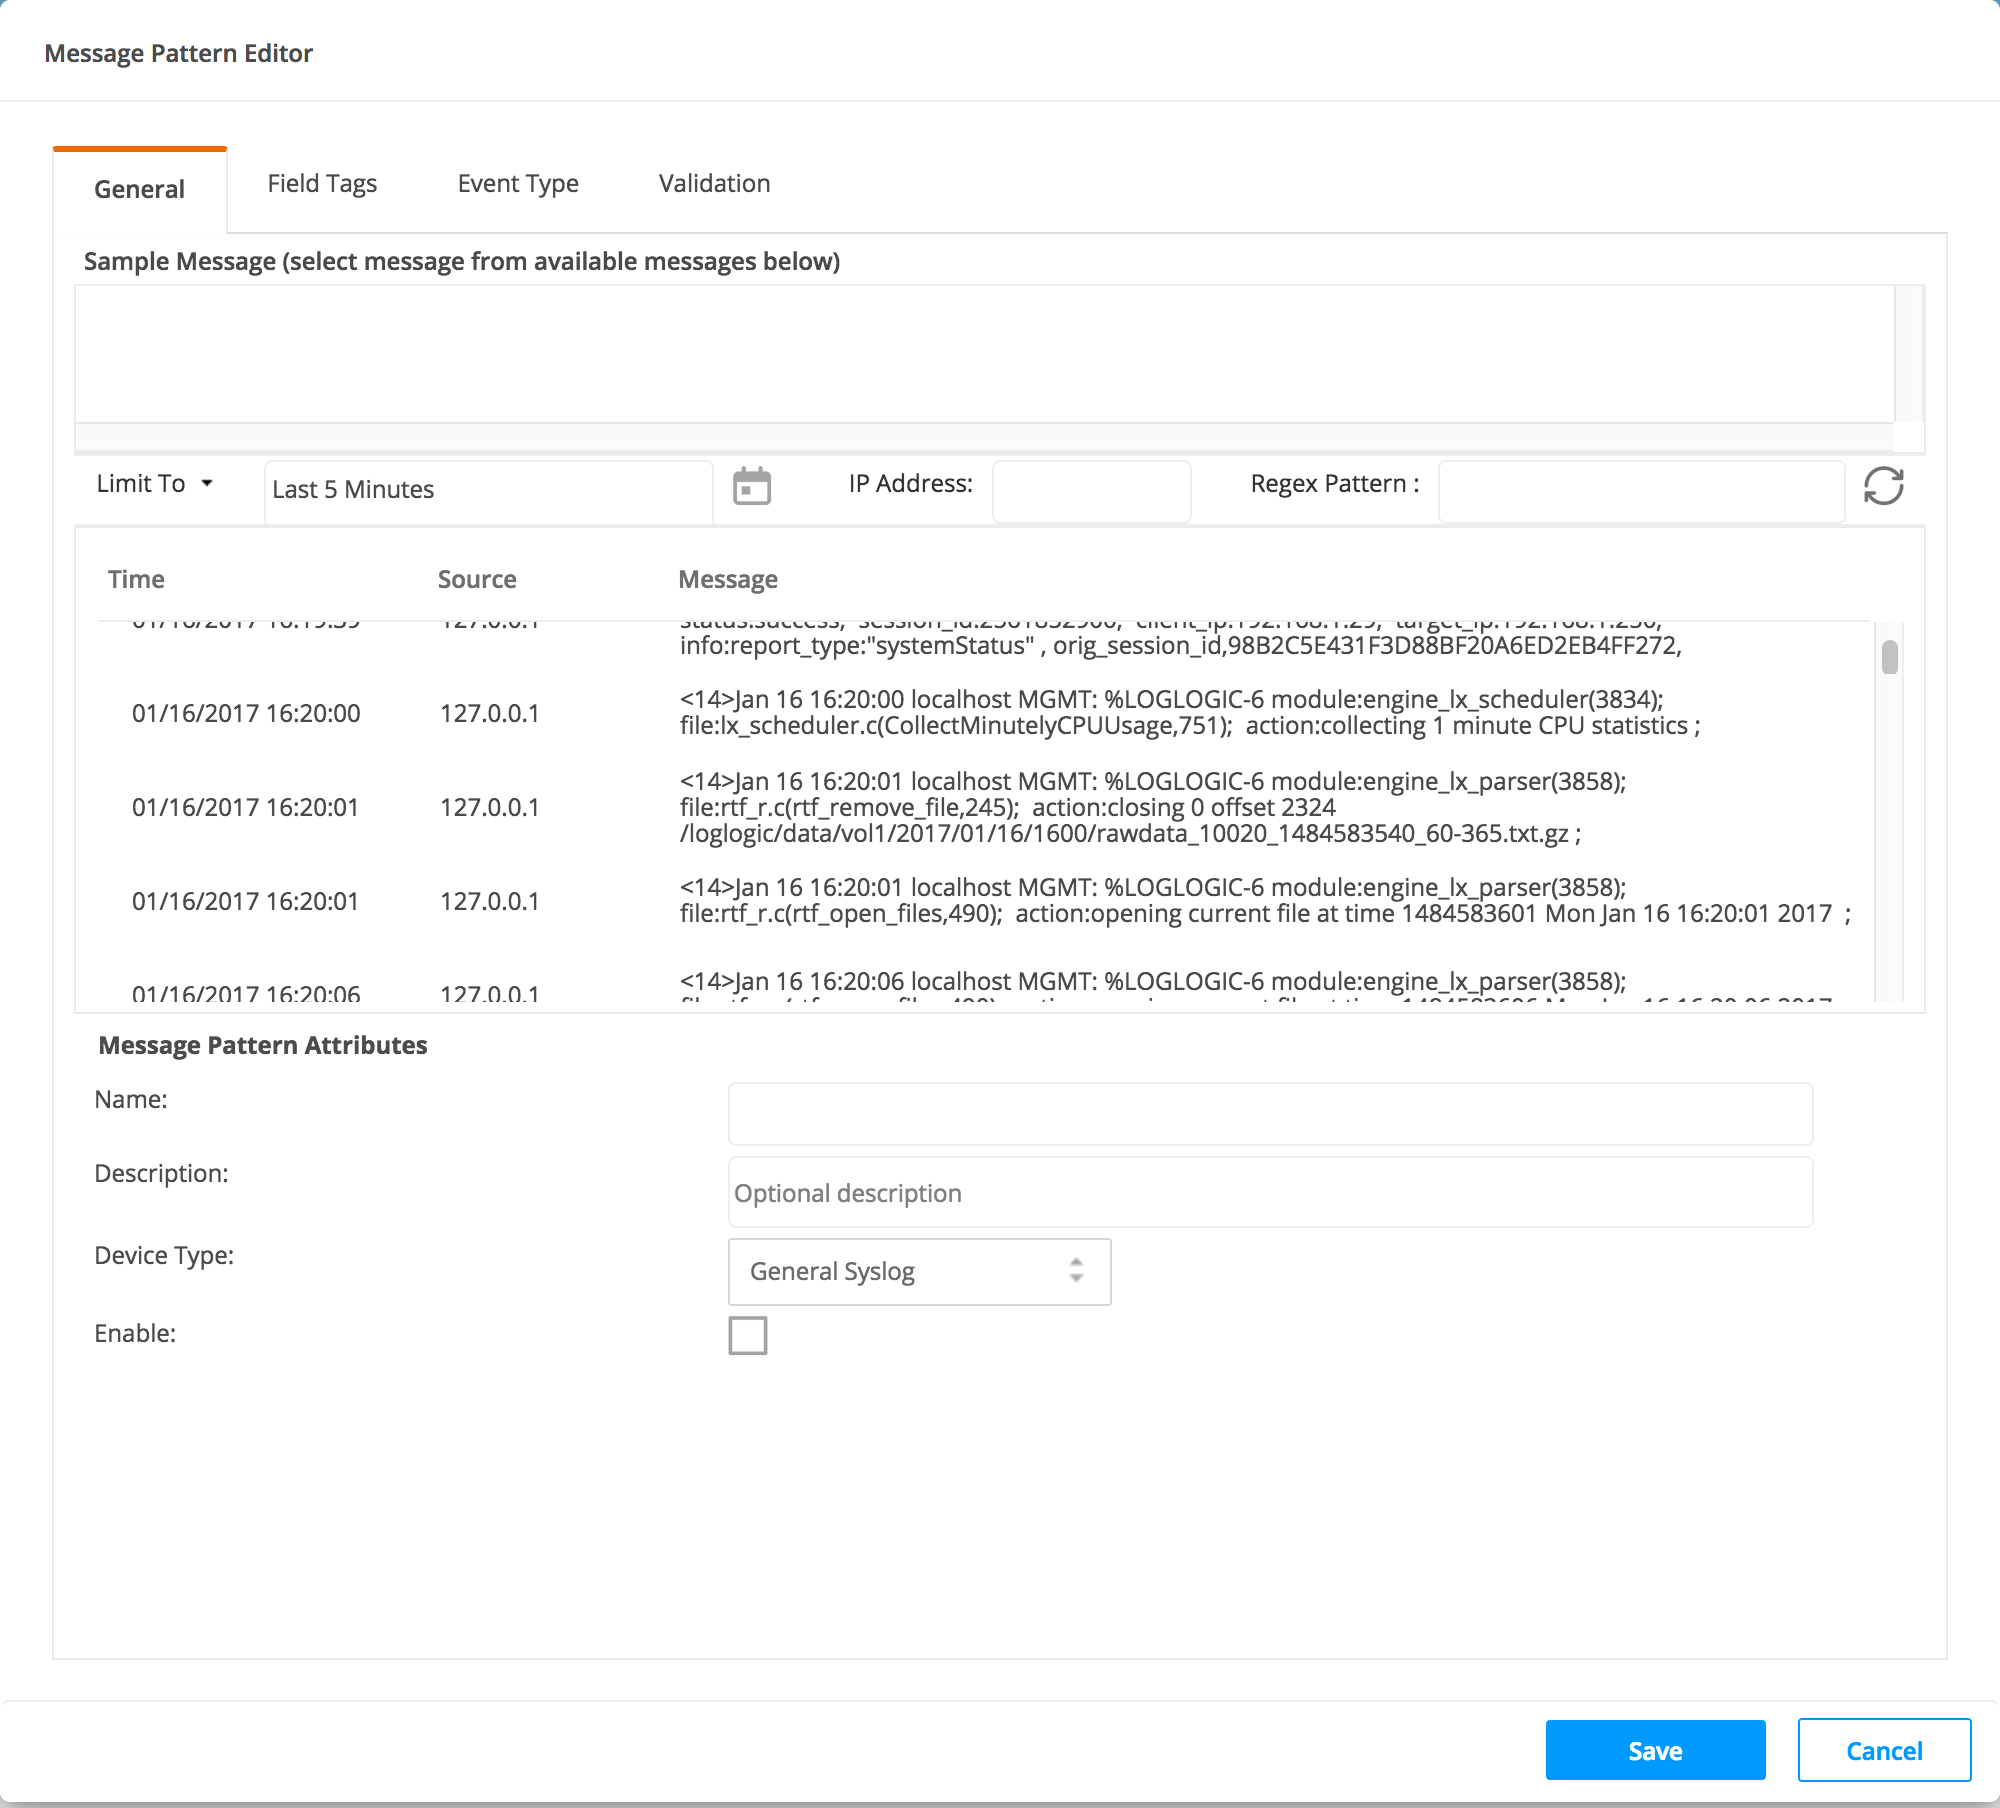
- Click Create. The Message Pattern Editor opens.
- On the General tab, highlight a message in the lower pane and click it. Your selection will appear in the Sample Message pane.
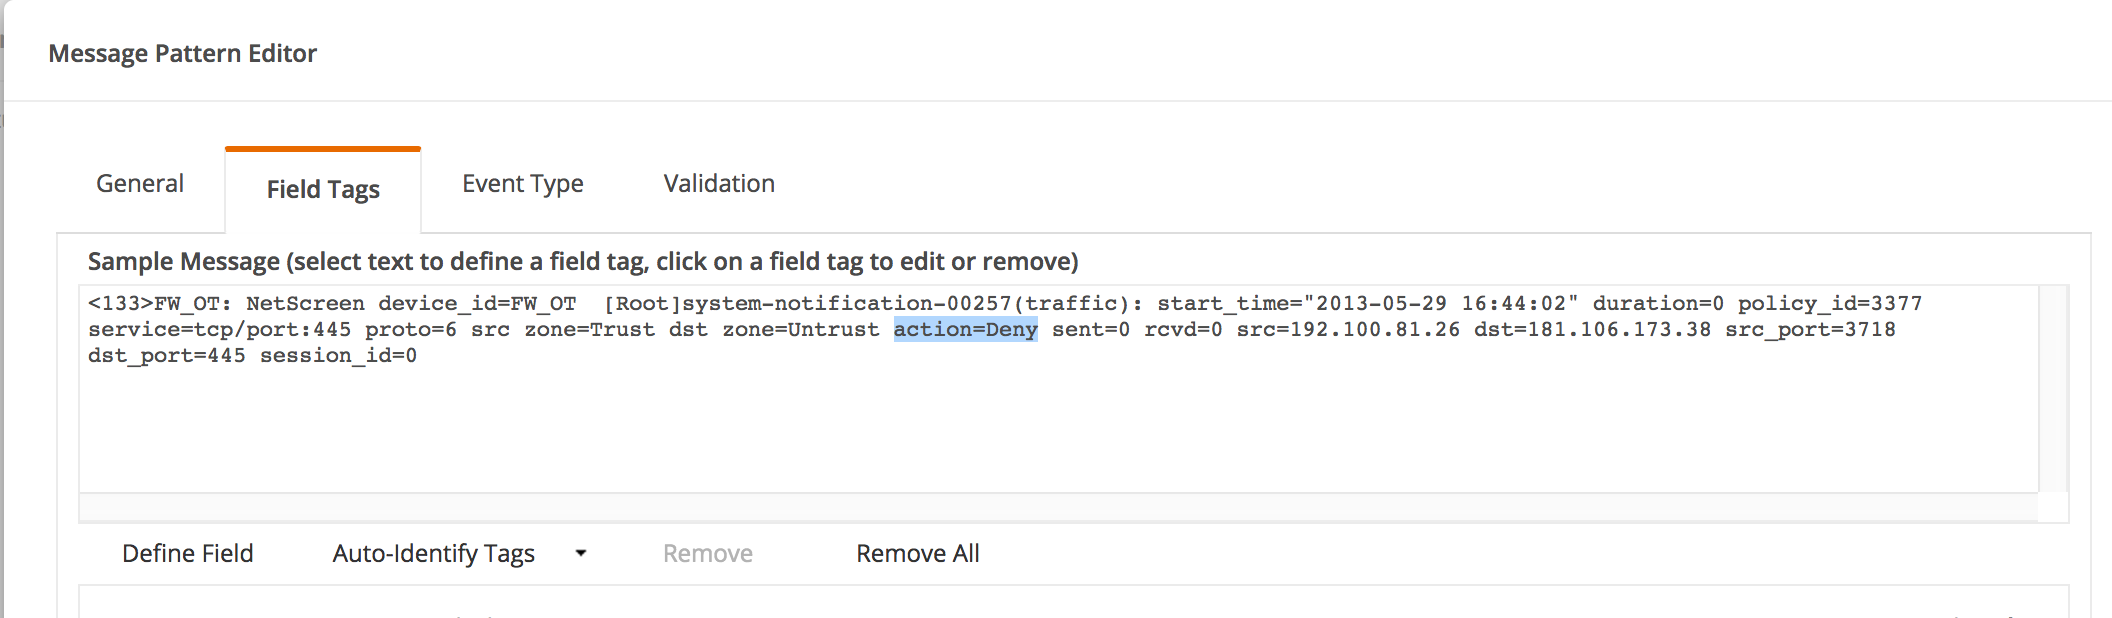
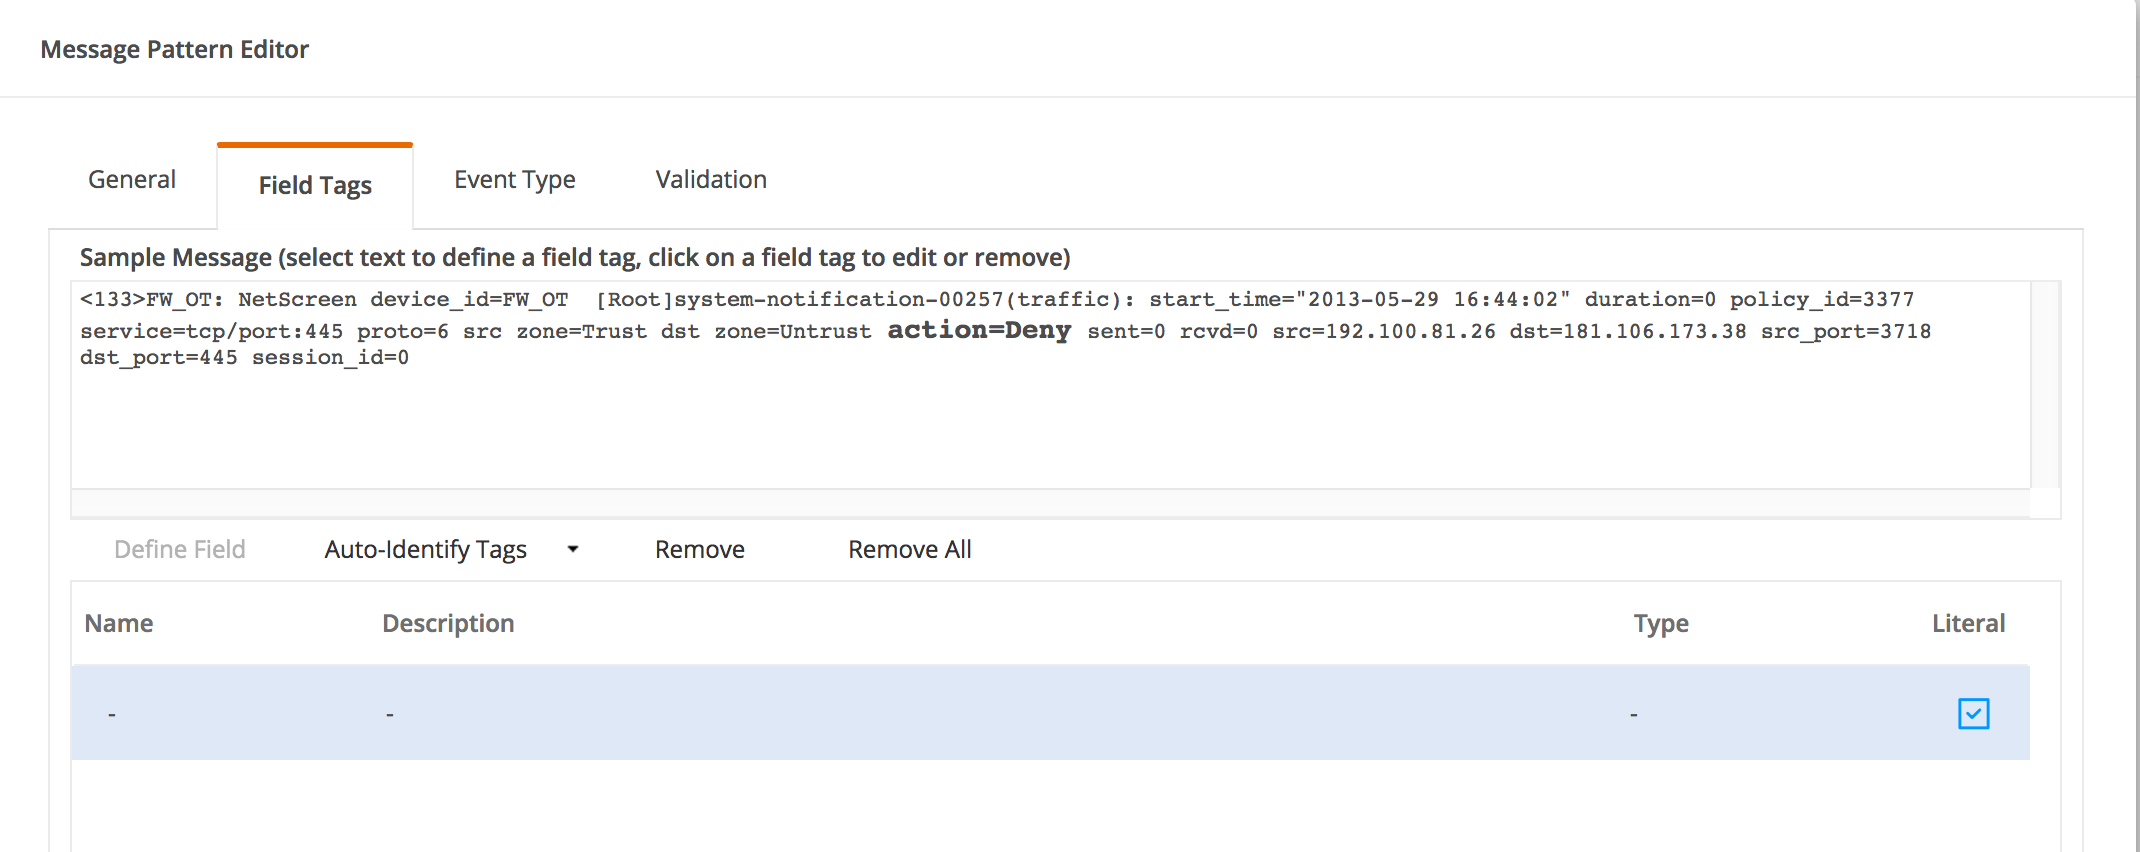
- Highlight a portion of the Sample Message you want to use as a Field Tag and click Define Field. The portion selected will appear grayed-out. The application will recognize your selection as one of 15 common tags in the Tag Library. Further identifying information will appear in the Tag Attributes section. You can edit these entries, or select different choices from the and Extract as: drop-down menus.
- If you select the Literal check box, the pattern matcher will search for that exact substring in the messages. Your selection will appear in bold face type.
-
To create a new tag, click the
 button to open
Create Field Tag window. Enter the
Name
and
Description fields. Click
OK.
button to open
Create Field Tag window. Enter the
Name
and
Description fields. Click
OK.
-
To create a new event type, click the
button to open
Create Event Type window. Enter the
Name, and
Description fields. Click
OK.
-
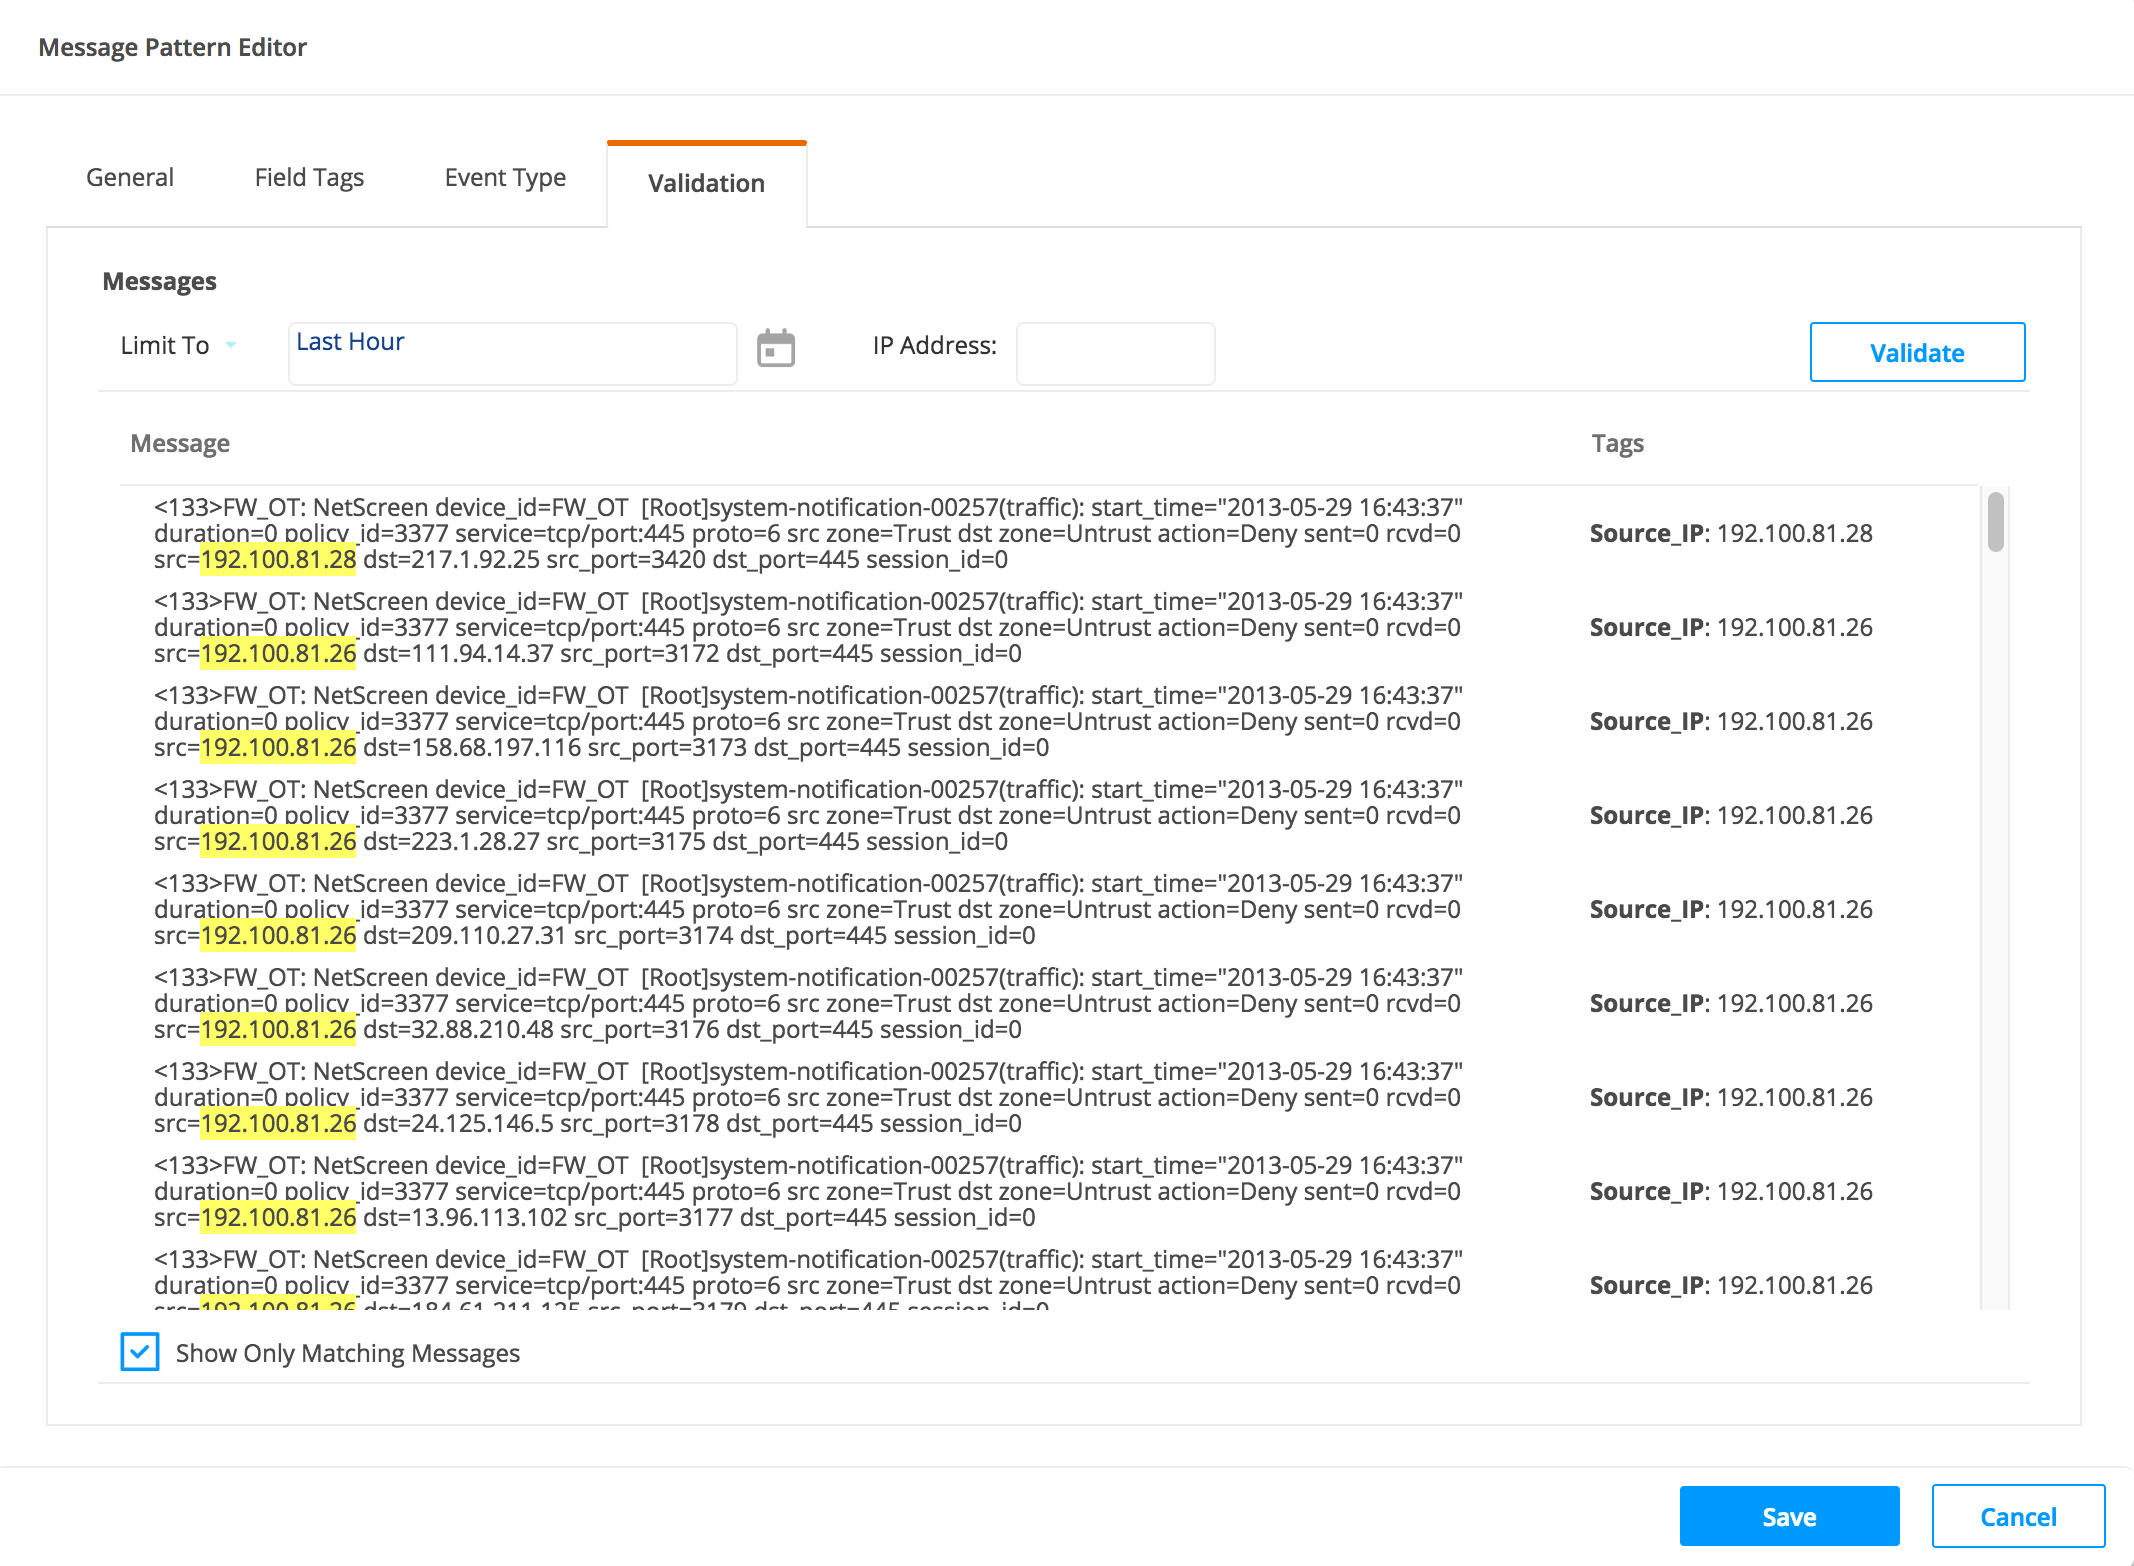
Click
Validation tab, and then click the
Validate button.
If the Show Only Matching Messages check box is selected, the messages with the Tag Name is highlighted in color, and the Tag value extracted appears on the right. If the Show Only Matching Messages check box is not selected, all messages appear strike-out for the non-matching message patterns.

Copyright © Cloud Software Group, Inc. All rights reserved.