Single Node Multi-Instance Topology
The Single Node Multi- instance or Vertical Scaling deployment topology can be achieved by running multiple instances of the micro-services on a single machine.
The Orchestrator component is an integral part of omsServer. By running multiple instances of the micro-service, Orchestrator instances form a cluster. The name of the cluster is passed as DOMAIN_ID property with the default value as 'ORCH-DOMAIN' and must be the same in all the scripts.
For example, if 4 micro-service instances are started on a node, the total number of listeners on tibco.aff.orchestrator.order.submit.queue is 4 times the value configured in ConfigValues_OMS.xml.
You can use the following steps for deployment topology.
Prerequisites
- TIBCO Fulfillment Order Management is installed on top of all the underlying required products on the designated server node.
- Correct configurations for the default topology, Single Node Single Instance, are in place.
- The default micro-service instance under $AF_HOME/roles is up and running with all the server and client side components deployed successfully.
Creating New Cluster Members
- Access Fulfillment Order Management configurator GUI application in a supported browser through the HTTP interface of the default micro-service instance using the URL http://<host>:<port>/#/login.
- Select Order Management System configuration.
- Navigate to the existing member Member1 in the cluster. Right click Member1 to pop up the menu. Select Clone as shown in the following figure:
-
In the Clone Member dialog-box, provide a unique name for the new member in cluster, for example, Member2 and click Create. A new cluster member namely Member2 is created.
At this step, a copy of the complete <Server name="Member1"> element is created as <Server name="Member2"> containing the exactly same configuration properties as the original element in ConfigValues_OMS.xml.
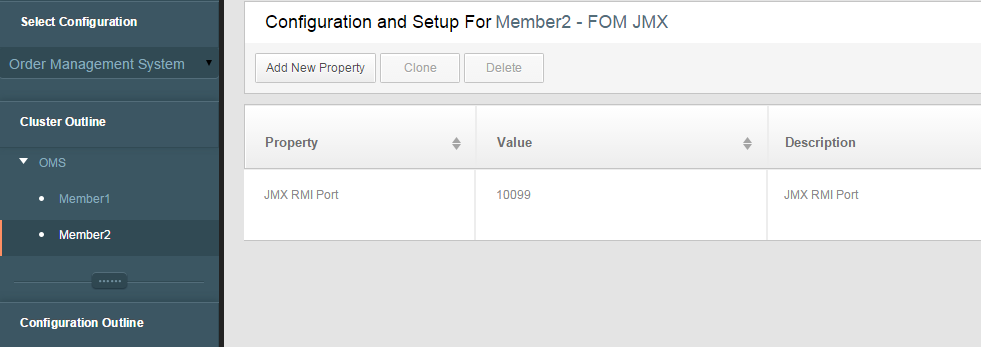
- Change the JMX RMI port for Member2 using the following configuration:
- Save the configuration changes. The newly created Member2 is saved in the $AF_HOME/roles/configurator/standalone/config/ConfigValues_OMS.xml file.
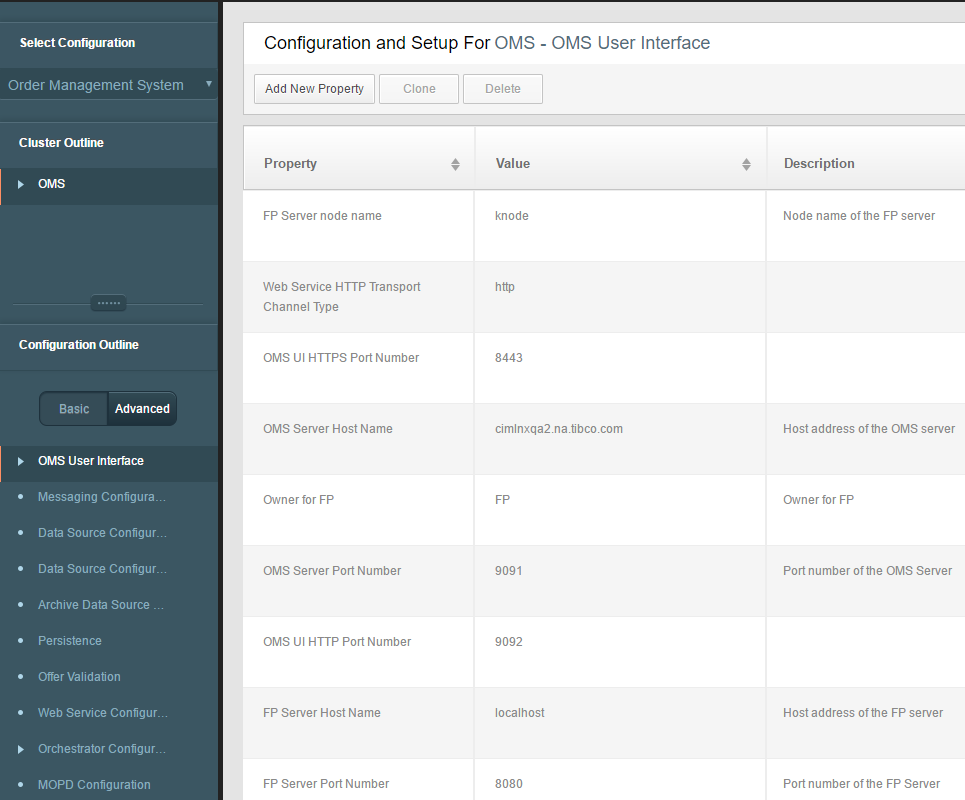
- The user interface is at a cluster level, which means it is available for all the configured members; therefore, select OMS under Cluster Outline and select User Interface to configure the members and change the values for the following properties. Provide unique values as displayed:
- Save the port configuration changes.
- Perform steps three to six for creating additional members Member3, Member4, Member5, and so on in the cluster. This should be done according to the requirement.
- Save the configuration changes. The Configuration Saved popup opens. At this step, the number of copies of the complete <Server name="Member1"> element are created as <Server name="Member2">, <Server name="Member3">.


Note that the deployment of multiple OMS instances does not provide HTTP load balancing capabilities out of the box. However, any third party load balancer can be used to balance the load across multiple instances of OMS. For this, no specific configuration is required. The only requirement is that the load balancer must have support for the sticky session. Sticky sessions mean the load balancer always directs a given client to the same back-end server.
Hardware Load Balancer (HLB), which has Layer 7 capability, can direct the traffic and maintain session persistence for web applications using session cookies. It does not rely on the IP address. Typically, HLB inserts a cookie that the load balancer creates and manages automatically to remember which back-end server a given HTTP connection should use. And then it would always direct the request originating from that client browser to the same server. Some of the HLBs which support layer 7 capability include Barracuda, jetNexus, and F5.
The load balancing for JMS interfaces is provided out of the box. The consumer count on each incoming JMS destination used by omsServer and jeoms is automatically multiplied by the total number of deployed instances.
Adding Cluster Members to a Database
- An entry for the default member Member1 in the default cluster ORCH-DOMAIN is already present in the DOMAINMEMBERS table of the OMS database.
-
To deploy and run additional members in the Orchestrator cluster, corresponding entries must be added. For this, refer to the following insert statement in the $AF_HOME/db/oracle/oms/OMS_SeedData.sql script.
insert into domainmembers (memberid, description, domainid, clusterid, isclustermanager, seqnumber, heartbeattimestamp, lastupdatetimestamp, status, is_static) values ('Member1', 'This is Member1 in Orchestrator cluster domain.', 'ORCH-DOMAIN', null, null, 0, null, null, null, 0); - Replace the values for the memberid and description columns in the insert statement according to the names of the additional members created in previous steps. Prepare one insert statement for each new member to be added.
- Run the insert statements prepared for all the new members on the OMS database schema. Also run the commit statement to commit the insert changes.
-
Run select * query on DOMAINMEMBERS table and verify the newly added members.
Note: Always add only the required number of member entries to the DOMAINMEMBERS table. For example, if 10 instances are required to be run in the ORCH-DOMAIN cluster, add only the corresponding 10 entries in the DOMAINMEMBERS table. For deleting the existing entries corresponding to the members which are not required to run, the following delete statement can be used by replacing the placeholder entries in the parenthesis with the actual memberid entries.delete from domainmembers where memberid in ('member1_id', 'member2_id>', ...);
Creating Additional Micro-Service Instances
- Stop the running instance of the default micro-service.
- Create as many copies of the roles directory under the $AF_HOME directory as the number of members configured previously to be run in the cluster.
- Enter the admin database details in the configDBrepo.properties file, and change the port number accordingly. The port numbers in $AF_HOME/roles/omsServer/standalone/config/application.properties must be changed for added members.
- In case of static allocation of member IDs to nodes, set the system properties NODE_ID and DOMAIN_ID. If dynamic allocation is required, it is not required to set these variables.
The cluster deployment is primarily done to scale the server side Fulfillment Order Management components that is omsServer (Orchestrator, OPE, and AOPD included) and jeoms.
The server components are actually scaled through EMS as more number of listeners and processors are activated on inbound destinations by deploying them in multiple micro-services. This also creates additional thread pools to increase the processing capabilities.
Sanity Test
- Start all micro-service instances to start the deployed Fulfillment Order Management components.
- Monitor the logs of each micro-service to make sure that the server and all the deployed components have started correctly without any errors.
-
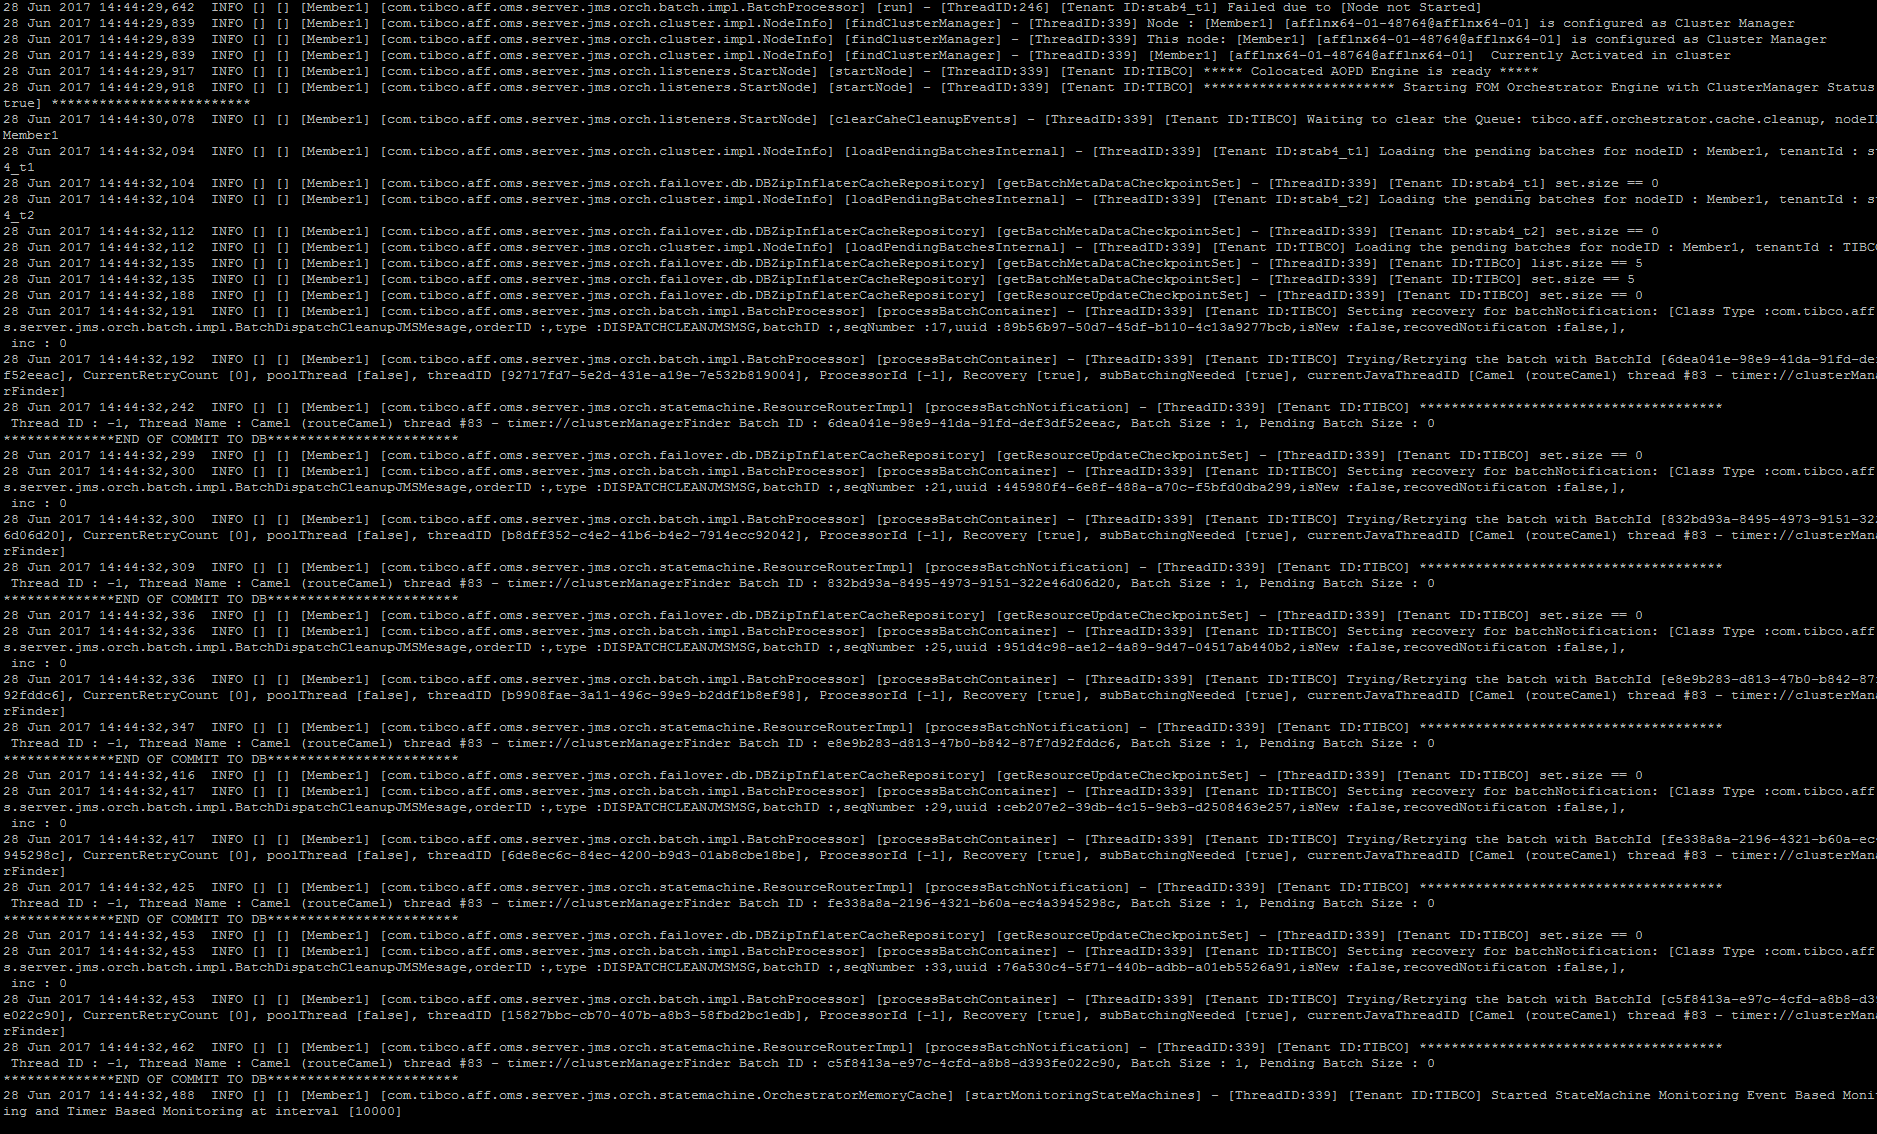
Start the Orchestrator member as a Cluster Manager for the ORCH-DOMAIN cluster. Start the Orchestrator member in the same cluster. Verify this according to the sample log statements shown below in the log file.
- When it is confirmed that all the members in the cluster are started correctly, submit a couple of orders using the SOAP/JMS interface. The order messages are equally distributed for processing among all the members.
Per default configuration, the member which has accepted the submit order message for a specific order processes that order. This means all the further messages for that order from external systems such as process components are picked up and processed only by that particular member.