Deploying and Running the Project

Since the ManageCustomerEnquiries project references the organization model in the EasyAsExtendedOMSolution project, the organization model must be deployed before you deploy the ManageCustomerEnquiries project.

Note: Deploying these projects is similar to the deployment of the WelcomeUsers project described in the Create, Deploy, and Run Your First BPM Application tutorial. Refer back to that tutorial for more detail on any of the following steps.

Procedure

  1. Check whether the EasyAsExtendedOMSolution project has already been deployed in a previous tutorial. To do this:
    1. Expand the Deployment Servers view and select your deployment server.
    2. If the Properties view indicates that the Server State is Disconnected, right-click on the server in the Deployment Servers view and select Connect.
    3. Expand your selected deployment server, expand Applications, and check whether EasyAsExtendedOMSolution is included in the list. If so, it is deployed.
  2. If it is not already deployed, deploy the organization model. Follow the procedure in the How to Implement and Deploy the WelcomeUsers Application tutorial to deploy the EasyAsExtendedOMSolution project.
  3. Follow the same procedure to deploy the ManageCustomerEnquiries project.
  4. If you have not already done so, log into Openspace, create an LDAP container, and map two users to the Customer Services Representatives Group in the Easy As organization model that you imported previously in this tutorial.
    Note: By default, the Organization Browser is available in Openspace. In Workspace, the button used to display the Organization Browser is by default not visible. However, in both clients administrators can configure which functions are available. Depending on your organization’s policy, therefore, you may be able to use the Organization Browser from either client application or from both. This tutorial assumes that you are using Openspace.
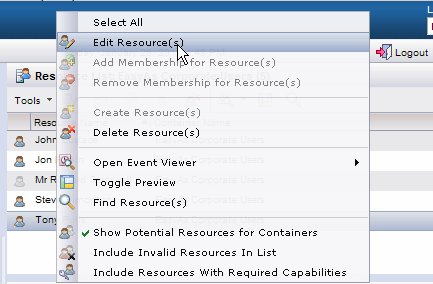
  5. In the Resource List, select one of those two users. Right-click on the user and select Edit Resource(s).
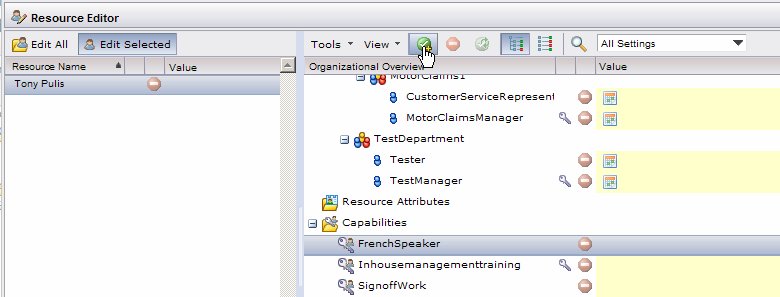
  6. The Resource Editor displays. To assign the French Speaker capability:
    • Select the user in the left-hand pane
    • Scroll down the right-hand pane until you can see the capabilities, and select French Speaker.
    • Click in the menu bar.

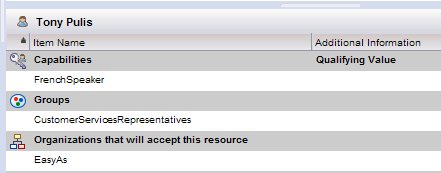
  7. The same icon appears next to the user’s name, indicating that a capability has been granted.

    Click OK to return to the Resource List. When the user is selected, the capability is now shown.

  8. Log out of Openspace.
  9. Log into Openspace again as the user you mapped to the Customer Services Representatives Group and gave the French Speaker capability. Use the password "tibco123".
  10. Start the Follow up > French Customer Enquiry business service. Click Submit.
  11. In your work item list you should now see the work item Complete product enquiry form shown as OFFERED. Don’t do any more with this work item yet - you will come back to it later.
  12. Log out as that user.
  13. Now log in as the other user you mapped in step 4. You will not see a work item as you did not give them the French Speaker capability.
  14. Log out as that user.
  15. Log in as the first user again, and double-click on the work item, complete the work item and submit it.
  16. You will now be sent the next work item in the process, Issue response to customer. Double-click on the work item, complete the work item and submit it.