You can schedule an import of a data source dataset so that it runs automatically at an interval you specify. This is useful if you have a table that is often updated and you want to add new data as it comes in.
Team Studio starts the process at the time you specify and imports the data into the destination table.
If you chose to notify people upon the success or failure of the job, they receive email notifications of the job's status.
Prerequisites
Procedure
Navigate to your workspace's
Jobs tab.
Click
Create a Job.
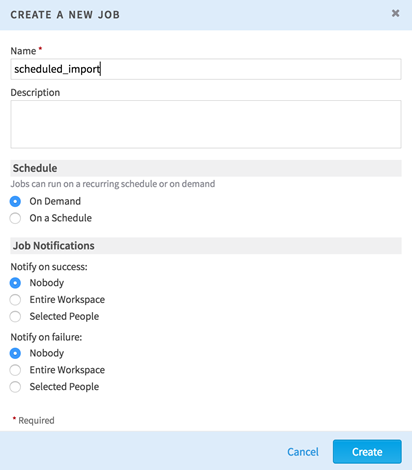
Choose a name and an optional description for the job.
Specify whether to run the job on demand or on a schedule.
If you choose
On Demand, the job runs when a user navigates to the job in the workspace and clicks
Run Now.
If you choose
On a Schedule, the job runs automatically based on a schedule you provide. To make a recurring data import, choose this option.
Specify your preferences for job notifications. This controls who is notified about the job status. You can choose settings for job success, job failure, or both. The people you choose receive email notifications and
Team Studio notifications.
Click
Create. The job detail page is displayed.
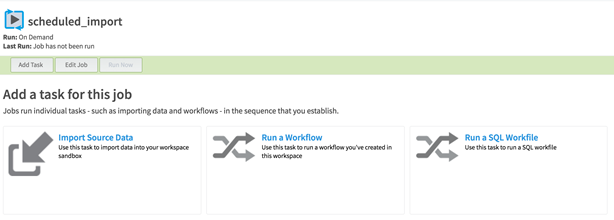
Select a task to add to the job. To set up a recurring data import, click
Import Source Data.
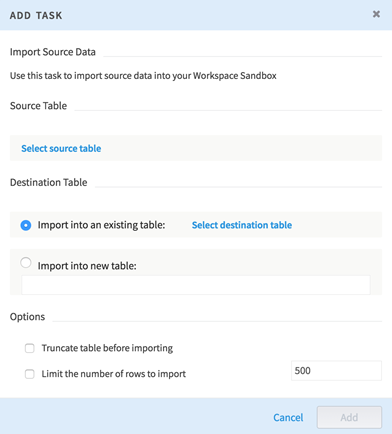
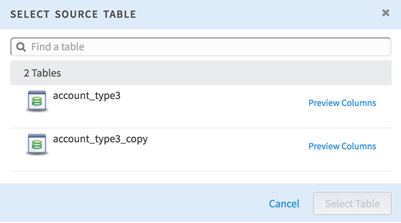
Select the source table to import. All eligible tables for import from this workspace are shown. In this example, you can see a few
Team Studio views that were generated by a SQL query.
Specify the destination table. This can either be an existing table or a new table. If you choose a new table, you must input a valid table name.
Specify any additional options. For example, you can choose to truncate the existing table before importing, which can be useful if you have auto-increment columns to reset. You can also specify how many rows of the data set to import.
Click
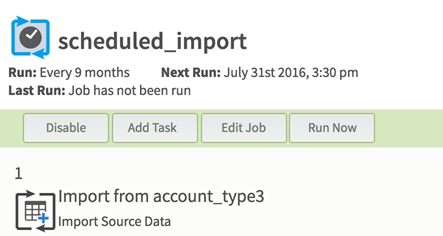
Add to add the task to this job. It should now appear as a task on the job page. It shows the run frequency, the next run time, and the last run.
Click
Enable to start the job scheduler.
Team Studio automatically runs this job at the time listed as
Next Run. To run the import sooner, click
Run Now.
To add extra steps to the job, select
Add Task and add as many as you want. You can drag them around to specify the order in which they run.