Output maps can be created within the same repository or across repositories.
Procedure
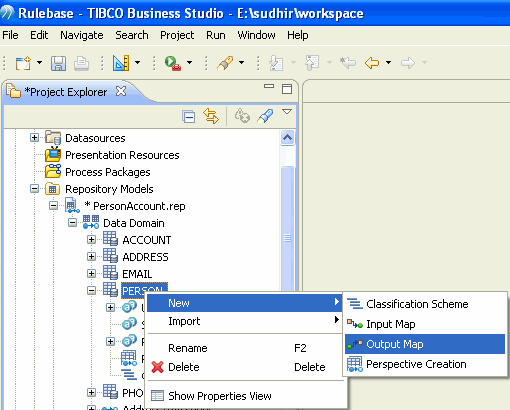
In the Project Explorer under the Repository model file, Right click on Repository on which user want to define the Output Map and select
New-- > Output Map.
The Output Map Wizard is displayed.
Enter a name and description for the Output Map. The Name is unique and case insensitive and can contain A-Z, 0-9 and _.
Select the appropriate synchronization format from the
Select Synchronization Format drop-down list.
Select the
User Predefined checkbox if you want to use the predefined output map. For more information, refer
Importing Predefined Output Map
Click
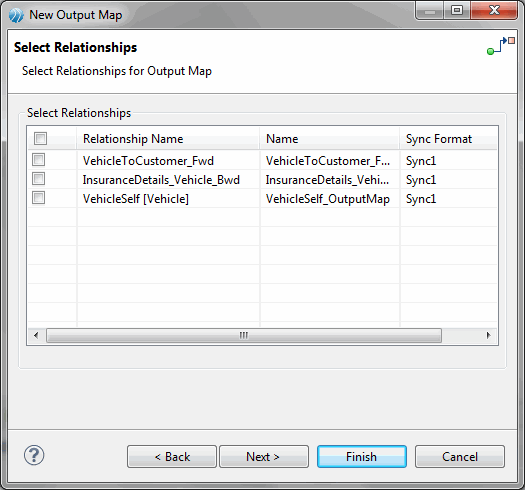
Next. The Select Relationships screen is displayed.
To support hierarchical all the immediate relationships of the repository (self relationship, forward and backward relationships) are displayed. You can select different or same sync formats for the relationships. Select the check box corresponding to the relationship name and click
Next.
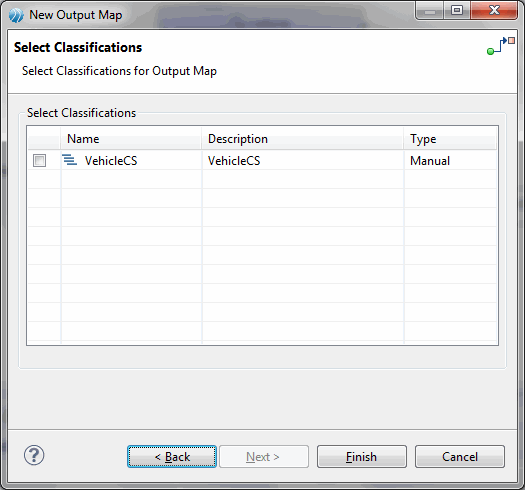
The Select Classification Scheme for Output map screen is displayed.
If you want to include classification scheme, select the check box corresponding to the classification scheme and click
Finish.
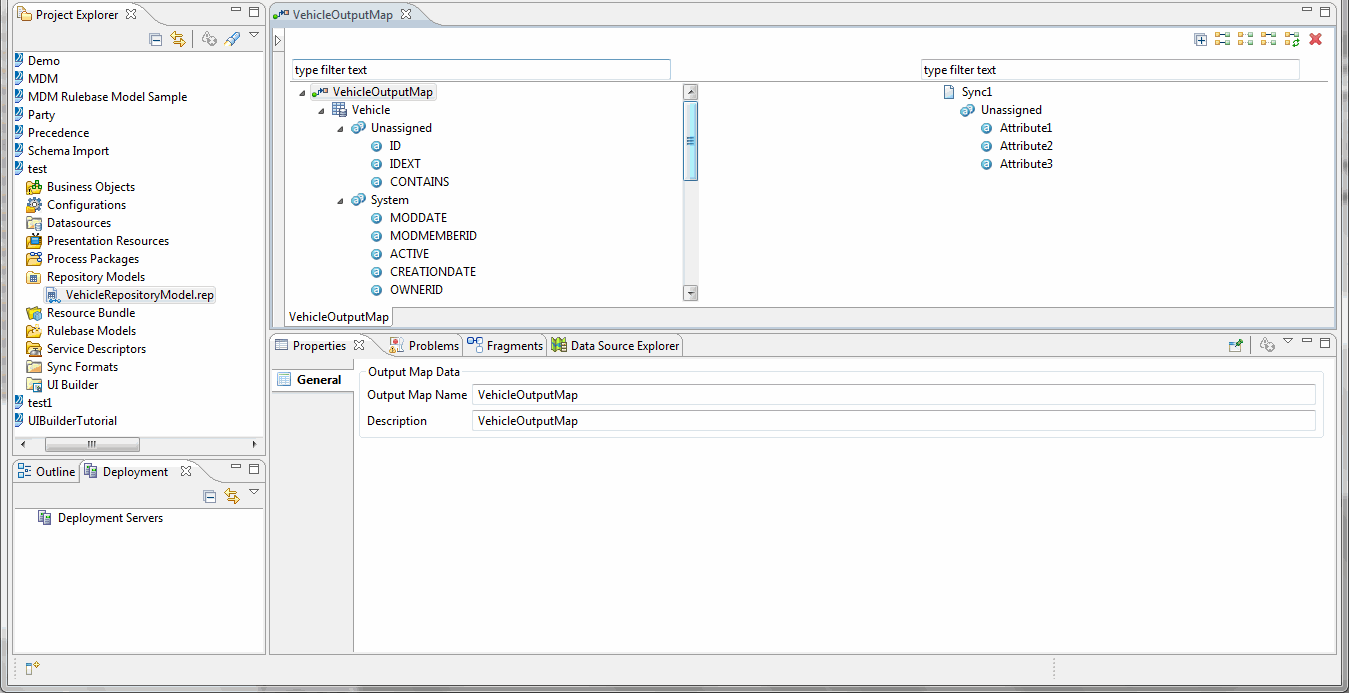
The output map is created and displayed in the Output Map editor. If the output map is created by selecting forward, reverse, or self relationships then forward, reverse, relationship output maps are created in separate tabs.