Using a Local Translation Table

An administrator can define a new translation table to be used by TIBCO MFT Internet Server.

By default 
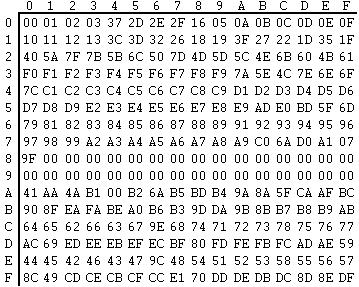
TIBCO MFT Internet Server comes with two internal tables to convert ASCII to EBCDIC and vice versa. These two translation tables are used for transfers between a mainframe and Windows or UNIX platforms. When the default translation table is not exactly what is needed, a customized translation table can be used.

The example below will alter the text JSY contained in a file to read CAT on the remote z/OS system.
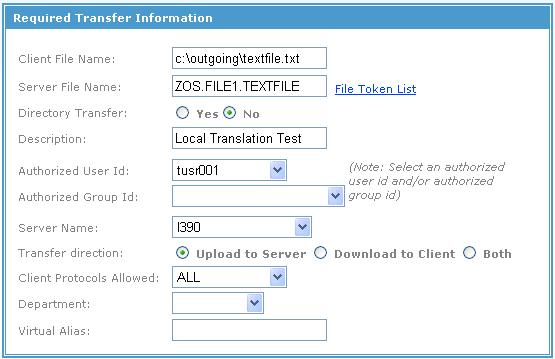
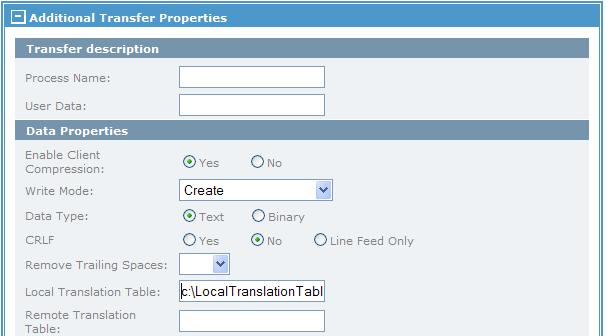
Procedure

  1. Create a customized translation table.
    1. From the directory MFTIS_Install/server/webapps/context/translate, make a copy of the Comtblg.cp037 file.
    2. Paste the Comtblg.cp037 copy into an empty directory on the TIBCO MFT Internet Server web server, and rename it to LTABLE.dat.
      This file contains the table below which converts data between the ASCII and EBCDIC and EBCDIC to ASCII character sets:

      To make better sense of the table above, place it in an Excel spreadsheet below for demonstration purposes only:

    3. To convert from an ASCII system (Windows) to an EBCDIC system (z/OS), you will be looking up the EBCDIC character for each ASCII character and replacing it with the EBCDIC character you want. Then save this file.
      The ASCII value for J is 4A, so you will go to the chart above and locate 4 going down and slide your finger to the right until you are in the A column. You will see the EBCDIC value D1 for J. You want this to translate to a C, so you will replace the D1 with C3 which is the EBCDIC value for C.
      Do the same to have S translated to A and Y to T.
  2. Create a text file containing capital JSY on your windows platform, and save it to be transferred later.
  3. Create an upload file transfer definition.
    1. Click Transfers > Add Transfer. Configure the Required Transfer Information section on the Add Transfer page:
      Parameter Description
      Client File Name Enter the path of a file that you created in Step 2.
      Server File Name Configure the file name for the file that will be created on the z/OS system.
      Directory Transfer Click No.
      Description Provide a short description.
      Authorized User Id Select the user ID that will be used to make this file transfer from the list.
      Server Name Select T390 that represents your z/OS system.
      Transfer Direction Select Upload to Server.
      Client Protocols Allowed Select ALL. Translation tables will only be used with HTTP protocol.
      Department If you have a department for this transfer to be assigned, set it here. If not, leave it blank.
    2. In the Additional Transfer Properties section, click Text in Data Type area, and type the path to your translation table that you created in Step 1.
    3. ClickAdd.
    See the following example of the upload file definition:

  4. Log in to the browser client with your MFT user ID, in this case tusr001, and click Upload.
    Your file written to the mainframe should contain the letters CAT and not JSY.