Creating a Synchronization Profile
Create a synchronization profile that associates a repository with an output map.
Procedure
-
Click
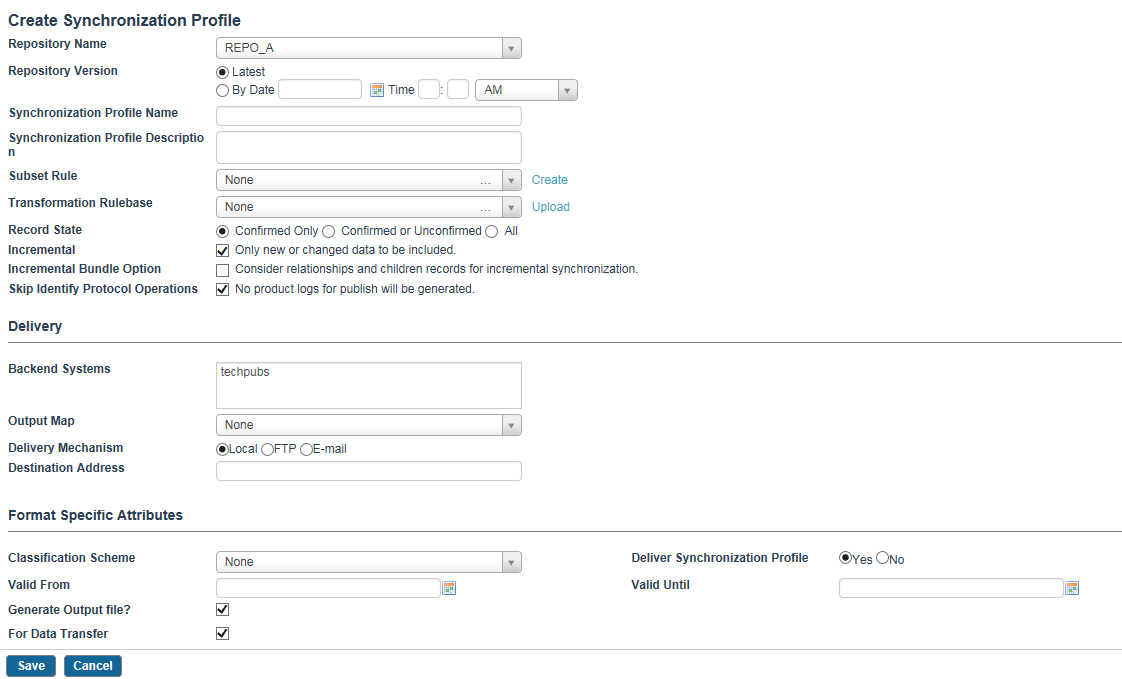
 . The Create Synchronization Profile screen is displayed.
Create Synchronization Profile Fields Field Name Description Repository Name From the list of repositories, select a Repository. Repository Version Specify the Repository Version. Use this option to specify the snapshot option of the repository. This option works in conjunction with the Record State option. The options available for the repository version are: - Latest: All the records available in the repository as of now. However, if the Latest option is selected, and All is selected for the Record State option, the records are published from the latest version of the record and not from the root record. For example, if a record "a" in the A repository includes versions from "a1" to "a10", and version "a8" is selected as the base version for publishing, in this case, even though "All" record state is selected, versions from "a8" to "a1" are considered during synchronization.
- By Date: Records available in repository, till the date specified. If there are records which were created after the specified date, then those will not be included for synchronization.
- By Named Version: If any named version were created on the repository, then this option appears. Choose one of the available named version for synchronization. Any record which was created after the named version creation, will not be included for synchronization.
Synchronization Profile Name Specify the name of a synchronization profile. Synchronization Profile Description Specify the description for a synchronization profile. Subset Rule Select the subset rule from the drop-down list or click Create to create the subset rule. Subsets created from this screen are private, meaning, such subsets are only visible to the user who created them unless visibility of this subset is changed and permissions are granted to other users using permissions. Refer to Resource Security for details on permissions. You can also browse the selected subset to verify the records that are included. Note that the record list shown here is indicative only as subset are re-evaluated on synchronization. If no subset is selected, all records in the repository are included. If you edit a synchronization profile which already has subset assigned and you do not have browse or edit permissions, you will not be able to edit or browse the subsets. Transformation Rulebase Select a Transformation Rulebase from the drop-down list or click Upload to upload one directly from here. Transformation Rulebase validates the records being exported. The changes to the data do not affect the repository. Note that the transformation rulebase uploaded from here cannot be removed. Record State Select the following record state options: - Confirmed Only: Confirmed means that the last confirmed versions of records, if not deleted are included. Note that only last qualifying version is included.
- Confirmed or Unconfirmed: Confirmed or Unconfirmed indicates that as long as the last record version is not deleted, and it is confirmed or unconfirmed, it will be included. Note that only last qualifying version is included.
- All: All indicates that all versions (confirmed, unconfirmed, and deleted) of a record from the selected repository and its relationship are exported. Only the rejected versions are excluded.
- synchronizes all versions of the root record, that is from the version being selected for publish up to the first version of the record and valid relations of all those versions.
- includes version wise record classification information (codes) in output because a record may belong to different code hierarchies in different versions, and classification scheme structure may change in the terms of logical levels and codes.
Note: Added a new column MODVERSION in the Classification output file generated in synchronization to denote the version of a record in case of ALL publish.
Incremental By default, this option is selected. The selection indicates that only new or changed data is included in the output file. In case of changed data, ensure that you modify the repository attributes that are mapped with the output map attributes. - Incremental for child records (bundle) or relationships
In the Customer > Address > Account output map structure, if the records in the Address and/or Account repositories are changed, however the root records in the Customer repository are not changed, the records in the Customer repository are also considered for publishing along with the relationships selected for synchronization using output maps. The newly added relationships are also considered for synchronization.
Incremental Bundle Option If you select this option, the relationships and children records are considered for incremental synchronization. Skip Identity Protocol Operations By default, this option is selected. The selection indicates that the IdentityProtocolOperations activity used in synchronization workflow is ignored and the product logs are not generated while publishing records. - If Incremental and Skip Identity Protocol Operations are selected, the product and record sync logs are not generated.
- If Incremental is selected and Skip Identity Protocol Operations is not selected, the product logs are generated.
- If Incremental is not selected and Skip Identity Protocol Operations is selected, all records selected for export are included in the output file and the product logs are not generated.
- If
Incremental and
Skip Identity Protocol Operations
are not selected, all records selected for export are included in the output file, however the product logs are generated.
Note: The Skip Identity Protocol Operations option is available only for the MDM software edition.
Delivery (Select the entity to which you have to deliver the records.) Backend Systems If you select this option, you have to specify the name of the backend system. Note that a backend system must already exist in the system to create a new Synchronization Profile. When you click Synchronize, the system creates a ZIP file that should be delivered to the selected backend system. You can either send the ZIP file through mail, FTP, or copy the ZIP file to the destination address provided. (GDSN Only) Datapool The Datapool is the central repository. When you select Datapool, and click Synchronize, the system sends the data as a message to the Datapool. The message is sent in an XML format and the system waits for an acknowledgement from the Datapool. When you select Datapool, you need to provide the name of the Datapool, the output map, and the delivery mechanism. (GDSN Only) Backend System on Datapool When you select this option, and click Synchronize, the message is sent to only those backend systems who are subscribed to the Datapool. The backend system should have a valid GLN account with the Datapool. You need to specify both the Datapool and backend systems subscribed to the Datapool. You also need to specify the Output Map format and the delivery mechanism. Output Map Select the output map from the drop-down list. Delivery Mechanism Select any one of the following options: - Local: When this option is selected, the transport of the extracted information gets decided in the workflow. The data transport using JMS is supported out-of-the-box and can be used.
- FTP: When this option is selected, the extracted data file is sent through FTP.
- Email: When this option is selected, the extracted data file is attached to the email and sent along with the email. However, the file may not be attached to email if the size of the file exceeds the threshold specified for your organization.
Destination Address Specify the destination address.