Installing TIBCO MDM (Simple Installation)
In Simple installation, the installer bundles, installs, and configures most of the required softwares. You need not worry about dependencies. Thus, it simplifies the installation process.
Prerequisites
- Verify that your computer meets the system requirements to install TIBCO MDM for PostgreSQL. The system requirements are listed in the readme.txt file. All the software components are installed under $MQ_HOME. Ensure that you have at least 5 GB of disk space.
- Install JDK 1.8.
- Set the $JAVA_HOME environment variable.
- Optional: Download the wildfly-10.1.0.Final.zip file from http://wildfly.org/downloads/
- If you are installing in a Linux environment, ensure that you are a non ROOT user.
- TIBCO MDM does not use the existing PostgreSQL instance. It re-installs and re-configures PostgreSQL. Ensure that you have stopped the current PostgreSQL instance, if running. Ensure that the default port 5432 is not in use.
- Download TIBCO MDM from https://edelivery.tibco.com. The application is available as a ZIP file.
- Extract contents of the ZIP file to a folder on your computer.
- Search for the TIBCOUniversalInstaller application in the location where you have extracted the ZIP file.
Procedure
-
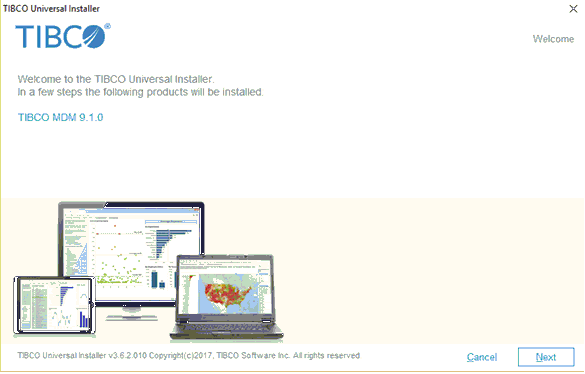
Run the
TIBCOUniversalInstaller.exe application. The
TIBCO Universal Installer Welcome window is displayed.
-
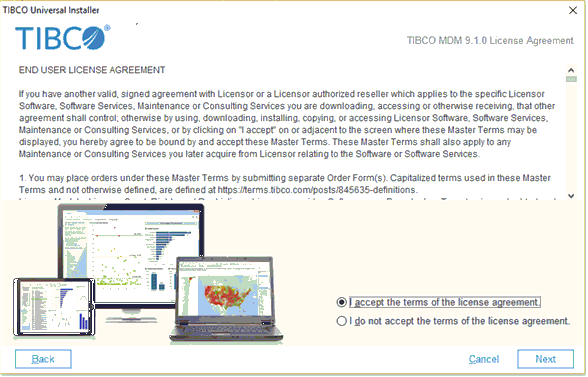
Review the information and click
Next. The license agreement is displayed.
-
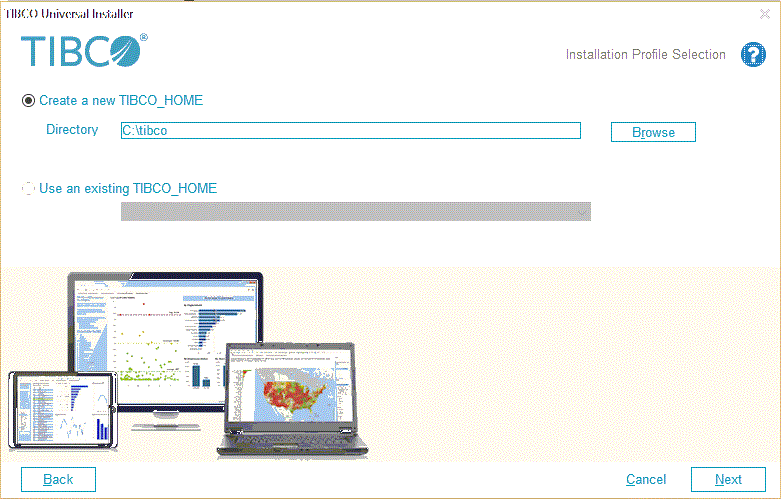
In the
Installation Profile Selection window, do one of the following:
-
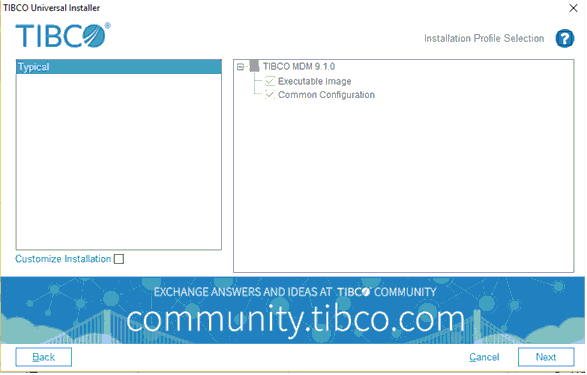
Click
Next. The
Installation Profile Selection window is displayed. By default, the
Typical installation profile is selected.
-
In the
MDM Configurator Tomcat Settings window, the default port values are displayed. You can change the default port values.

Click Next. -
In the
TIBCO MDM Common Config Location window, select the common configuration location and click
Next.
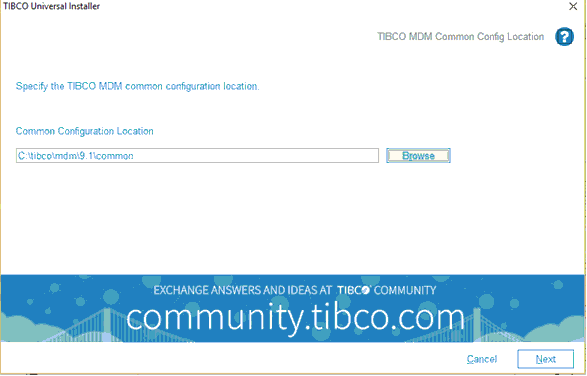
If you have selected the standard common configuration option, the default $MQ_HOME\common directory location is displayed. You can retain the location or change it by clicking Browse.Note: If you do not specify the common configuration location, Configurator does not start and you need to perform the manual configuration. For information, refer to Manually Configuring TIBCO MDM. -
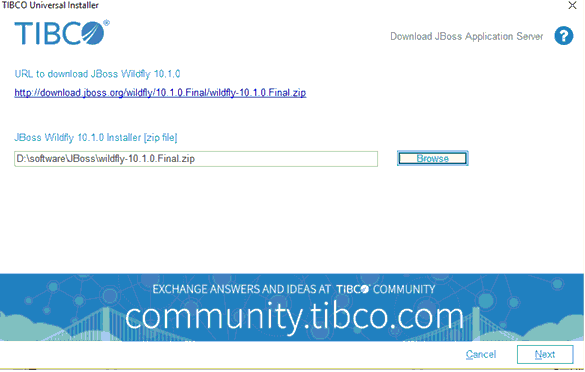
In the
Download JBoss Application Server window, do one of the following:
-
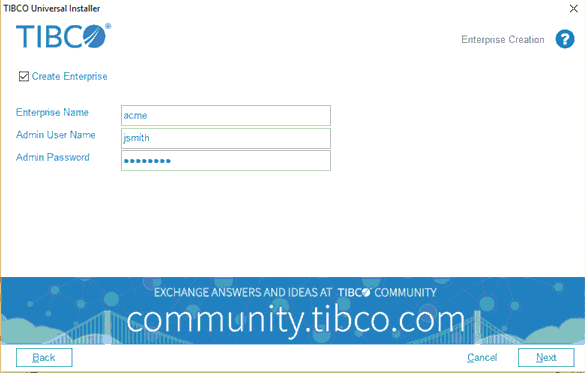
In the
Enterprise Creation window, do the following:
-
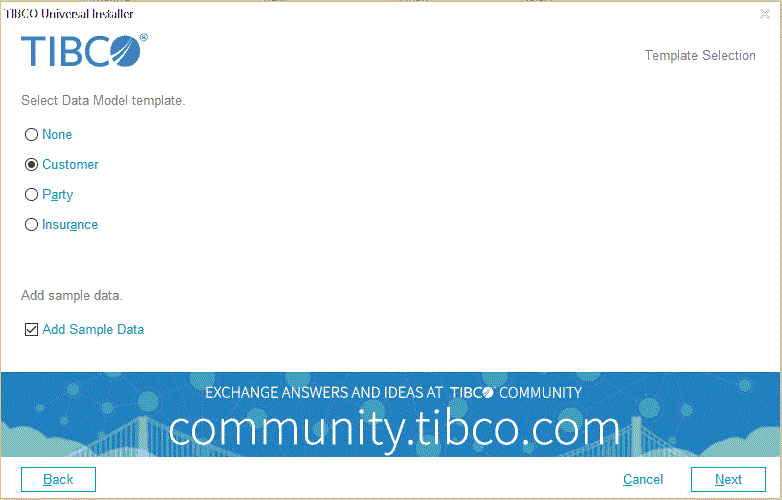
In the
Template Selection window, do the following:
-
In the
TIBCO Patterns Settings window, the default user interface port value (required for Patterns GUI tomcat server) and Patterns server port value (required for Patterns binary) are displayed. You can change the default port values.

- Select Install as a Windows Service check box if you want to install the Patterns server binary as a service.
Click Next. The installation process starts. -
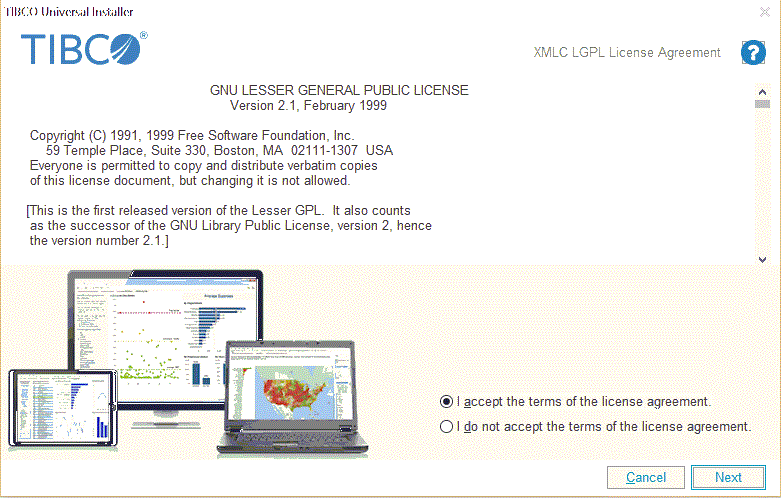
The
HIBERNATE LGPL License Agreement window is displayed.

If you agree with its terms, accept the license agreement, and click Next. -
In
LGPL Assembly Download window, select one of the following options:
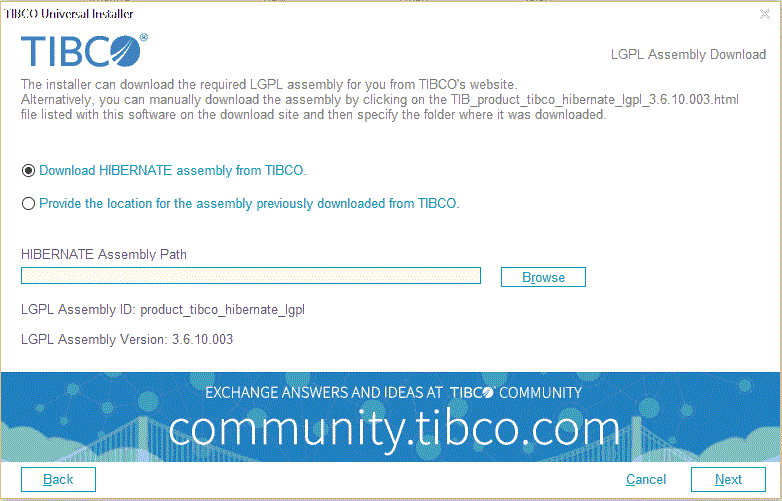
- Download HIBERNATE assembly from TIBCO: if you select this option, the HIBERNATE assembly is downloaded and configured.
- Provide the location for the assembly previously downloaded from TIBCO: If you select this option, the HIBERNATE Assembly Path field is enabled. Click Browse to select the HIBERNATE assembly.
Click Next. -
The
XMLC LGPL License Agreement window is displayed.
If you agree with its terms, accept the license agreement, and click Next. -
In
LGPL Assembly Download window, select one of the following options:
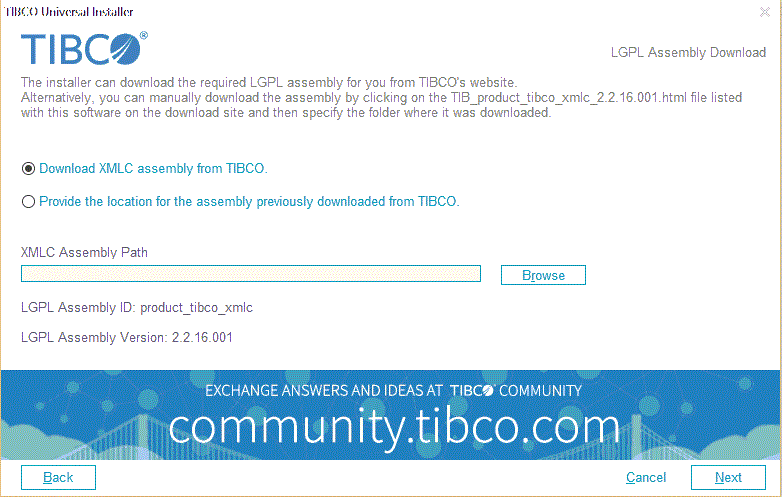
- Download XMLC assembly from TIBCO: if you select this option, the XMLC assembly is downloaded and configured.
- Provide the location for the assembly previously downloaded from TIBCO: If you select this option, the XMLC Assembly Path field is enabled. Click Browse to select the XMLC assembly.
Click Next. -
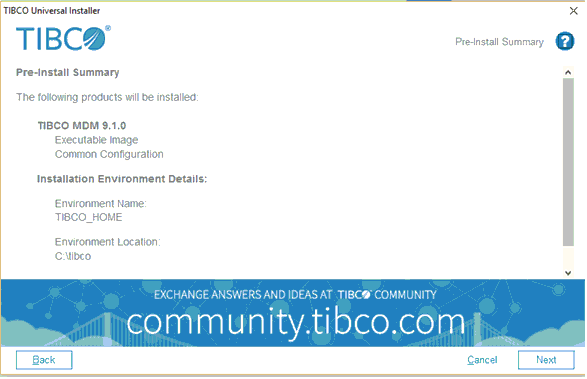
In the
Pre-Install Summary window, review a list of the components that are going to be installed and the installation environment details and click
Next.
-
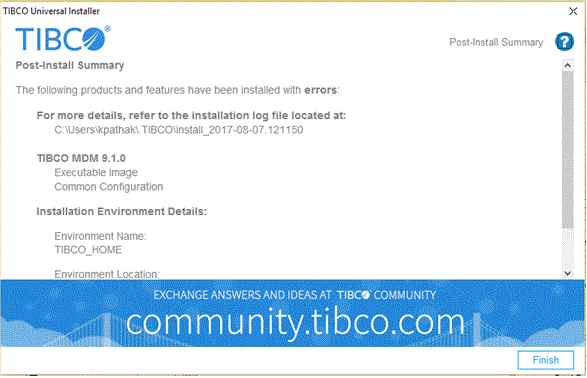
In the
Post-Install Summary window, review a list of the components that are installed and the installation environment details.
Copyright © Cloud Software Group, Inc. All rights reserved.