Creating a Pageflow Process

You can create a Process and its containing package and Project in one operation or create a pageflow process.

Procedure

  1. Before creating a pageflow process, you must create a project and a package to contain your process.
  2. In the Project Explorer, select the package you created, right-click and select New > Pageflow Process.
  3. The 
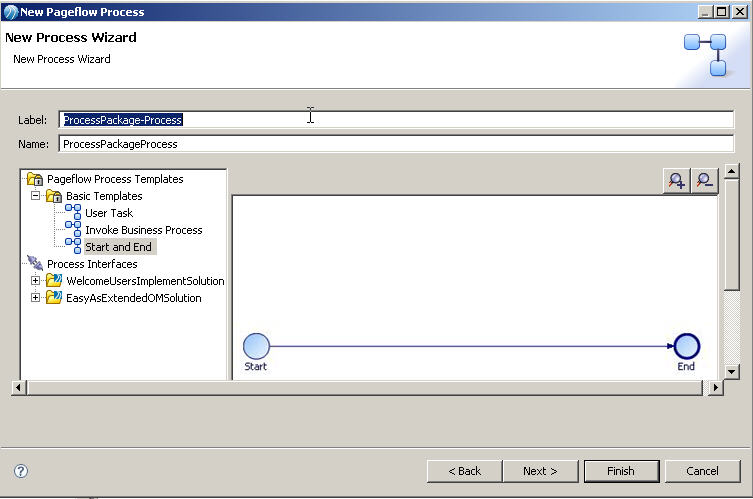
New Pageflow Process wizard is displayed.
    Note: If you start this wizard from the File > New menu, the first dialog is the Project and Package dialog, where you must specify a valid project and package. This dialog is not displayed if you right-click at the package level to start the dialog; however you can click Back to display it if necessary.

    Enter the Label of the process. If you want to use a template to create the process, select the template and click Next.

    In addition to the process templates, you can select a process interface as the basis for your new pageflow process. This creates a process with events and parameters that are specified in the process interface.

  4. In the Description dialog, add optional text that describes the process, an optional URL that links to documentation about the process, and click Next.
    Note: The Documentation Url field is intended for design-time collaboration; it is not displayed in the runtime environment.
  5. In the Destinations dialog, select the Destination Environment (optional). This controls the validation that TIBCO Business Studio performs when you save the process:
    Note:
    • The exact destination environments that are displayed depend on the edition of TIBCO Business Studio that you have installed.
    • The specific destination components that make up a destination environment can be viewed by selecting Window > Preferences, and selecting Destinations.

    If you do not select a destination environment, basic BPMN validation will be performed.

    Tip: To avoid error messages and warnings associated with modeling constructs that cannot be executed in the runtime environment, set the appropriate destination environment on the process.

    You can change or select the destination environment after the Process has been completed on the Destinations tab of the Process Properties.

  6. The Extended dialog is displayed. This allows you to add optional supplemental information to the XPDL for the process .
  7. Click Finish.
  8. The process that you created is displayed in the Process Editor:

    When you first start the Process Editor, the palette (on the right side of the diagram) might be collapsed; if so, expand it. You can expand this window to fill your screen by double-clicking the title bar. A pageflow process has a different default color scheme from a business process.

    Note: Pageflows do not contain pools or lanes.