This procedure shows you how to created the screen layout needed in the How to Create a BPM Desktop Using Components tutorial.
In
step 17 of the How to Create a BPM Desktop Using Components tutorial, you are asked to create a layout using the standard General Interface Builder components. If you are not familiar with TIBCO General Interface Builder, you can use the following procedure to help you create the layout.
Procedure
-
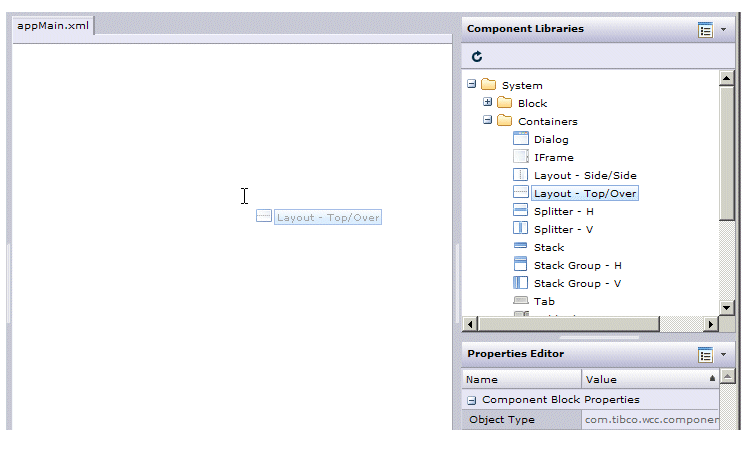
From the
Component Libraries palette, expand
Containers and drag a
Layout - Top/Over
component into the
appMain.xml canvas.
-
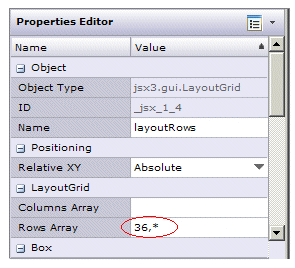
In the
Properties Editor
palette in the lower right part of the screen, change the
Rows Array
property value to “36,*”.
-
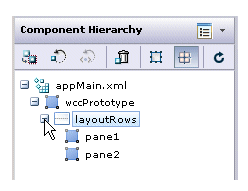
Expand the layoutRows
component in the
Component Hierarchy
palette.
-
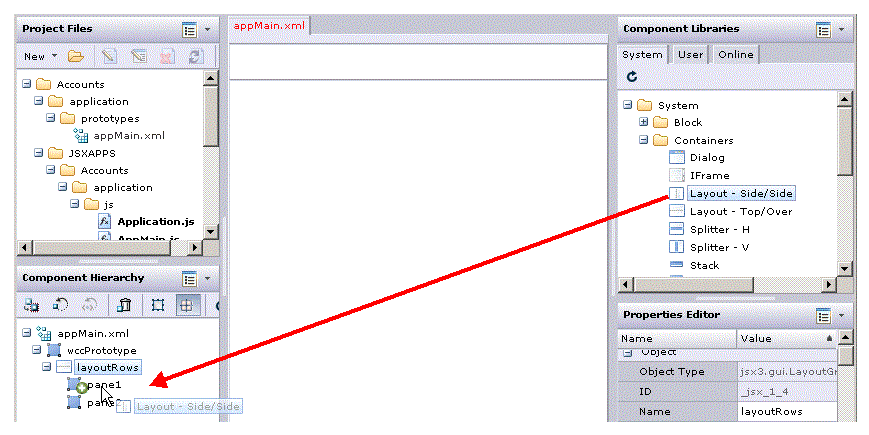
From the
Component Libraries palette, drag a
Layout - Side/Side component into the top pane of the
layoutRows
component in the
Component Hierarchy palette.
-
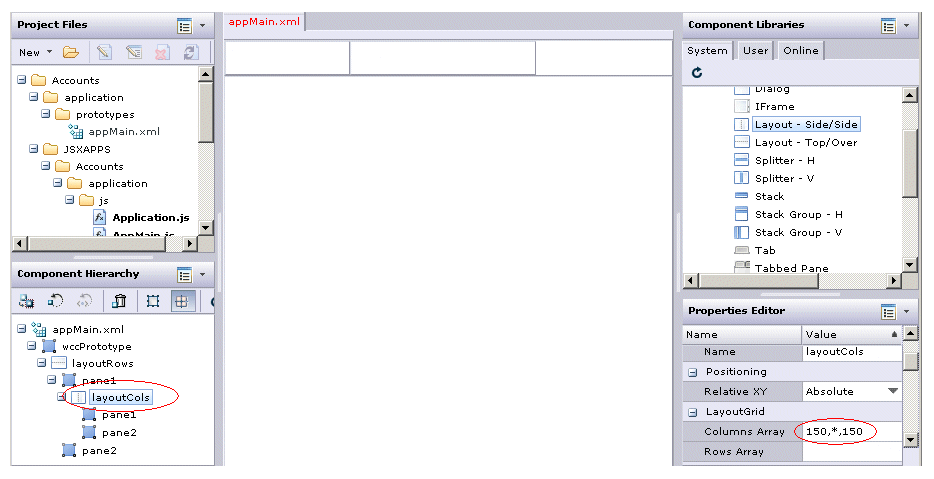
Expand and then select the layoutCols
component in the
Component Hierarchy
palette, then in the
Properties Editor palette, change the
Columns Array property value to “150,*,150”.
-
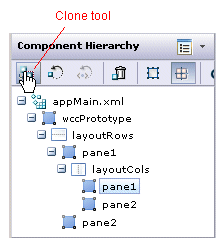
In the
Component Hierarchy
palette, select the top
pane component, under
layoutCols
and then click the
Clone tool.
-
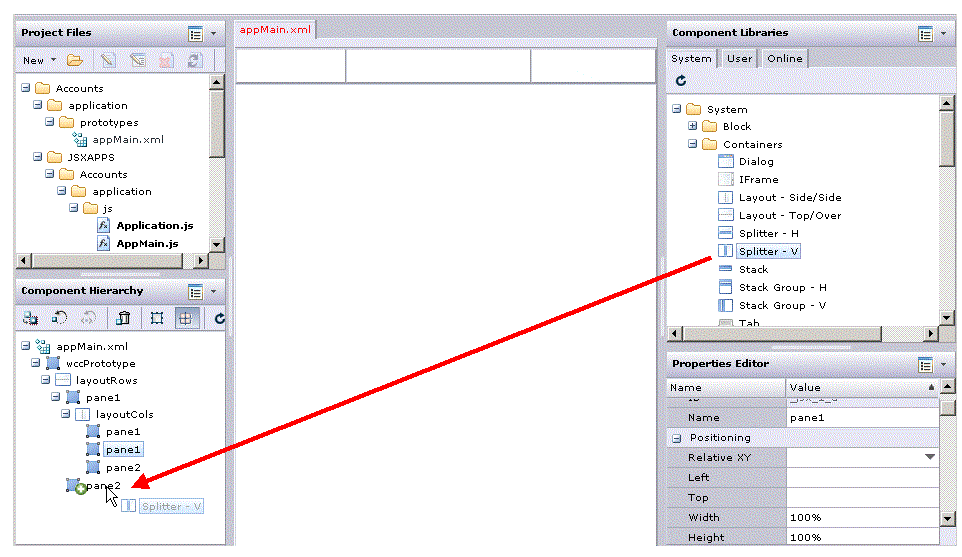
From the
Component Libraries palette, drag a
Splitter - V component into the bottom
pane of the
layoutRows
component in the
Component Hierarchy palette.
-
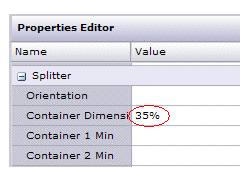
Select the
splitterV component in the
Component Hierarchy, then in the
Properties Editor, change the
Container Dimension from 100% to 35%:
-
Save the new layout you’ve just created.
Result
You can now proceed with
step 18 of the tutorial.
Copyright © Cloud Software Group, Inc. All rights reserved.

