Configuring the Resources in the Deployment Project
When you have added the projects and other resources that you want the deployment project to contain, you must configure those resources and generate a DAA for each of the resources. Depending on the state of the BPM projects, you may also need to specify some other details.
This is similar to the deployment process described in Deploying an Application Using the Deployment Wizard.
Prior to configuring the resources, you may need to refresh the deployment server to ensure that its current state is known (for more information, see Refreshing a Deployment Server).
Also note that if the projects in your Deployment Project are using virtualized bindings, you may need to deploy some the projects first, then configure and deploy the other projects (that are dependent on the earlier deployed projects). You must do it this way so that the virtual bindings are available in the pick list when you are configuring the projects that are dependent on those bindings.
Procedure
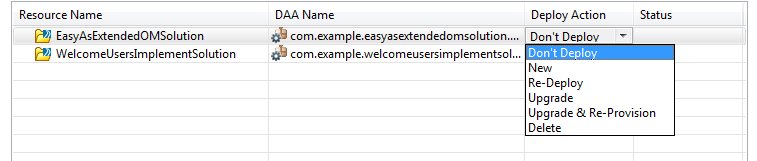
- For each resource in turn, select it in the Projects Configuration panel and select New from the Deploy Action dropdown (replacing the default Don’t Deploy).
-
The
DAA Generation Page displays. For scripted deployment to work, a DAA must exist in the deployment project.
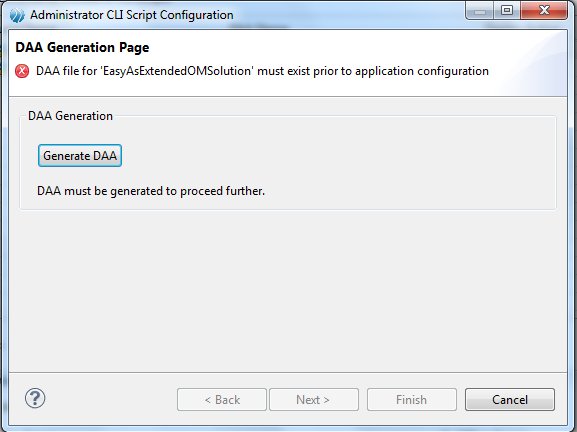
Click Generate DAA, and then click Next.
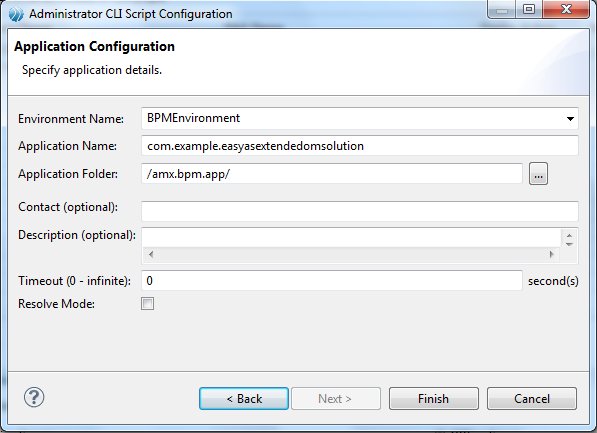
Note: If a DAA for this resource already exists within the deployment project, the button on this page shows Re-Generate DAA instead. You can ignore this and click Next if you are confident that the resource has not changed since the existing DAA was generated, or you can re-generate the DAA now. If the source as changed, you must re-generate the DAA. - The Application Configuration page displays. This shows the default deployment information for the server that you selected in Specifying the Server. This is some of the information that you entered in the RuntimeServer Parameters dialog when creating the deployment server - see Creating a New Deployment Server. Amend the Environment Name, Application Folder and other information displayed if you want to use values different from the defaults that you set up for this deployment server or if the server that you specified is offline.
Result
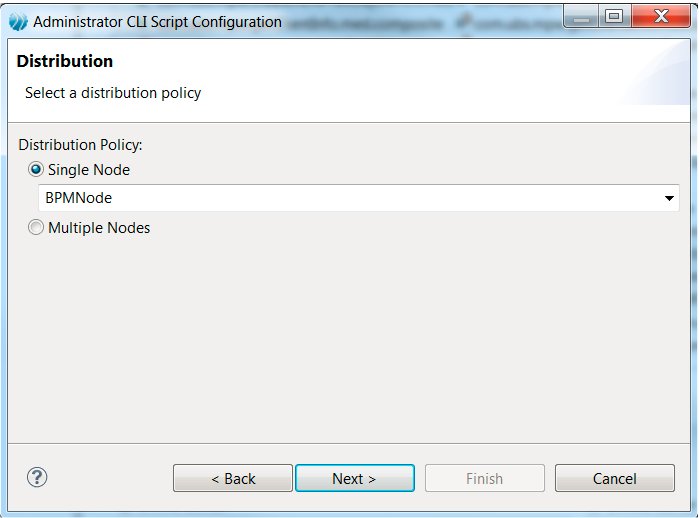
The Distribution page may then be displayed. Select whether you wish the resources to be deployed to one node or more, and then select the node from the drop downs provided.
Click Next.
The Property Configuration page is displayed if any property mappings are required.
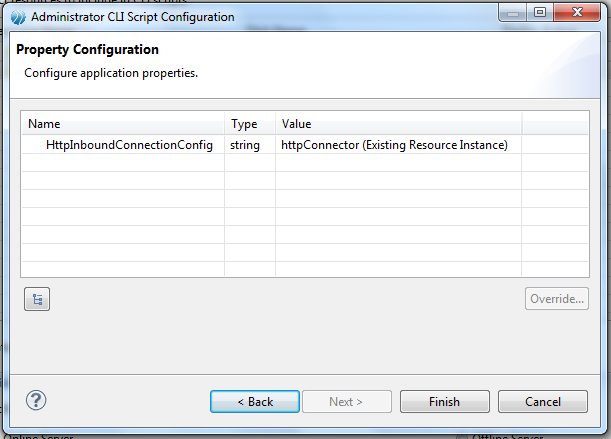
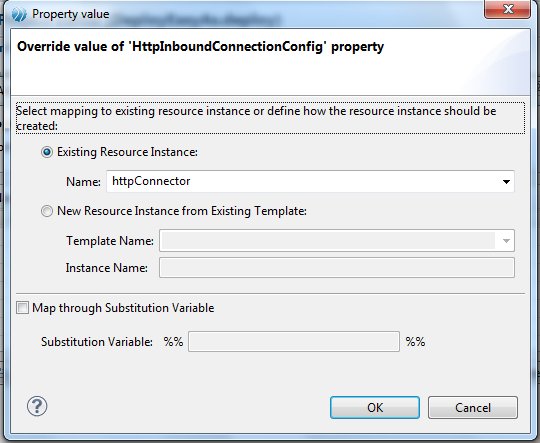
Select a property and click Override to change the specified value assigned to any of the properties in the Name column. The Property value page displays.
By default, the properties are mapped to substitution variables, which provide a level of indirection. To change this, specify the new value in the Property value dialog and click OK.
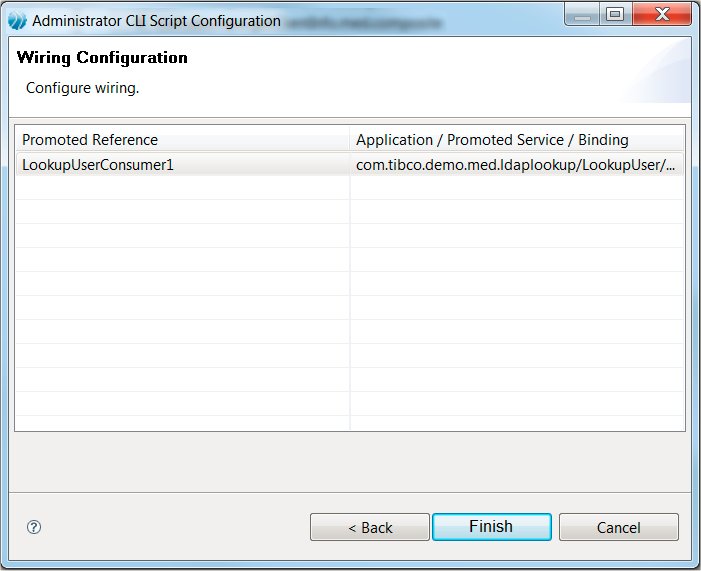
The Wiring Configuration page is displayed if the resource contains unresolved promoted references.
- Click -add wire- in the row containing the unresolved promoted reference. A drop-down listing the available applications, services, and bindings appears.
- Select the application, service or binding that you want to wire the promoted reference with, and click outside the text
- When you have done this for all the listed references, click Finish.
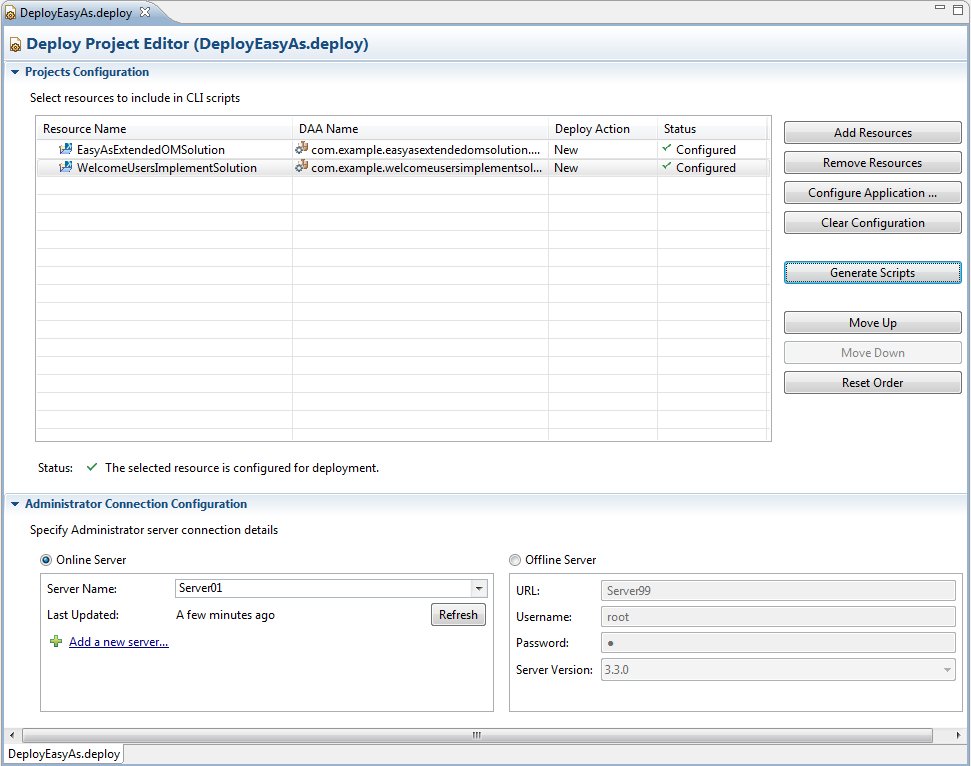
The Deploy Project Editor for the project is now populated.