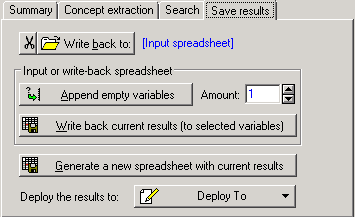
Save Results Tab
Select the Save results tab of the Results dialog box to access options to save the current results, i.e., the word frequencies or transformed word frequencies [see the documentation for the Frequency (importance/relevance measure) option in the Text Mining Results dialog box] for the term-document matrix as well as the singular values, if singular value decomposition was performed (see the documentation for the Concept extraction tab). Specifically, with the options available on this tab, you can write these results back into the input data spreadsheet or database; you can also use the Generate a new spreadsheet with current results option to create a new spreadsheet with these results, along with selected variables from the input file.
Thus, these options are extremely useful for joining the computed results with other information available in the input spreadsheet from which they were computed. This is a common requirement and operation in many applications related to data mining projects, where the input data consist both of structured numeric information as well as unstructured textual information, both of which are to be included in the analyses.
| Option | Description |
|---|---|
| Write back to |
Click this button to display a standard file selection dialog box where you can browse to the data file to which you want to write back the results. |
|
Click this button to clear the current Write back to file selection and reset the write-back destination to Input spreadsheet. |
|
| Input or write-back spreadsheet | Append empty variables: Use this option to add the specified number of variables to the write-back spreadsheet. For example, you may have extracted 300 useful (selected) words from the input documents, and you may want to write the frequencies for each word and document back to the input data file. In this case, you would need to create 300 new variables to make room for the information you want to write back. When you use the Write back current results (to selected variables) option, the default variable labels (e.g., NewVar1, NewVar2...) will automatically be replaced with the more meaningful words or terms (or component numbers for scores computed from singular value decomposition; see also the documentation for the Concept extraction tab).
Write back current results (to selected variables): Click this button to display the Assign statistics to variables dialog box, which is used to save computed statistic values to the input spreadsheet. Via this dialog box, you can write back the selected word frequencies or their transformations to the selected variables in the input file. Use the Append empty variables option (see above) if you need to add variables to the input file first to make room for the additional information you want to write. |
| Generate a new spreadsheet with current results | Click this button to create a stand-alone input spreadsheet with the results of the current analysis, along with selected other variables from the current input file. After clicking this button, a variable selection dialog box will be displayed, where you can select the variables to save along with the text mining results (word frequencies or transformed frequencies, SVD scores if available). Statistica will then create an input spreadsheet that can be used for subsequent analyses using the various facilities available in Statistica and Statistica Data Miner.
Deploy To: Click this button to display a menu where you can choose either PMML File or Statistica Enterprise. PMML File. Select this command to generate a PMML file of the Text Mining model in order to use it to deploy new data against this model. The Save As dialog box is displayed first, where you name the file and select a location for it. Statistica Enterprise. Select this command to deploy the Text Mining model to Statistica Enterprise so that the Analysis Configuration created can score new data against the deployed model. The Choose Deployment Type dialog box is displayed first, where you can specify whether you are deploying a new object or updating an existing object. Then, the Select a Data Configuration/DE Setup/SVB Data Configuration dialog box is displayed, where you select the System Folder location for the deployed model. |
