Deep Learning Dialog box
Navigation
| Click on the File tab on the ribbon. | The File menu will display. | |
| Click on the Open Examples icon. | The Open a Statistica Data File dialog box will display. | |
| Select the Datasets folder. | Example datasets will display. | |
| Scroll down to find, and then click on, the CreditScoring spreadsheet. | The spreadsheet will open in Statistica . | |
| Back on the File menu, click New, then the Workspace icon. | The Create New Document dialog box will display. | |
| Under Workspace Template, leave the selection Local. | ||
| In the Template list, leave the selection Blank. | ||
| Click OK to accept these selections. | The Select Data Source dialog box will display. | |
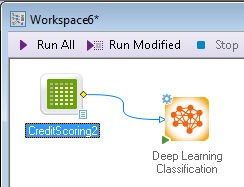
| Select the CreditScoring spreadsheet and click OK. | A workspace containing the selected spreadsheet will open. | |
| Make sure the spreadsheet is selected and click on the Data Mining tab on the ribbon. |

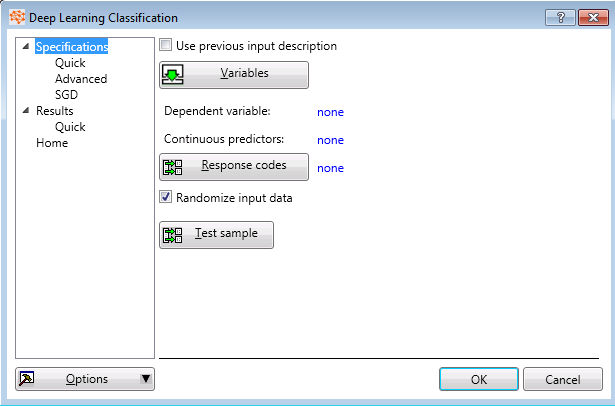
Specifications (Quick) Tab
Input is required. You will be able to use any standard input data source supported in the Workspace Environment (the Input File) to connect to the CNTK Regression node.
Use previous input description
On the Specifications (Quick) tab, you can use a previous input description, in which case the Variables and Response codes buttons will be disabled.
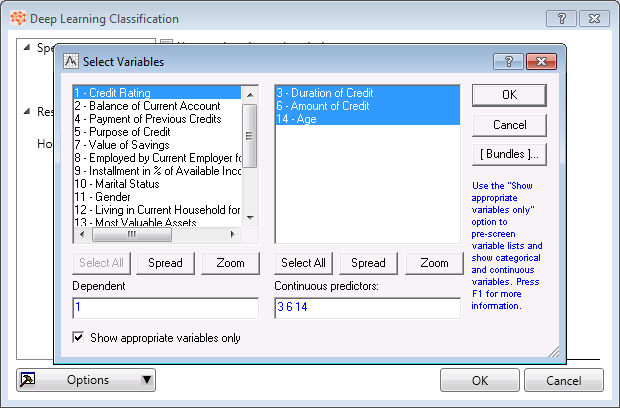
Variables Button
Click this button to open the
Select Variables dialog box. The selected
Dependant variable and
Continuous predictors will display.
Response Codes
Click this button to open the Select Dependent Code dialog box. Enter Response codes (all is an option).
Randomize input data
Select this check box if you want to randomize the input data prior to the application of the SGD estimation process, which is used internally by the algorithm, specify test samples.
Test sample button
Click this button to open the Text-Sample CreditScoring dialog box, where you can select a Sample Identifier Variable, a Code for the test sample, and set the Status to One or off.
Select the sample identifier variable and a code for that variable that uniquely identifies the cases to be used in the analysis. Any remaining invalid cases (which have positive case weights and meet any selection conditions) can be treated as a test sample. For these cases, the overall fit of the model can be computed over successive boosting steps.
Hidden layer sizes:
Specify the number of nodes in each hidden layer. The default is five nodes per layer. EXAMPLE:
Layer types:
For each layer, you can specify a transformation or energy function. The default transformation is Sigmoid. You can also choose TanH or Rectified Linear.
Max epochs
Select the Max Epochs from this miniscroll to specify the number of epochs (iterations). The default is 100
Mini batch size
Enter value in this text box to specify a minibatch size for the Stochastic Gradient Descent (SGD) estimation process
Momentum per mini batch
Enter value in this text box to specify the momentum per minibatch. The default is 0.9.
Momentum per sample
Enter a value in this textbox to specify the momentum per sample. The default is missing. You can also specify Momentum per Sample as a syntax.
Learning rates per mini batch
Enter value in this text box to specify the learning rate per minibatch. The default is 0.1 .
Learning rates per sample
Enter value in this text box to specify learning rate per sample or per batch. (if you specify one, it applies to all.). The default is missing.
L1 regularization weight
Select value in this field to specify a L2 regularization weight. The default is 0..
l2 regularization weight
Select value in this field to specify a L1 regularization weight. The default is 0
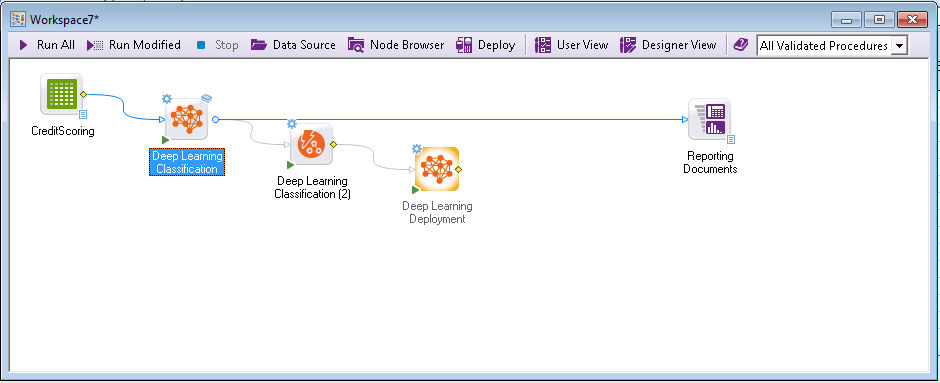
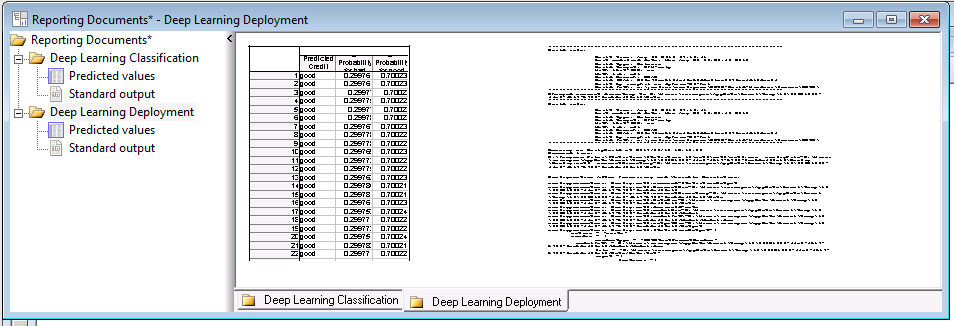
When you run the node, it creates a simple workspace. You get two outputs plus the Reporting Document.