Example 2: Setting Up Enterprise Users and Groups
Statistica Enterprise utilizes access control and security to limit what users can view and perform in the system. There are two categories of user accounts in Statistica Enterprise.
- Integrated Windows accounts
- User accounts can be imported from a Windows domain or Active Directory, and users log on with their standard Windows user name and password; passwords expire according to the Windows settings, etc.
- Statistica-specific accounts
- Statistica Enterprise also supports accounts set up and maintained specifically in Statistica. These accounts have their own Statistica-specific user name and password.
System Administration (SADM) or User Administrator (UADM) permissions are required to configure Users and Groups. For an overview of Statistica Enterprise permissions, see Permissions.
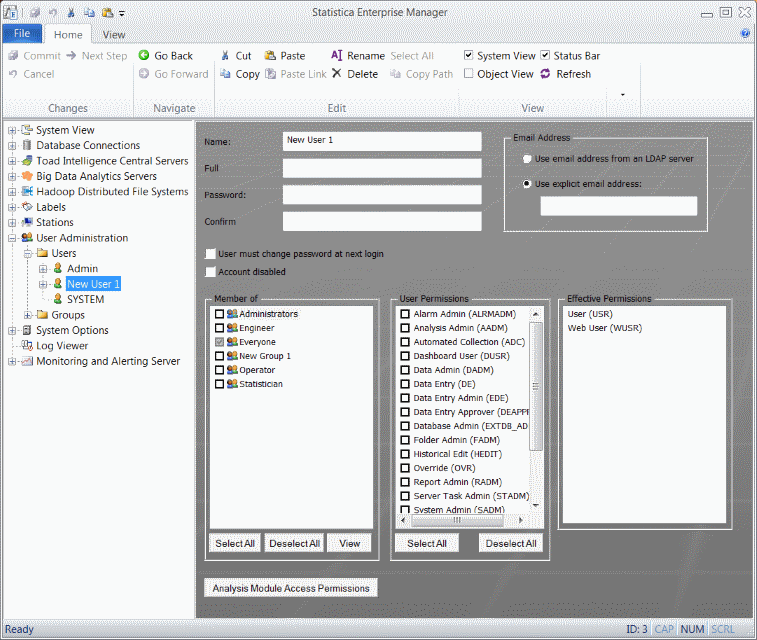
Log on to Enterprise Manager. In the tree view, expand the User Administration node.
To set up the groups into which user accounts will be placed, select the Groups folder. In the properties page (the right pane of Enterprise Manager), click the New Group button to display options to assign a name, a description, and permissions to the new group. If you have already configured users, you can assign them to this group in the Group Members box.
Click the Analysis Module Access Permissions button located at the bottom of the properties page to configure the Statistica analytics to which the group may have access.
In the Available analyses list, select the check box(es) adjacent to the desired modules.
On the Home tab in the Changes group, click the
 Commit button to save the new group.
Select the Users node in the tree view. Two options are presented in the properties page, New User and Import Users, respective to the two types of user accounts described at the beginning of this example.
If the user account will be a Statistica-specific one, click the New User button to display options in the properties page to assign the user name, password, group membership, and user permissions.
If the user account will be an integrated Windows account, click the Import Users button to display the Select Users or Groups dialog box.
Proceed with configuring the user account details.