Cause and Action Write-Backs
Sometimes when a quality control chart is displayed with out-of-control points, users want to be able to enter a cause and an action for each out-of-control point. STATISTICA Enterprise Data Configurations and Analysis Configurations can be configured to prompt users for causes and actions for out-of-control points. Those causes and actions will then be displayed in the chart next to their respective out-of-control points. In addition, those causes and actions will be written back to a database so that they will be displayed the next time that same quality control chart is run.
- Create Cause and Action Database Tables
- Create a database table to hold causes. Insert two fields in the table: ID and CAUSES. Create another database table to hold actions. Insert two fields in the table: ID and ACTIONS. do not name the tables or the fields Action, since Action can be a reserve word in some Database Management Systems.
Ensure that the data table that will be queried by the Data Configuration has a unique ID field. This ID field will be used to join the data table to the cause and action tables created above.
- Create a Cause Label
- Open
Enterprise Manager, and right-click on the
Labels node in the tree view. Select
New Label, and name the label
Problems. For the
Label Type select
Cause, and for the
List Type select
Static.
In the List of values group box, click the New
 icon. A text field is displayed where you can enter a value. Enter
TooCold. Repeat the process to add the values
TooHard and
TooSour.
Now we will have 3 types of causes to choose from: TooCold, TooHard, and TooSour.
- Create an Action Label
- Right-click on the Labels node again, and select New Label. Name the label Solutions, select the Action label type, and select the Static list type. Now add the following list of values: Heat, Sweeten, and Soften. These will be the possible actions that we can choose from.
- Create the Data Configuration
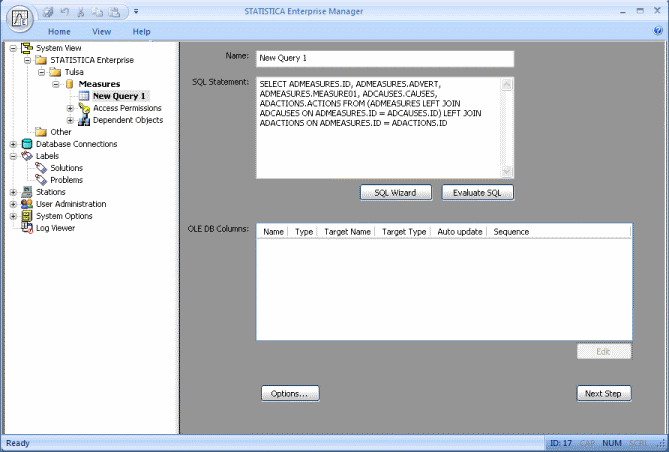
- Start to create a Data Configuration as usual, but when it is time to create the query, we will not use the graphical SQL Wizard tool. Instead, we will need to manually type in the necessary SQL code.
The SQL code should use LEFT OUTER JOINs to combine the data table, cause table, and action table. Following is an example of how such SQL code would look:
Here is a closer look at the SQL code:
SELECT ADMEASURES.ID, ADMEASURES.ADVERT, ADMEASURES.MEASURE01, ADCAUSES.CAUSES, ADACTIONS.ACTIONS FROM (ADMEASURES LEFT OUTER JOIN ADCAUSES ON ADMEASURES.ID = ADCAUSES.ID) LEFT OUTER JOIN ADACTIONS ON ADMEASURES.ID = ADACTIONS.ID
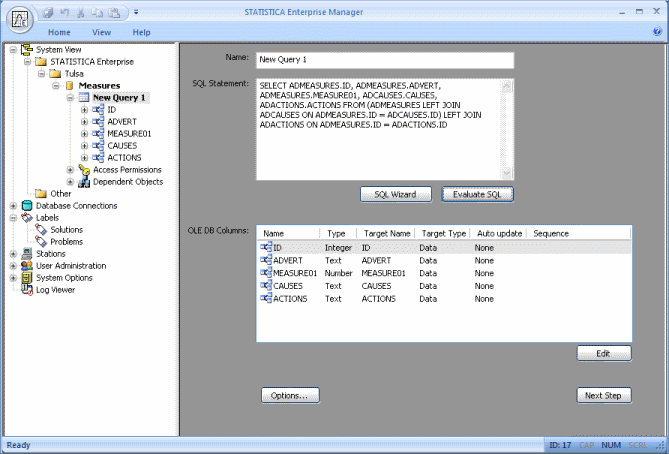
Click Evaluate SQL, and expand the New Query 1 node in the tree view of Enterprise Manager.
Now we need to specify the appropriate options for each field. In the tree view, select the MEASURES01 node. Set Target Type = Variable Characteristic.
Then, select the CAUSES node. Set Target Type = Cause. Set Associated Characteristics = MEASURE01. Set Use Label = Problems.
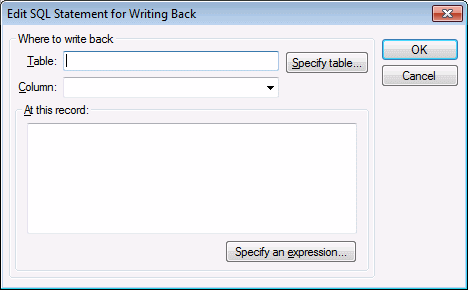
In the Writeback SQL Statement group box, click SQL wizard. The Edit SQL Statement for Writing Back dialog box will be displayed.
Click the Specify table button, and select AdCauses. Set Column = Causes.
Click the Specify an expression button. The Specify an Expression dialog box is displayed. Set Column = ID. Set Value/Target name = [ID]. Click OK.
Click the OK button in the Edit SQL Statements for Writing Back dialog box.
Now we have specified the SQL statement that will be used to write back to the AdCauses table whatever causes are selected by the user for out-of-control points.
In the tree view, select the ACTIONS node. Set Target Type = Action. Set Associated Characteristics = MEASURE01. Set Use label = Solutions.
In the Writeback SQL Statement group box, click Edit. The Edit SQL Statement for Writing Back dialog will be displayed. Click Specify Table, and select AdActions. Set Column = Actions.
Click Specify an expression. The Specify an Expression dialog will be displayed. Set Column = ID. Set Value/Target name = [ID]. Click OK.
Then, Click the OK button in the Edit Sequal Statements for Writing Back dialog.
We have now specified the SQL statement that will be used to write back to the AdActions table whatever actions are selected by the user for out-of-control points.
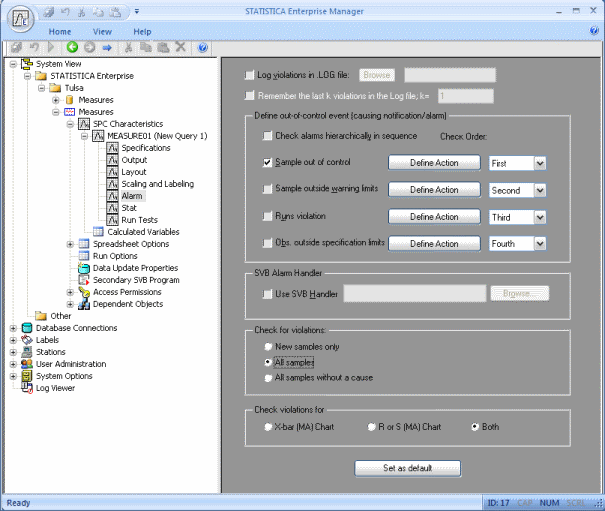
Now create an Analysis Configuration that uses the data from the Data Configuration that we just created. In the tree view, expand the Analysis Configuration node, and select the Alarm child node.
In the properties page, in the Check for violations group box, select the All samples option button so that all samples in the chart are checked for violations.
Select the Sample out of control check box. Click the Define Action button. The Define Alarm Events dialog will be displayed. Select the Automatically request input of cause check box. Select the Automatically request input of action check box. Click OK.
Save the Analysis Configuration.
Now when you run the Analysis Configuration, you will be prompted for a cause and an action for each out-of-control point. The causes and actions that you select will appear on the quality control chart, and they will also be written back to the cause and action tables.


