Data Filtering
Once Data Configurations and Analysis Configurations have been set up, you can modify them to filter the data. This enables you to generate analysis results for only a desired subset of the data.
Data filtering can be accomplished by two different methods:
- Interactive Data Filtering
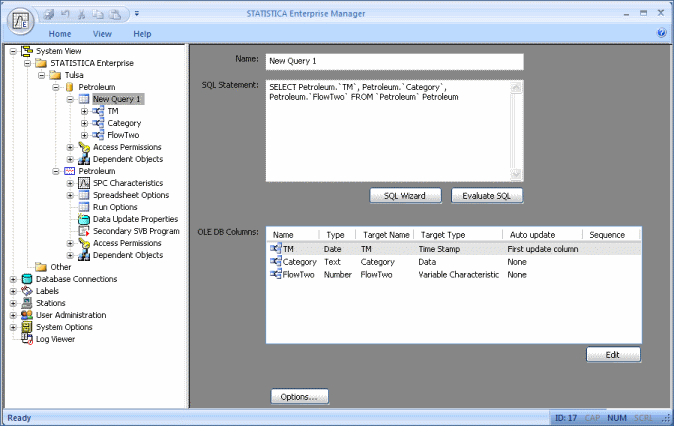
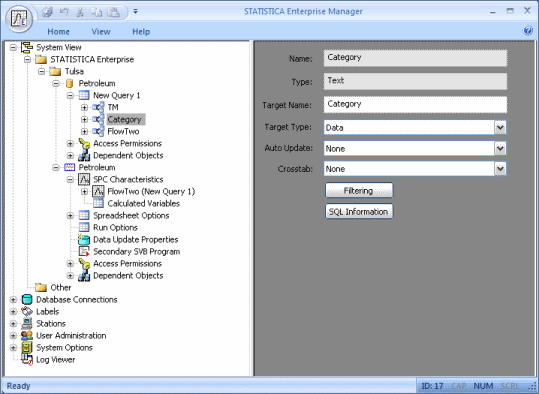
- With interactive data filtering, you can specify filter criteria whenever an Analysis Configuration is run. The criteria for interactive data filtering are specified on a field-by-field basis in the Data Configuration. For example, consider the setup in the following image:
Here is a Data Configuration that contains 3 fields: TM, Category, and FlowTwo. TM has Target Type = Time Stamp, and FlowTwo has Target Type = Variable Characteristic.
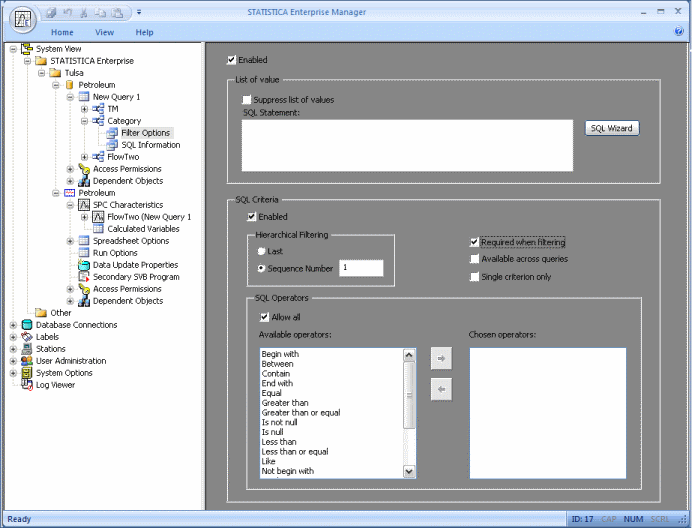
Now suppose we want to set up interactive filtering by the values in the Category field. Select Category in the tree view.
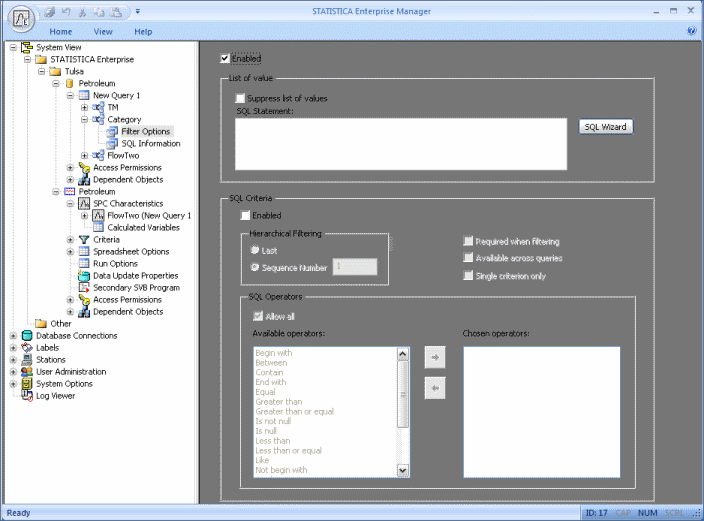
In the properties page, click the Filtering button. In the Filter Options properties page, select the Enabled check box. Then, in the Hierarchical Filtering group box, select the Sequence Number option button and accept the default value of 1. Select the Required when Filtering check box.
Save the Data Configuration. Now when you run an Analysis Configuration that is based on that Data Configuration, you will be prompted to select a value from the Category field.
Click the
 button to display the
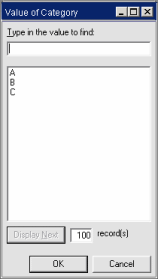
Value of Category dialog.
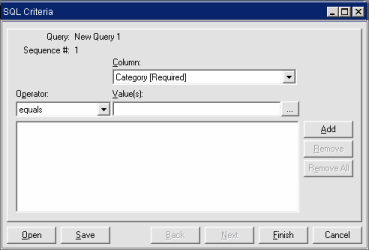
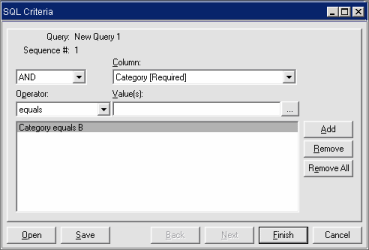
You will be presented with a list of the unique values. Select B and click OK to display the SQL Criteria dialog.
Only records where the Category field = B will be returned. Click Finish to run the analysis. Now look at the spreadsheet of retrieved data.
Notice that only the records with Category = B were returned and the SQL statement Where clause information is placed into the spreadsheet header.
- Non-Interactive Data Filtering
- With non-interactive data filtering, you define filter criteria in an Analysis Configuration that will be used whenever that Analysis Configuration is run.
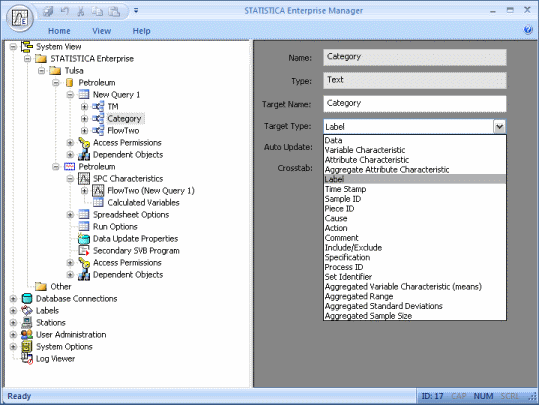
The first step is to specify the field in the Data Configuration that will be used to define the filter criteria. Consider the set-up shown below:
We will use the Category field again. First, change the Target Type to Label.
Now, select the Filter Options node and ensure that the Enabled check box in the SQL Criteria frame is cleared (to disable the interactive filtering). Save the Data Configuration.
Setting the Target Type to Label and enabling filtering makes a field available for non-interactive filtering in the Analysis Configuration.
Enabling filtering and enabling SQL Criteria make a field available for interactive filtering in the Analysis Configuration.
Both types of filtering can be enabled for the same field, but is not recommended as it could cause confusion.
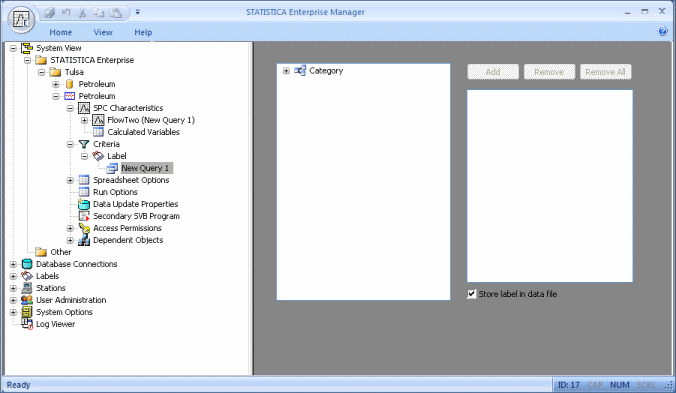
Notice that a new Criteria node has been produced as a child node in the corresponding Analysis Configuration. Expand that Criteria node as shown in the next illustration.
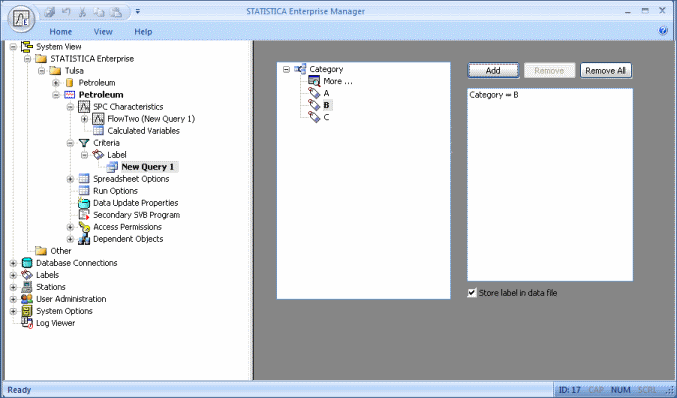
Now expand the Category entry in the list box in the properties page by clicking on the + sign. Select the B category, and click the Add button.
Now we have an Analysis Configuration that will display results only for data where Category = B. Save the Analysis Configuration and run it.
When you view the spreadsheet of data, you will see that only records where Category = B are included.
- Data Filtering by Time Stamp
- It is common for users to want to filter their data by date and time, so this example illustrates filtering by Time Stamp.
In the Data Configuration, set the Target Type of the time stamp field to Time Stamp.
Click the Filtering button, and in the Filtering Options properties page, select the Enabled check box.
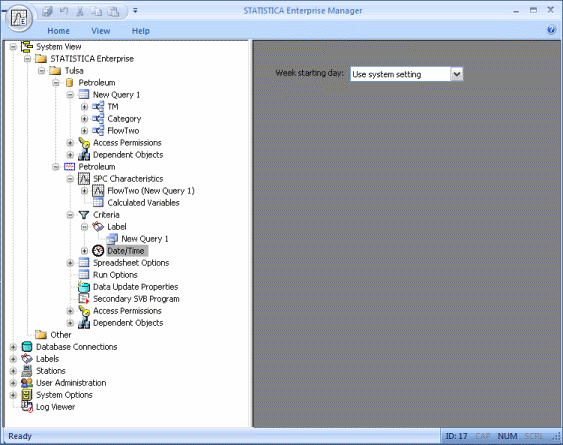
When you save the Data Configuration, you will notice that a Date/Time child node has been added to the Criteria node of the corresponding Analysis Configuration.
Expand that Date/Time node, and you will see several options for filtering your data by Date and Time.

