Useful Features
User Interface Customization
The Statistica classic menus can be customized by deleting commands or adding commands or macros. See Customize dialog box - Menu tab for instructions.
Statistica toolbars displayed when using the classic menus can be customized, and different toolbars can be enabled on a per-document class basis. New user-defined toolbars can be created as well. See Customize dialog box - Toolbars tab for instructions.
You can customize the Quick Access toolbar on the ribbon bar by adding or deleting options or by moving it below the ribbon bar.
- You can assign macros toolbars and/or menus. For the classic menus instructions. For the ribbon bar, after creating and saving a macro, select the Home tab.
- In the Tools group, click Macro.
- On the menu, select Add Macro to Ribbon Bar. Now, when you click Macro, you can see the macro added to the menu.
You can map shortcut keys to existing classic menu commands.
Keyboard Navigation of Cells
- Ctrl+Home moves your cursor to the first (top, left) cell.
- Ctrl+End moves your cursor to the last (bottom, right) cell.
- Ctrl+Right Arrow (or End) moves your cursor to the rightmost cell in the row where your cursor is located.
- Ctrl+Left Arrow (or Home) moves your cursor to the first cell in the row where your cursor is located.
- Ctrl+Down Arrow moves your cursor to the last cell in the column where your cursor is located.
- Ctrl+Up Arrow moves your cursor to the first cell in the column where your cursor is located.
Press F2 in a cell to start editing (instead of double-clicking)
Drag/Drop Cells
- A selection of cells can be dragged by grabbing the border of the selected cells.
- Drag to a new location to move the cells (they are deleted from the original location).
- Hold down the Ctrl key while dragging to a new location to copy (the cells remain in their original location and are moved to the new location).
- Drag the cells into the empty spreadsheet area. Rows and columns are added to contain the new cells.
Drag/Interpolate Fill
You can perform a fill operation by grabbing the fill handle (small black square) at the lower-right corner of a selection of cells. You can drag the selection either vertically (down, up) or horizontally (right, left), but you cannot drag diagonally)
If the selection contains cells within a single row, then dragging the fill handle up or down replicates those cells into the new rows. If the selection contains cells within a single column, then dragging right or left replicates those cells into the new columns.
If the selection contains cells within multiple rows, then dragging up or down, or dragging right or left, produces an interpolate fill. An interpolative fill operates differently depending on the type of data:
- If the data is numeric, the linear regression is calculated from the data, and the new values are extrapolated, which can be used for filling rows with sequential numbers by placing 1 and 2 in the first two cells, and then dragging the fill handle down to the remaining cells. The linear extrapolation ends up being sequential numbers.
- If the data is text, the text is matched against the Custom Lists defined in the Options dialog box - Custom Lists tab. If the text within the selected cells is determined to be part of a pattern sequence defined in one the Custom Lists, then the new cells are filled cyclically with the next values in the pattern. For instance, the values Mon, Tue, Wed, Thu, Fri, Sat, Sun are defined as a pattern. If you enter Mon, Tue in the first two cells and drag the fill handle down, the new cells fill starting with the next value in the pattern, Wed, and when reaching Sun, it then starts over at Mon. The result is repeating the sequence of Mon through Sun for as many cells as you drag over. Note that you can define your own sequences on the Custom Lists tab.
- If the text data does not match a sequence in the Custom Lists, the existing values of the selected cells are repeated. For example, if you enter A, B, and C in the first three cells, select them, and drag the fill handle down, the result is a repeating sequence of A, B, C.
Split Panes
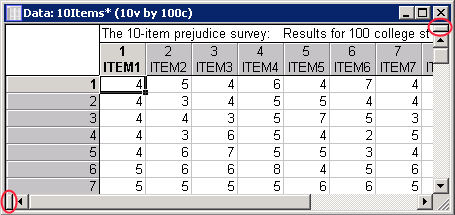
The spreadsheet can be split into two vertical display areas by dragging the splitter (see following image) located at the top of the right scroll bar, or into two horizontal display areas by dragging the splitter located at the left of the bottom scroll bar, or both vertically and horizontally by dragging both splitters. When the splitter is activated, you can scroll the two areas independently, allowing you to compare cells that are not contiguous.
Direct Mode
Large spreadsheets can benefit from direct mode; this option is on the Data tab in the Mode group. When editing large spreadsheets, the standard operation (direct mode off) is to make a copy of the spreadsheet, and make changes to the copy, thereby preserving the original spreadsheet in case you decide not to save the changes. Direct mode avoids this copy, and makes changes directly to the original spreadsheet. This has the obvious penalty of not being able to revert from changes, but the benefit of not making the backup of the spreadsheet, which can take a lot of time if the spreadsheet is large.
Auto Filter
The spreadsheet supports interactive selection/sorting of rows by the Auto Filter mechanism. First, select a set of columns on which you want to enable interactive selection/sort. Then, on the Data tab in the Transformations group, click Auto Filter. From the drop-down list, select Auto Filter. Now the spreadsheet column headers/variable names contains drop-down lists with the distinct values of the spreadsheet; selecting a value displays only rows that contain these values. You also have the ability to sort the rows by the select columns.
Bundles
The spreadsheet can define frequently used selections of variables using the Variable Bundle Manager. These selections of variables then show up as entries in the variable selection dialog boxes; selecting the Bundle has the effect of choosing all the constituent variables. To access the Variable Bundle Manager, select the Data tab. In the Variables group, click Bundles. Or, in the variable selection dialog box, click the Bundles button.
Locking
The spreadsheet can be locked to prevent changes. On the Tools tab, click Locking to display the Lock Spreadsheet dialog box. Different aspects of the spreadsheet can be protected from change such as the data, the spreadsheet display characteristics and case selection/weights. A password can be added so that the spreadsheet can be unlocked only by entering the password.
Audit Trails
Spreadsheet audit trails track individual changes to a specific spreadsheet. To enable these settings, select the Tools tab. Click Audit Trail, and on the menu, select Settings to display the Spreadsheet Audit Log Settings dialog box.
Workbooks
Workbook items in the workbook tree view can be dragged to a different location within the current workbook, dragged out to the desktop to create stand-alone windows, dragged to other workbooks, and dragged into reports.
- During drag operation, hold the Ctrl key down to make a copy (leave existing object in the workbook). Note: Without the Ctrl key down, the original workbook item is removed after the drop.
- When dropping a workbook item into the same or a separate workbook, hold the Shift key down to place it as a sibling of the target item. Note: When the Shift key is not used, the workbook item is placed as a child of the target item.
Keyboard Navigation
- Workbook items can be selected by keyboard: Select a workbook item in the tree control, and then use the up/down arrows to navigate to other items.
- Hold the Shift key down when clicking the up/down arrows to extend the selection.
- The right arrow expands a workbook item to show its children.
- The left arrow collapses a workbook item to hide its children.
- The Home and End keys select the first and the last visible item in the workbook, respectively.
- Workbook tabs can be displayed on top, bottom, right, or left of the window using the Workbook tab, Tools group, Tab Control option.
Analysis Workbook
An analysis workbook holds the results for a given analysis. The red arrow on each workbook folder is an indicator that the script (macro) that produced the results in that folder has been attached to the folder. This enables Statistica to re-run or resume the analysis.
- To re-run an analysis, right-click on a folder with a red arrow, and on the shortcut menu, select Re-run Analysis. The Re-run Analysis dialog box is displayed, enabling you to update/re-run results from analyses when new data is entered into the spreadsheet.
- To resume an analysis, right-click on a folder with a red arrow, and on the shortcut menu, select Resume Analysis. The Resume Analysis dialog box is displayed, enabling you to bring an analysis back to the point before the results were generated, so you to select different options or continue an analysis in progress.
Office Integration
- You can open Excel files in Statistica and then perform analyses using the Excel file as your data source. Statistica supports analysis from an Excel workbook that is embedded in a Statistica workbook or an Excel spreadsheet that is in a stand-alone window.
- To send output to a Word document, select the Home tab, and in the Output group, click Add to Word.
Extra Object Movement
- Extra objects can be moved using the keyboard by selecting them, and then using the arrow keys.
- Hold the Ctrl key down when pressing the arrow keys to move the object in smaller increments.
- An arrow/line or text object can be rotated by selecting it and then pressing Page Up or Page Down.
- Hold the Ctrl key down while pressing Page Up or Page Down to rotate in smaller increments