How do I add/delete cases (rows of data)?
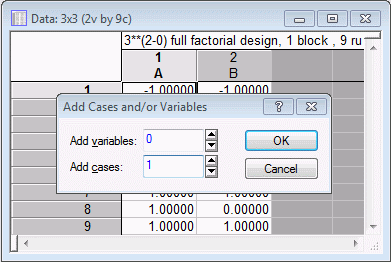
Perhaps the easiest way to add cases to an existing data file is to double-click on the gray area of the spreadsheet to display the Add Cases and/or Variables dialog box.
Specify the number of cases you want to add and click the OK button. The new cases are added to the bottom of the data file.
Cases can also be added to and deleted from a data file either by 1) using the drag-and-drop operation (insert to add cases), see
drag-and-drop features, or 2) selecting the appropriate option from the
Data tab,
Cases group,
Cases menu (ribbon bar) or from the
![]() menu on the
Spreadsheet toolbar (classic menus).
menu on the
Spreadsheet toolbar (classic menus).
- How to add cases before case 1
- The quickest way to add cases before case 1 is to select the
Edit tab and in the
Insert group, click
Cases and from the menu, select
Add Cases (ribbon bar), or select
Add Cases from the spreadsheet
Insert menu (classic menus). In the
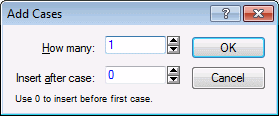
Insert after case box of the
Add Cases dialog box, enter
0, which references the case number. When the case number is 0, it effectively means that you are inserting before the first case.
After you click the OK button, a new case is inserted before the first case of the spreadsheet.
The name of the new case is 1. To change this, double-click on the cell and enter a new name.


