Example 4: Setting Up a Data Configuration
Notes and Preconditions
- Data Configurations are based on Database Connections. Data Configurations will utilize Database Connections, with the Data Configuration specifying the queries and respective metadata about the columns, and the Database Connection specifying the target database and the details about how to connect to it. This example uses the Database Connection configured in Example 3: Setting up a Database Connection.
- Data Configurations are placed in a System View folder and are assigned User/Group permissions. Before beginning this example, ensure that you have already configured your System View and Users/Groups.
- System Administration (SADM) permissions or Data Administration (DADM) permissions are required to create or modify Data Configurations. For an overview of the Statistica Enterprise permissions, see the Permissions Help topic.
This example will query measurements to be used for Quality Control analyses, including the querying for specifications to be applied to characteristics.
First, log on to the Enterprise Manager.
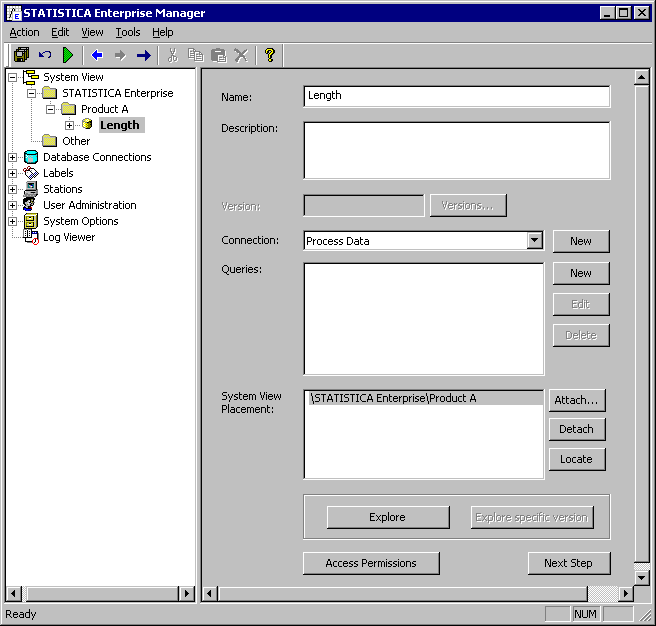
Browse to the System View section of the tree view. Right-click on the Product A folder that was created in Example 1, and from the shortcut menu, select New Data Configuration. This configuration will query the lengths of parts, so name it Length. In the properties page, from the Connection drop-down list, select to use the Process Data Database Connection configured in Example 3.
Adjacent to the Queries box, click the New button to define a new query to be part of this Data Configuration. Note. A Data Configuration can contain more than one query and the results of the multiple queries are placed side by side in the resulting spreadsheet.
The Statistica Query options will be displayed in the properties page.
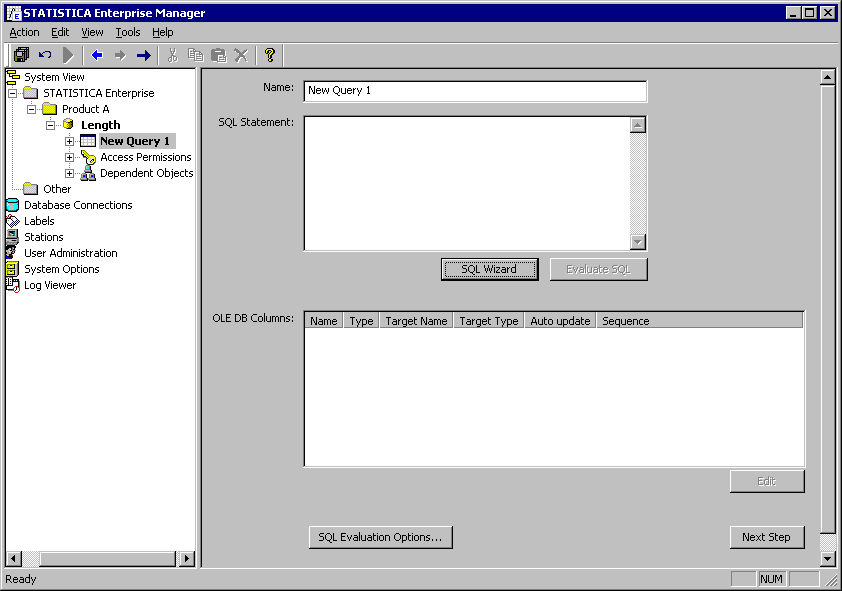
Statistica Query provides an interface to define the query graphically by reviewing the database objects in the left pane and dragging them into the query or by typing/pasting in a SQL statement. Click the SQL Wizard button to display the Statistica Query dialog box.
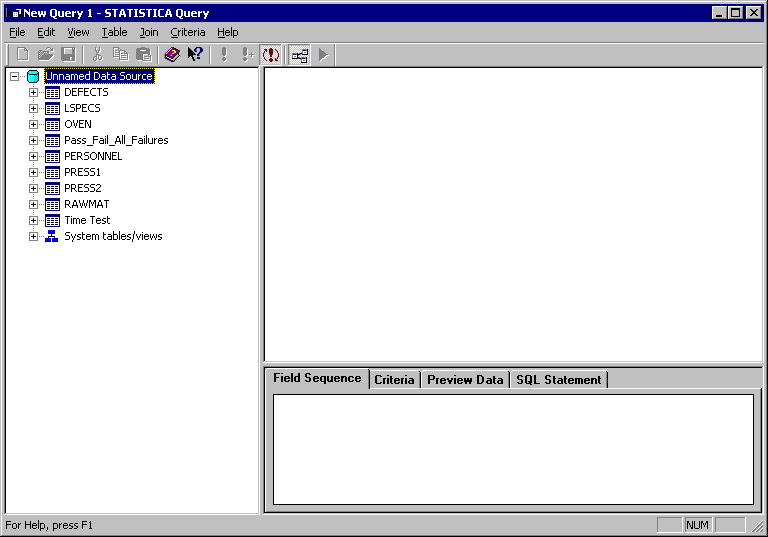
In the left pane, select RAWMAT and drag it to the upper-right pane. Then, in the left pane, select LSPECS and drag it to the upper-right pane.

From the Join menu, select Add to display the Add Join dialog box. From the Join this table drop-down list, select RAWMAT. From the and this field drop-down list, select PARTNUM. From the To this table drop-down list, select LSPECS. From the and this field drop-down list, select PARTNUM.
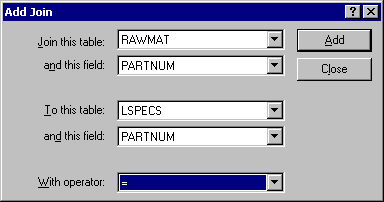
Click the Add button and then click the Close button. In the RAWMAT list, select, in this order, DATE, LOCATION, OPERATOR, SHIFT, PARTNUM, and LENGTH. In the LSPECS list, select, in this order, LCL, UCL, LSL, and USL.

Click the green arrow on the toolbar, and return to the Enterprise Query View. When prompted about whether to retrieve column properties, click the Yes button. This prompt is provided because with some database providers, depending on the nature of the specific query, Statistica's retrieval of the column properties may be time-consuming. The columns and their associated metadata are listed in the OLE DB Columns box, as shown below.
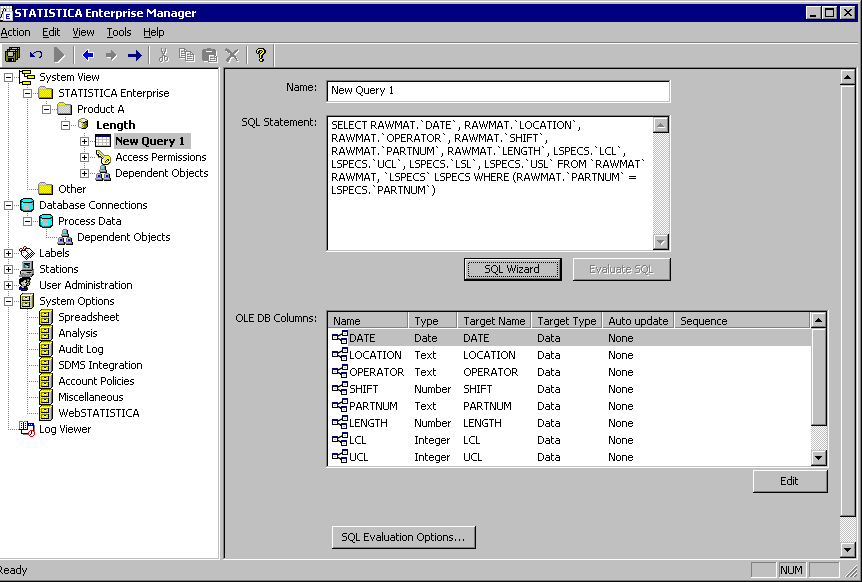
For each column, Statistica Enterprise stores metadata about the name of the column to display to end users how the values will be used, whether the end user is able to filter on the column, etc.
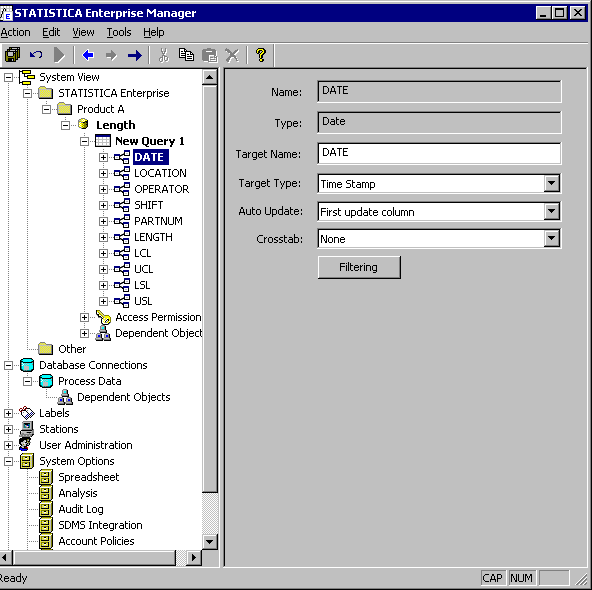
In the OLE DB Columns box, select the DATE column and click the Edit button to display the OLE DB Column options in the properties page. Set the Target Type to Timestamp, and the Auto Update setting to First update column. What this latter configuration means is that this query will support auto updating analyses and will determine new data from old based on the values in the Date column.
Now, in the tree view, select LOCATION. In the properties page, set the Target Type to Label.
In the tree view, select OPERATOR. In the properties page, set the Target Type to Label.
Select SHIFT. Set the Target Type to Label.
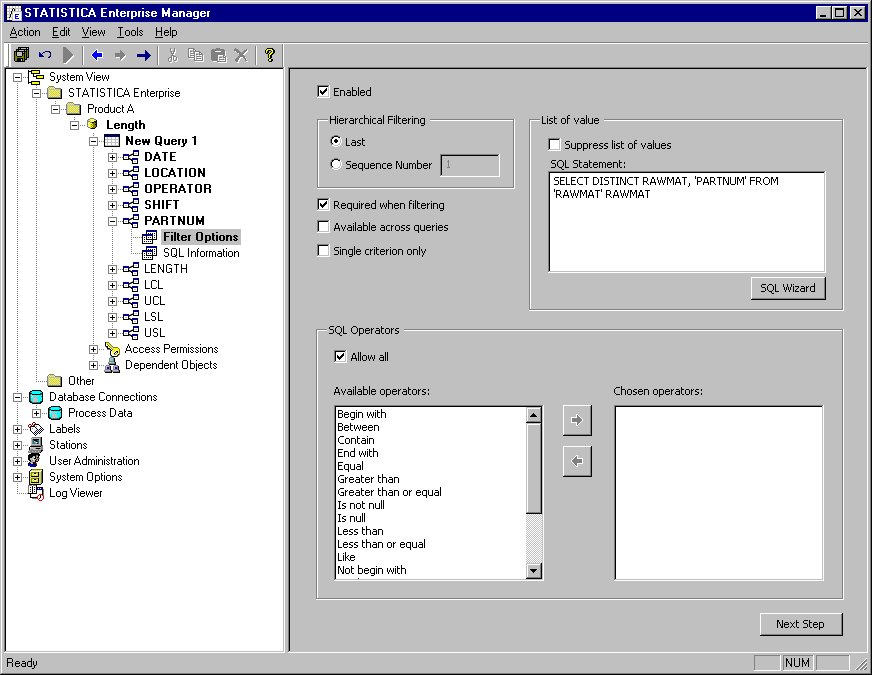
Select PARTNUM. Set the Target Type to Label. Click the Filtering button to display the Filter Options in the properties page, and set the options as shown below, indicating that end users of this Analysis Configuration that are based on this Data Configuration will have to filter on the PARTNUM field.
In the tree view, select LENGTH. Set the Target Type to Variable Characteristic. This setting means that the values in this column are available to be used for Quality Control analysis in one or more Analysis Configurations.
Select LCL. Set the Target Type to Specification. From the Specification Type drop-down list, select Lower Control Limit (LCL).
Select UCL. Set the Target Type to Specification. From the Specification Type drop-down list, select Upper Control Limit (UCL).
Select LSL. Set the Target Type to Specification. From the Specification Type drop-down list, select Specs Lower.
Select USL. Set the Target Type to Specification. From the Specification Type drop-down list, select Specs Upper.
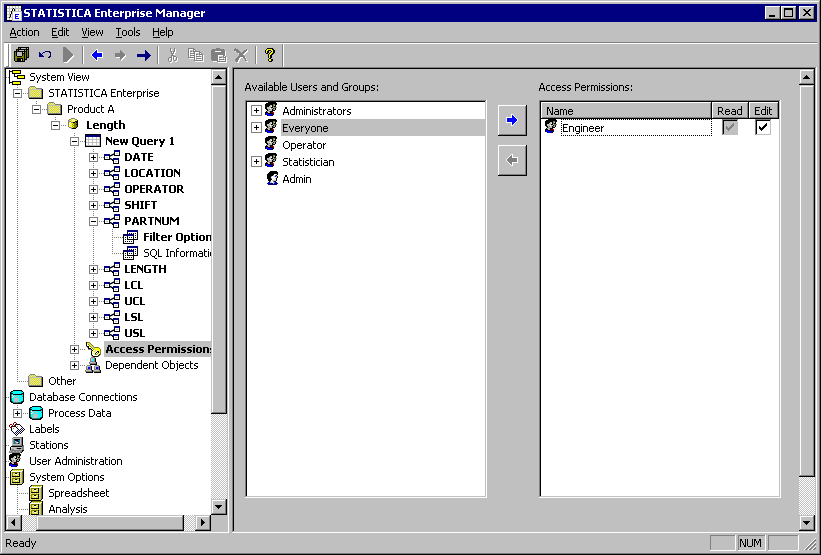
Now, select the Access Permissions node in the tree view within the Length Data Configuration. In the properties page, in the Available Users and Groups box, select the Users/Groups that can use this configuration and click the blue right arrow button.
The selected Users/Groups will be transferred to the Access Permissions box. There, select the Edit check box to give the User/Group permission to use/edit/delete the Data Configuration.
The new Data Configuration will be saved after clicking the Commit Changes button on the toolbar or after selecting Commit Changes from the Action menu.
When the configuration is completed and committed, it is ready for Analysis Configurations to be based on it (see the other examples for setting up Analysis Configurations, Report Configurations, Server Tasks, and Dashboards).